Square Foot Gardening Pros & Cons

If you’re searching for “square foot gardening” or “pros & cons of square foot gardening, you’re probably just trying to plan your new garden.  They offer gardeners a orderly and neat looking garden, but are they the best way to grow vegetables?

What Is A Square Foot Garden?

If you’ve browsed through gardening magazines or watched some HGTV you’ve probably seen a few raise garden beds which are divided perfectly into squares.  Each little square has its own type of plant.  It looks incredibly organized, yet is it the best way to grow vegetables?  We will explore if square foot gardening is the best way to grow your veggies in this post to help you decide what kind of garden you want to set up.

Who Started Square Foot Gardening?

Square foot gardening is an incredibly popular method of gardening which involved making highly productive kitchen gardens with limited space.  The technique was developed and invented by Mel Martholomew and introduced to the public in 1981.  It involved sectioning off a raised garden bed into 1 foot by 1 foot squares to grow individual types of plants.

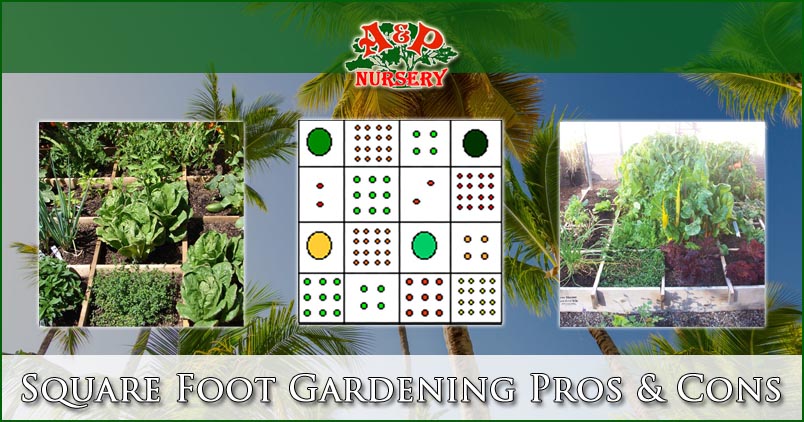
Square Foot Gardening Concept

The idea is to create a small garden and divide it into a grid of 1 square foot sections. The size of the gardens vary but are usually 4 foot wide and either 4 foot long, or 8 foot long.  This is done so you can reach the plants in the middle by not exceeding a reasonable reach.  Seedlings or seeds of each kind of vegetable are planted in each square.

Plant Density Per Square Foot

How many individual plants is dictated by how large each type of plant will grow.  An example is a tomato plant takes up a lot more space than radishes, so you’d only plant one tomato plant.  Whereas with radishes you could pack a whopping 16 seeds in that same square foot. One huge advantage of square foot gardening is that there are no paths between rows, and no wasted space.  The soil also stays loose and there’s no chance of you stepping on plants.

Square Foot Gardening Pros

Square foot gardening offers gardeners a quick way to grow a lot of veggies with minimal effort.

Quick Set Up

For people wanting to jump into gardening quickly square foot gardening is a great option. Easy gardening kits can be set up just about anywhere including over pavement or grass.  This means it takes less than a day to set it up, fill with soil, and plant your garden.  Even if you aren’t planning to use a raised garden or easy gardening kit a square foot garden makes it easy to section off your existing soil and get started.

Highly Productive

When you plan and use your space efficiently you will get more out of your garden per square foot.  Seeds and plants are carefully selected and planted in greater density which means a greater yield.  When you want to maximize your gardening efforts, square foot gardening is a great tool to get your biggest bang from your gardening buck.

Virtually No Weeding

If you use a raised gardening set up with a soilless mix for your plants there will be very few if any weeds.  This is because there won’t be any weed seeds in the soil you buy and fill your square foot garden with.  Over time they can blow into your garden, but if it is raised or laid on concrete there is less chance of it compared to a regular traditional garden.

Minimal Effort

As the gardens are smaller and there are only so many types of plants it requires less effort and maintenance per day.  The time required for planting, and harvesting your veggies is considerably less. This is made even easier should you decide to have a raised square foot garden which removes the need to kneel or bend down to do your gardening.

Square Foot Gardening Cons

The downsides to this type of gardening is they may require more watering, have limited size, and may cost more than just planting in the ground.

Intensive Watering

Soil in raised garden beds does dry out faster than soil on the ground. In hotter weather it may mean that daily watering becomes part of your routine.  Automatic watering options such as drip irrigation or soaker hoses can make this much easier and require less manual watering.  Combined with organic mulch you can manage your need for watering.

Limited Depth

Many popular plants need more than 6” of depth to grow properly.  This means that gardeners wanting to grow their favorite plants may need to ensure that they have enough room in their raised beds by building deeper containers.  Some gardeners prefer to double the depth and go to a full foot deep.  Keep in mind the supports for your raised garden bed must be built to support the additional weight.

Limited Width

Some popular plants take up an incredible amount of room and are not ideal for square foot gardening.  Things like sweet corn, winter squash, or asparagus should be grown in traditional row gardens.  Square foot gardening is ideal for things like radishes, carrots, tomatoes, and herbs.  Plan ahead and consider the mature size of each of the different types of plants you want to grow.  Use your square foot garden for the more compact options in your garden.

Potentially Costly Build

If the soil you have in your garden isn’t of good quality you should consider purchasing soil from your local nursery.  Soilless mix also is more costly and is a option that many avoid to keep the cost of their garden down.  The cost of building the raised garden bed is also a factor which can be avoided by either growing on the ground, or by buying an inexpensive gardening kit.

Starting Your Square Foot Garden In Arizona

If you live in the Phoenix Valley and want to start you own square foot garden A&P Nursery has 4 locations in the Phoenix Valley to serve you.  With the best locally grown plants and easy gardening kits we can give you a head start at vegetable gardening in Arizona.  Visit our easy gardening kit page to see our options, call us with questions, or simply stop by one of our locations to get started!

Call or visit one of our 4 locations today

Types Of Plants In a Nursery

If you happen to be a garden lover, then you know that there are only a few pleasures that will equal to browsing the aisles of your local nursery. Below is how you can make the best use of your time and actually get a real bang for your buck.

Types of Plants found in a Nursery

While you are walking through a nursery, you will certainly find plants that are found in 3 different forms: You have in-container plants which are normally your perennials, annuals, and smaller trees and shrubs. You have bare-root plants which are normally your large hedge plants and roses. Then you have Balled-and-Burlapped Plants which are normally larger shrubs and trees that have burlap wrapped around the root balls. Plants will also be grown differently as well. Some will be kept in containers, some kept in fields, and some start out in the field but are eventually transplanted into a container to be sold.

Local Field Grown Plants

Nurseries will often times grow shrubs and trees in their fields, where the plants are much easier to maintain and are able to grow to a much larger size than if they were to be kept in containers. Field grown stock will need to be dug up in winter and early spring before it stops being dormant, wrapped in burlap and twin and even in metal cages when it comes to large trees, then shipped to the sales center. The balled and burlapped plants may actually lose up to 90% of their root systems, but this is the only way to be able to offer very large plants for any type of selling.

Once you have selected the best plants, you need to learn about the importance of their soil for their growth.

Before you select a tree, you want to make sure that you have read the tag which will list its mature height and spread.

Bare Root Stock

Bare root stock will be dug from the fields during the dormant season which starts late fall to early spring and will be placed in cold storage. Because there isn’t any dirt to surround the root system, the bare root shrubs and trees are light and quite easy to transport including being easy to transplant. They also cost a lot less than a balled and burlapped plant or container grown plant.

Cold Season Availability

During the late fall to early spring for some temperate zones, a nursery may offer you the chance to purchase bare root plants in groups of 50 to 100 for hedges like lilacs. For a general rule, bare root plants are not offered at a regular nursery as the plants will come out of dormancy and begin to grow whenever they are removed from their plant cold storage. A Bare root plant is best for those online mail order nurseries, where they are often kept in suspended animation of cold storage and then shipped to you in time to be immediately planted. Not to mention that purchasing roses that are bare root plants from a single source means that there will be less of a chance of you bringing home a fungal disease to your garden.

Container Grown Plants

Container grown stock will start its life within a container. As the plant begins to grow larger, the grower will transplant it into a larger container. The more years that it is spent inside of a container, the more money and time that a grower has spent on the plant, which actually explains why some container grown plants are quite expensive. For instance, dwarf conifers, which are really slow growing will spend several years in a container before it ever starts growing large enough to even be sold.

How to pick your nursery plants

You will be able to learn a lot from a nursery simply by comparing the available plants. For instance, if you are wanting to buy a River Birchtree and the nursery you got to happens to have 10 trees in the size you want. They are between 8 and 10 feet tall and feature large trunks that are starting to show the peeling characteristic of a mature river birch. They are $230 each, so they are not cheap, but they offer immediate satisfaction for your landscape.

Examine The Selection

Examine the trees. Some may just have one trunk while others have 2 or more. You are wanting a 3 trunk river birch, and only 6 out of the 10 trees meet that criteria. One may have pale colored green leaves, where the others are a healthy leafy green type of color. You will want to skip over the pale colored one because it is probably starved of nitrogen. 2 of your trees may have root balls that are smaller than the others, so skip over it. Then one of the 3 trees left has a large root that is through the burlap and it seems quite dried out and distressed, so skip that one as well. Then look at the last 2 trees. Either one will most likely be right, but there will be one that will really speak to you to take it home.

Be sure to talk to nursery staff members as they are a valuable resource when it comes to picking the right type of plan for your needs.

Pick Plants To Match Scale

If you are wanting to know if a particular tree will grow a bit too tall for your yard, then here is a good rule to keep in mind: in order to keep your tree in scale with your house, they need to be no more than ¼ to 1/3 taller than your roof. If you have a one story design or a ranch house that has a height of between 12 and 15 feet, then the mature height for your trees near your home need to be between 15 and 20 feet. A two story home that is up to 22 feet tall, can handle a taller tree that is between 22 and 30 feet tall during its maturity. Plant your taller trees around the perimeter of your yard, where they will not be able to overpower your house.

You may also decide that you would like to purchase a smaller sized river birch that is only $150, so that you are able to spend the remainder on three azalea bushes to plant around your tree. Be sure to limit your purchases to a number of items that you are going to be able to plant in a single day. If you are unable to plant in a single day, then group the plants together in a shaded area and also make sure that you are watering them until you are able to finish planting them in another day or two.

Nursery Plant Guarantees

Quality nurseries will also guarantee the plants that it sells to you. If you purchase a healthy and promising shrub or tree, then plant it properly, and you diligently water and mulch it, then it should flourish and thrive for you. If not, you should contact your nursery. Many will refund your money or replace your plant. You will need to have your receipt and you may also need to bring in the dead plant.

Transporting your Plants

You want to be sure that you have securely wrapped your trees and other plants for your trip home.

You have finally picked out your plants and you have paid for them. Now you have to figure out how to get them home. If you have purchased a large tree, it is best to have your nursery deliver them to your property, although that is normally an extra fee for this service. In the fall, many nurseries will often run specials. They are going to try and sell as much of their stock as possible, so that they don’t have to provide any winter care, and they may include delivery in your purchase price. Here is another helpful tip: If you have spent over $1,000 for plants, ask if the nursery can do free delivery, as it never hurts to ask.

If you happen to be hauling your own plants home, then you want to make sure that you are brought rope and tarp to cover them. Wind damage, even if you are only a couple of miles from home and driving at a slow pace, can permanently damage or even kill off your plants. Like evergreens, who cannot handle any type of dehydration in their needles.

Picking out Balled and Burlapped Plants

Tip: Avoid any plants that have large roots protruding from rotting burlap material.

What you should look for:

  • Healthy and green foliage with the supple branch tips.
  • Branches that have fat leaf and flower buds before the begin leafing.
  • Shape that is appropriate for the cultivar and species of plant.
  • Living branches. 1 to 2 dead branches will not hurt your plant, but more than 3 may indicate a serious problem.
  • Solid root ball that feels firm and moist.
  • Conifers that show signs of new spring growth. Candles should be soft, flexible and bright green.
  • Evidence that watering systems have been used. Look for muddy earth aisles or puddles on the walkways at your nursery.
  • Mulch around the root ball.
  • A root ball that is between 10 and 12 times the trunk diameter.
  • Properly tied and wrapped plants. The burlap needs to look new and the twine needs to be snug but not too tight which can choke the trunk.

What to avoid:

  • Numerous broken branches
  • Leaves or needles that are turning brown or curling
  • Diseased foliage
  • Plants showing no signs of new growth when others are showing growth, especially in conifers.
  • Limp ended branches that have dried out leaves. This happens to indicate that there was water deprivation
  • Large exposed roots. Roots may come through the burlap, but you should avoid the ones that seem much larger than the plant.
  • Branches that have leaves at the base of the plant which indicate that branches may be winter killed.
  • A badly skinned trunk
  • Twine gripping the neck of the plant
  • Trunks that move easily when the ball remains still. This indicates that the roots may have broken from the trunk of the tree.
  • Lopsided root ball, which means that the plant was dropped.
  • Rotted burlap as this indicates that the plant may not have sold past season. If the plant is properly cared for, this isn’t a problem, but you should inspect the plant carefully.
  • Trees that tilt when the wind blows which mean that it isn’t properly supported.
  • Dried out root ball. The burlap or twine will be loose.

Picking Bare Root Plants

What to look for:

  • Well-formed stems
  • Ready to burst leaf nodes
  • Moist roots
  • Evenly distributed and healthy basal roots that have multiple feeder roots

What to Avoid:

  • Unfurled leaves, especially ones that are sunlight starved and white. This indicates that the plant broke dormancy.
  • Broken stalks on multi-branched plants like roses
  • Broken roots especially the large taproots
  • Root system that is too small to support the plant
  • Roots that twisted into a ball
  • Lopsided roots

Picking Container Plants

What to look for:

  • Plants with foliage on most branches. The leaves should be uniformed colored.
  • Sleek, healthy looking branches that are not dried out.
  • Well established roots that are surrounded by firm soil. If able, gently pull the plant from the container to inspect the roots.
  • Leaf and bloom nodes are ready to burst even in early season.
  • Shape that is appropriate for the cultivar and species of the plant.
  • Uniformly moist soil.

What to avoid:

  • Healthy foliage on top but brown foliage underneath.
  • Broken branches.
  • Diseased foliage
  • Large roots coming from the container
  • Roots that have been exposed on the This may actually indicate that the plant did not sell during the last season and that the vital soil and nutrients have been lost.
  • Pot bound roots. Pull the plant from its container and check to see if the roots encircle the plant, if it does that means that it has grown too long in the container.

Phoenix Valley Nursery Stores

If you live in the Phoenix Valley A&P Nursery has 4 locations to serve you.  The east valley locations are easy to get to and are full of top quality locally grown plants, shrubs, trees, and other great options for your landscape.  Our team has a wealth of knowledge about all things green and can help you start your garden or landscaping project.  We can also help you find the perfect tools to maintain your landscape to ensure it stays healthy and looking its best.

Click To See All The Types Of Plants In Our Nursery

Call or visit one of our 4 locations today

Stop Fall Tree Pruning | Save The Trees!

If you’re wondering how much pruning your tree needs in the fall, this post will make clear exactly how much you need.

Fall is that time of year that really makes people want to start pruning more than a vampire craves blood. With the fall garden clean up starting, maybe it might be all the mulching raking that is causing people to go insane. Before you begin hacking at your bushes and trees, take a bit of advice from a gardening expert.

Fall Tree Pruning

The rules for fall pruning is simple. Just don’t prune during the fall. That means nothing, zilch, zero, nada during the fall. That goes for plants and shrubs and even trees. Make a sign that states leave the pruning alone until winter or spring. There isn’t any type of exceptions. Don’t prune during the fall.

If you feel as if you got scolded by a teacher, then let that be a reminder that fall isn’t the time that you are supposed to trim your shrubs and trees, even though that the leaves that have fallen off have really exposed the imperfections. Put those pruning shears back into your shed until winter or longer. Below are a few pruning basics that you can use whenever it is time to trim back your shrubs and trees which is much safer:

Understand why Fall isn’t the best time to prune

It should be stressed that pruning your shrubs and trees now will stimulate new growth when your plants are trying to go dormant and this will weaken your plant. If you prune during a warm day then sap will rise up through your plant then the temperature drops to below freezing at night and then you don’t have anything that is pretty.

Instead of pruning in the fall, prune in the dead of winter or during early spring. That is if you can stop yourself. Spring bloomers will often get their haircut after they have finished flowering, but get over this weird obsession with pruning, you need to know that there are fruit trees and only a few plants that actually need to be pruned and many gardeners will prune too much and not too little.

Still, properly pruning overgrown fruit tress or flowering shrubs near your home will help those plants to produce more fruit and flowers, which benefits wildlife. Doing it wisely can even help your trees and plants a way to fend of pests and diseases. Just remember, don’t prune during the fall. Waiting until it is winter means that your plants are mostly dormant and because the leaves have fallen, you can easily see what you are doing. For those early spring bloomers that only need light pruning, it is best to do so right after they have finished blooming. For the overgrown shrubs, winter pruning is much better.

Don’t Prune when it is wet

Just a general rule, don’t prune anything if it is damp outside. Don’t prune if it is wet because it will spread diseases. Damp weather actually encourages microbe growth which makes the most of the damage that pruning does. You will want to wait until the sun has been out for a while and then it dries out and kills the bacteria and mold.

Know how to Hack

Pruning can actually add more air and sunlight to filter through your shrubs and trees, which helps to keep them really healthy. Whenever it is time for you to prune, you need to focus on removing dying or dead branches. If you see a sick brank, cut between the healthy and diseases spot. It is also recommended that you prune whenever branches cross each other or rub each other, or if the branch is growing vertically. You can take off the low branches that mess with foot traffic or your lawnmowers. Cut the branch as close to the source of the plant as you can. It is best to prune back to the main stem. If you leave a stub that is sticking out, it is a place where insects and bacteria can live. You also want to cut at the same angle that your branch collar is, which is near the furrow of bark where the trunk and branch meet. If you have done it right, then a circle of healthy callus will swell up around that spot.

Know what you are hacking

There is a really long list of shrubs and trees that you can prune from winter until sap starts back up in spring. Some of them are beauty berries, Callory pears, poplar, junipers, cherries, glossy abelia, hydrangeas, crabapples, Bradford pears, spruce, sumac and plums. But, just because some trees can ooze sap whenever they are pruned in the winter, you are best to wait until summer to prune elm, dogwoods, maples, walnuts and birches.

Keep your tools clean

It doesn’t matter what type of pruning tools you are going to use; you need to make sure that you are keeping them clean. If you happen to have cut out diseased branches, you want to make sure that you have thoroughly cleaned your tools before you move onto another tree, which helps to avoiding spreading diseases. You should disinfect your tools by using one to two teaspoons of bleach to warm water. You can also use soapy hot water which will kill most germs and remember to dry your tools very well afteryou have washed them. If you are unable to trim from the ground using a pole pruner or if you need to prune around a power line, then hire a professional instead of climbing up high and doing it all on your own.

Do your homework

We offer general pruning guidelines, but if you are wanting more specific information on your shrubs and trees that are growing on your property, then ask your master gardeners who are involved with your local tree nursery.

Trees & Tree Pruning Tools

If you need to get new tools for when it’s the right time to prune your trees, or you want to add new trees to your landscape, A&P Nursery has everything you need.  From the trees to gloves and fertilizer we can cover every step of the process.  In fact we partner with a number of landscaping companies that can do the work for you in planting  a new tree, tree trimming, and even tree pruning.

Call or visit one of our 4 locations today

How to Grow Grapes In The Phoenix Valley

If you are searching how to grow grapes in the Phoenix Valley you’re one of many Arizona residents that want to grow their own grapes.  Grapes are a great addition to any garden and are a welcomed refreshing snack.  Not only do grape vines produce the fruit but they add lots of greenery to make your landscape more lush and green.

Right Location For Growing Grapes

The first step in growing grapes in your Phoenix landscape is choosing the right location.  While most plants need some shade throughout the day grapes are the exception.  They thrive in full sun and at worst a leaf or two might dry up.  You can minimize this by staying on top of your watering. You should also choose a location where there will be room for the grape vine to grow up and spread out without overrunning other plants or your property.

If you need shade for other plants in your landscape grapes can actually be used to provide a sunscreen to protect the more sun sensitive plants.

Grape Vine Support & Training

Grapes grow best when the vine has something to grow up and expand on such as a trellis, fence, arch or even single stake. You should avoid using hurricane or chain link fences as the plant will overcome the openings in the fencing.

Training your grapevine will help you establish a straight trunk and better root system.  After your vine has grown new shoots during the first growing season you will need select the straightest one and tie it off to your stake, fence, or trellis. It may seem scary but remove all other shoots after tying off your best one.  Let your chosen shoot grow to about 5 feet and cut it back to about 42 inches at the end of the growing season.

Watering Your Grape Vines

Growing plump and delicious grapes starts with getting the watering right. While some plants need lots of specific attention grapes do well on your grass watering schedule. So if you choose a location that already gets water from your sprinklers you may not need to worry about any supplemental watering for your grape vines.

Protect Your Grapes From Pests

It isn’t just you and your family that crave the flavor of grapes, bugs and birds around your landscape will want a bite.  To protect your grapes it is a good idea to use mesh bags to keep the birds away from your grapes. Attach the bags securely with ties, rubber bands, and check them often to ensure they aren’t getting untied or loose.

Insects are also an issue that you need to be proactive about.  If you see leaves getting areas that are lighter or transparent you should flip the leaf over to check for caterpillars. If you see black flying bugs which are slow, aimless, and seem harmless you need to take action. Your local nursery will have pesticides which will help keep the bugs off and your grapes healthy.

Pruning Your Grape Vines

Pruning can be done by two different methods, cane pruning and spur pruning.  Cane pruning is usually the best for home gardens while spur pruning is most common with commercial grape growing.  We’re going to focus on can pruning as full time grape growers already have their techniques mastered.

Cane Pruning Grapes

You need a wire support system to get started that is 42 inches high and another 14 inches above that. The wire acts as a place to tie your vines to and to help prevent shoot breakage.  For the best grape vines you should wait until the 3rd year to grow fruit.  You’ll need to resist letting the grapes grow in the second year and remove the clusters before they bloom. If you don’t do this your vine will be stunted and not grow as much or as well when mature.

Call or visit one of our 4 locations today

How To Harvest Vegetable Gardens

If you’re searching for how to harvest vegetable gardens you’re probably right at the end of a growing season looking for the best tips.  A lot of different kinds of vegetables mature around the same period of time so it can be a task for backyard vegetable gardeners to keep up.

When Are Vegetables Ready?

The majority of veggies are ready and at their peak of flavor and tenderness when they are smaller.  Zucchini is one of the veggies that is best to pick smaller than wait for them to grow into giants.  They are best when they are about 6 or 7 inches long.  When they are grown too long they get woody and tough.

Keep Track Of Your Vegetables Planting

Seed packets indicate how long it will take for your seeds to grow and mature into the veggies you are excited about growing.   Keep your seed packets, mark your calendar, or use an online calendar to mark the approximate date the plants should be close to ready to harvest.

Keep Track Of Vegetable Varieties

Different varieties of fruits and veggies are designed to grow to different sizes before they are harvested.  One variety of beans might be ready when they are quite short while others can grow to more than a foot before they are ready.  Even watermelon varieties can differ a lot between when they are ready to harvest.  Know what you planted, keep track of their progress, and mark your calendar.

Harvesting Tips

As your garden grows and once it is ready to harvest it is important to keep an eye out for trouble and easier to harvest in small steps.  All of your veggies will probably not be ready on the same day, so picking what is ready daily will take less time and effort than dedicating an entire day to doing all of it at once.

Harvest Daily

One way to stay on top of harvesting is doing a little each day by taking your basket out and inspecting your vegetables to see what is ready to pick.  If you pick your veggies as soon as they are rip it encourages the plant to keep growing more.

Watch For Trouble

As you tend your garden or harvest it is important to watch for trouble in your garden.  Rotting fruit or yelling leaves are signs of problems and should be removed.  Even if the problem is serious such as a branch having cracked from excessive rain or a blossom end rot its best to remove the problem areas.  If you don’t your plant is wasting resources on fruits you won’t be able to eat.

Common Vegetable Harvesting

There are some varieties of vegetables which end up in practically every backyard garden.  Things like tomatoes, herbs, green beans, sweet corn, peas, and root veggies. Read below for tips for harvesting specific types of veggies.

Harvesting Sweet Corn

The key to sweet corn is when you harvest.  This is a variety of corn which beings to lose that wonderful sweet flavor the moment it is picked.  That means growing it in your garden is the ultimate way to get the absolute best sweet corn flavor.  In fact in years past many families wouldn’t pick it until a pot of water was already boiling and ready to blanch it.  Your sweet corn is ready to harvest when you can feel the kernels are full and round beneath the husk, a kernel produces a milky sap when squished, and the silk at the top of is drying out.

Harvesting Tomatoes

There are so many different varieties of tomatoes that it is impossible to list exactly when to harvest each of them without a post dedicated to harvesting tomatoes.  There are larger slicer types that take much longer than cherry tomatoes and even more variety.  Follow the seed packets carefully to know when to check these tomatoes.  Tomatoes produce the best flavor when they are allowed to fully ripen on the vine, but do continue to ripen even after being picked.

Harvesting Herbs

Unlike other kinds of veggies or fruit harvesting herbs is an ongoing and frequent process.  Cut back or pinch herbs often to encourage them to grow new stems and leaves.  These are the parts we eat and the more shoots your herbs have to produce, they more you will get. This means you will probably have an excess of things like basil or oregano but they can be used for recipes like pesto or oregano can be dried in brown paper bags.

Vegetable Gardening Nursery & Supply

If you want to get the most out of your vegetable garden our team has the knowledge to grow local, best plants, best seeds, and even carry easy gardening kits to get you started.  No matter what stage you’re at we can help you maximize your backyard gardening efforts!

Call or visit one of our 4 locations today