Planting Roses in Arizona

Planting Roses in Arizona

It is prime time for planting roses in the Phoenix area, in fact it will soon be too late. Roses are best planted during the latter half of December and January in the Phoenix area. For northern Arizona it is best to wait until March and April. Growing Roses in the desert southwest is a great addition of the traditional gardening centerpiece. While a lot of xeriscapes focus on primarily desert plants like succulents and trees that are adapted to the desert heat, roses are the crowning jewel that can set your yard apart.

Rose Selection

Selecting the roses you want to incorporate into your landscape is a straightforward process with just a few things to keep in mind. The size of the full grown

Size – Different types of rose variants grow to be different sizes. The type of roses you choose for your landscape should take into consideration how large the fully grown plant will be. Savvy gardeners plan for the full size of their plants so they do not have to over prune, or remove plants that rub against houses or fight for space and sunlight in their landscape. Some types of roses like to grow and climb. This means they should be planted in areas that include support for the climbing types of roses.

Climate – Every plant has a rating for which zone it grows best in. The Phoenix valley varies between zone 8 and zone 9. Choose roses that will do well in this environment. They should be more heat resistant than geared to resist the cold like you would need in northern Arizona.

Grades Of Roses – When you are looking at roses to plant in your landscape you want to make sure that you select nothing less than the best. Roses are graded as 1,1 ½, and 2, with number 1 being the best grade. You will be able to recognize a number one grade rose when there are three or more “canes” that are as thick as a pencil. Number 1 ½ will only have 2 canes that are pencil thick, and number 2 roses will be only a foot from where the canes come together.

How To Plant Roses

The way you buy your roses will affect how and when you should plant them. Nurseries in the Phoenix valley during the cold months should offer bare root, packaged, and container roses. If you are buying either bare root or packaged you should make sure to have them in the ground by the end of January.

Bare Root & Packaged

If the roses you buy are either packaged or sold to you with bare roots you will need to get them in the ground in late December or January. Before planting you should soak the roots in water for a few hours.

Containered

Roses that are left over from the dormant period of the year are sold in containers. These roses can be planted at any time during the year.

Rose Spacing

The various types of roses grow to different diameters. You should plan your landscape to not be overcrowded and give each rose plant its own space. For polyanthas and miniatures you should plan between a 1 and 2 feet. Rose shrubs need twice that space and should be given 2 to 4 feet. Tree roses grow to a greater diameter and should be allowed between 3 and 5 feet. Climbing roses should have even more space, between 6 and 10 feet of space. Climbing roses also grow better when eastern exposure.

Planting Your Bare Root Roses

  1. The first step in planting your roses is to soak it in water for at least 8 hours. They can do well with up to 24 hours of soaking if you are not going to be home, or want to give it the maximum saturation.
  2. Digging your hole is the next project. It should be between 18 to 30 inches wide to accommodate the root system and the root ball.
  3. Mix soil with a cup of triple superphosphate and a cup of sulfur
  4. Create a cone shape mound in the center of the hole with your mix and native soil.
  5. Spread out the roots of your roses to fit over the cone. The union between the canes and root should be about 2 inches above the soil line.
  6. Trim the canes to about 8 to 10 inches. You want to make sure the top buds are facing out from the center of the plant.
  7. To help retain the water you provide you will want to have about a 4 inch layer of mulch around the surface of the plant.
  8. Ensure that you water well every day for the first week.

Roses For Sale In The East Phoenix Valley

If you live in the Phoenix valley and want the best selection and most knowledgeable customer service A&P nursery has 4 locations to serve you. With the best stock of plants in the East Valley we can get you everything you need to get started with growing your own roses. We also have a list of great landscaping companies that we can recommend to plant the specific roses you choose. Call or visit one of our locations to ask any questions you have or to get started with planting your own roses in the Phoenix area.

Straw Bale Gardening In Arizona

Straw Bale Gardening In Arizona
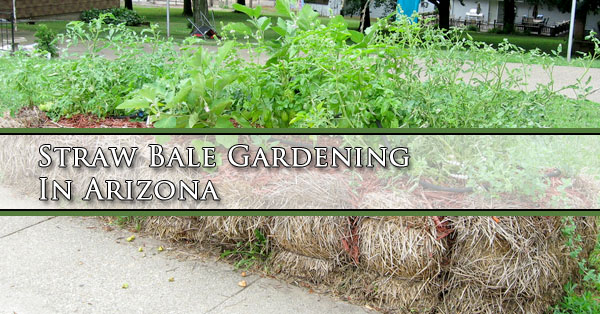
Photo by – knitsteel on Flickr

Benefits Of Straw Bale Gardening

Using straw bales to garden in is a way that Arizona gardeners can compensate for a few different problems. When you use straw bales you will be able to have better soil conditions that those found in some areas of the state. Straw beats Bermuda grass (hay) for insect infestation. And best of all you will have higher gardening beds to work in. This means that those sore backs and creaky joints will undergo less strain while gardening. The benefits are clear:

Better Soil Conditions

Superior Growing Matrix

Higher Gardening Beds

Easier On The Body 

How To Get Started

Choosing The Location

The first step in starting a straw bale garden is choosing the right place in your landscape. It needs to be a spot that is easily accessible. This makes getting all of your straw bales, soil, and plants to the location easier. The spot should be sitting on an East to West axis, meaning that it gets at least 6 hours of sunlight a day. The shape, size, and construction should be planned so it adds visual interest to your landscape. The location should also be one where the garden can benefit from rainwater. You don’t want to set it up under a giant shade tree which will limit sun and rainfall.

Buying The Supplies

You will need 3 main products to get started. Those are the bales of straw, edging material to help the straw maintain its shape, and posts. The posts are driven into the ground to help the edging material hold the garden up. The bales might seem sturdy when first set in place, but once soil, plants, and water are added they can, and should degrade. The edging helps the garden maintain its shape. Here is a short list of things you will need:

  • Straw bales – Make sure you purchase straw, not hay. Straw bales are yellow, hay is generally green. Ask specifically about what kind of straw it is, you want oat or wheat straw. You do NOT want barley straw.
  • Posts – The posts you buy will be part of the structural integrity of the straw bale garden. They will be driven into the ground to provide rigidity to the edging material. Simple metal T posts used in other agricultural applications can be used for the posts. Larger wooden posts may be used, but will require more work to anchor correctly. Either way be aware of if there are pipes or sprinkler systems under the soil.
  • Edging Material – Depending on the look you want for your straw bale garden you will chose from a variety of edging materials. Some people choose wood, some have gardening products that edge the bales and help them keep their shape as they decompose and help plants grow. Some people even choose to use coffee sacks around the bales for a earthy rustic look. Recycled metal roofing is another option

Building The Straw Bale Garden

Getting your straw bale garden built is pretty simple, but it does require a little muscle to set the bales in position. All you need to do is decide where, position the bales, condition them, add some soil and nitrogen, and set your plants in to grow.

Location Prep

Prepping the ground for your bale garden is fairly straight forward. Plan the overall size of area by how much you are wanting to plant, and how much space each plant will take. Make sure you like the spot because it won’t be easy to move them once they are wet, have soil, and already have plants growing in them. Make sure the spot you choose gets about 6 hours of sun a day.

Bale Positioning

For the best results you will want to take care in which end of the bale faces up. Bales are folded and then cut on the 2 edges. Make sure you point the edge that has cut ends of straw facing up. When the cut ends are facing up they allow better water penetration from rainfall or watering.

Bale Conditioning

It’s important to get the bales ready to be used for growing plants. When moisture is introduced your bales will start decomposing immediately. This is a natural process that makes straw bale gardening so successful. Bales must be conditioned before plants are added as the decomposition process produces heat.  Keep track of the internal heat of your bale with a compost or meat thermometer. Once the internal temperature is the same as the exterior or less, you are ready to add plants.

Water & Nitrogen Conditioning

To condition your bale you will want to take about 2 weeks before planting your plants. The first 3 days require through watering of the bales, so they stay damp. Next you will want to add nitrogen in addition to your daily bale watering. Use a liquid fertilizer that is high in nitrogen. This will help speed decomposition in your bales. All you need to do is add a capful to a gallon of water and pour it out on your bale.

Planting In Your Straw Bale

Straw bale gardens are good foundations for growing just about any type of plant. There are a couple exceptions, things like corn or tomatoes can become too tall and heavy for the bale to support. There can be other limitations for veggies that love growing in just soil, things like sweet potatoes.

Otherwise you can just pick the types of plants you love gardening and plant them like you would in a regular garden. Keep the spacing the same as you would anywhere else.

Straw Bale Garden Supplies

A&P Nursery has 4 locations in the East Phoenix Valley to meet all of your gardening needs. We can get you started from the ground up with tools, gloves, and everything a gardener needs. If gardening is already one of your passions we can help you start your straw bale garden with the best plants in the valley and expert knowledge to help you make the most of your efforts. Stop by or call one of our locations to get started.

Making Terrariums

Making Terrariums Mesa AZ

Terrariums add life, beauty, and visual interest to any indoor spot. They add life to a well lit office or a room in your home and even help increase the oxygen content in the air. Having that bit of green in your spaces brings the touch of life to any setting. This guide will help you understand the steps needed to make your own terrarium.

Getting The Gear

Before you can start your terrarium there are a few things you need to collect and buy. You might already have a few of these laying around that you can re-purpose. Here is a list of what you will need to get started:

Terrarium Container

The container you build your terrarium can be as small or as big as you want. Popular containers people use for terrariums can be candy bowls, goldfish bowls, and even canning jars. You can even choose a container that features a top and a seal.

A Set Of Gloves

Many terrarium lovers choose to plant succulents and cactus as they are easy on the water, which means easy on the maintenance. Use gloves and protect your hands as you build your terrarium. It also keeps the possible stains of dirt off your hands.

Tools For Success

Depending on the size of your terrarium it might be difficult to reach into the container to position things. Having a nice set of long tweezers for positioning helps you get it right. Also some funnels or spoons help lay your layers of rock and soil evenly.

Base Layer

Having a place for the water to come to rest is critical for terrariums. Many people simply use rocks like marbles, polished pebbles, or even sea glass. Others choose to use activated charcoal to give the base layer the property of water cleansing.

Sheet Moss

Sheet moss in your terrarium helps create a layer to keep your charcoal clean. It helps separate the potting soil layer from the activated charcoal or substrate.

Potting Soil

Using potting soil that you buy at your local nursery is the best way to start your terrarium. Using soil from outside can be problematic as it might already contain seeds for other plants or the wrong pH balance for the type of plants you are adding to your terrarium.

Terrarium Plants

There are all sorts of options for terrarium plants. Most indoor plants are going to be placed in semi low light areas. Choosing plants that can thrive in low light is key to making a successful terrarium.

Putting Your Terrarium Together

Once you have all your materials, container, tools, and plants you are ready to get your hands dirty. Follow these steps to build your terrarium.

Step #1 – Make sure the container you have chosen is clean inside. Avoid using harsh chemicals to clean the container and that it is rinsed thoroughly.

Step #2 – Take a handful of your base layer, the rocks, and place them at the bottom of your container. This layer should be about 1-2 inches thick. Its purpose is aeration and drainage. Without the base layer being a place for water to drain your plants can be over-watered and have root rot.

Step #3 – Place your semi damp sheet moss on top of the layer of rocks. If you need to soak your sheet moss for a few seconds and gently squeeze it to remove excess moisture. Place it evenly and make sure it creates a nice seal on all of the edges to prevent soil from leaking into the base layer of rocks.

Step #4 – Using spoons or a funnel add your potting soil to your terrarium on top of the sheet moss. The type you use will depend on the type of plants you have chosen. Each type of plant typically says on its tag which type of soil is best. If you have multiple types of plants simply using a non-moisture-control soil should work fine.

If you want your terrarium to have a little visual interest you can choose to have valleys, hills, and an uneven surface with this layer. There should be several inches of soil for your plants to grow in and get the nutrients they need to thrive.

Step #5 – Much like planting your plants outdoors, you will need to loosen up the root ball. Then you will want to set them in a small divot in your soil and cover the roots with soil. If the plants you have chosen don’t quite fit you can trim them a bit to help add them to your terrarium.

Step #6 – Get some water in your terrarium. It will help the plants adjust to a new environment. Water sparingly as there are not drainage holes in terrariums. Most plants used for terrariums are also low water use plants so just keep an eye on your soil and make sure it doesn’t get too dry. Many owners simply mist their plants every other week and have plenty of water for their plants to grow.

For closed terrarium systems you will want to create a healthy balance of water which will heat up, evaporate, and then “rain” down on your plants each day to give them the water they need. This is a delicate balance and has to be carefully managed for sealed terrarium systems.


Terrarium Supplies – Phoenix Valley

If you are ready to make a terrarium and live in the Phoenix valley A&P Nursery has the plants, soils, tools and understanding to help you get started. Come take a look at our inventory of plants for your terrarium and get our expert advice on choosing the right soil and plants for the size of terrarium you want to start.