9 Gardening Tips for Mesa Arizona’s Spring Planting Season Guide

When you’re searching for planting season Arizona for vegetables like cucumbers, tomatoes, garlic, cantaloupe, cilantro or any other type of fruit or vegetable A&P Nursery can help!  Our plant nurseries in Mesa, Gilbert, and Queen Creek are staffed with knowledgeable gardening expects who understand the unique challenges we face in the Phoenix Valley.

Arizona Spring Planting Season

The secret to growing vegetables and fruit in Mesa, Arizona is knowing your planting seasons“, here’s a spring planting season guide to help you out! 

Timing is one of the biggest mistakes new gardeners in Arizona make. The seasons in Arizona are much different than those in (Wisconsin for example, their spring season is more like autumn in AZ).

New gardeners in Mesa Arizona tend to make the mistake of planting the wrong vegetable at the wrong time.

Everyone has their own vision of a victory garden but growing vegetables in the Arizona desert can be a tough task for those who forget about Arizona’s planting cycle.

For example: gardeners in other states usually plant tomatoes in May, for Arizona, this could be the worst mistake you make. Your tomatoes will surely be dead by July due to Arizona’s 110+ heat in the summer. The Midwest planting cycle doesn’t work for the desert.

Vegetable Planting Calendar Guide for Arizona

Here’s a list of common vegetables and the best time to get them in the ground.
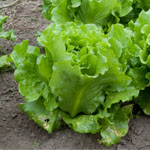
Vegetables to Plant in February ArizonaVegetables to Plant in February – Parsley, Fennel, Dill, Cilantro, Spinach, Rutabaga, Radishes, Potatoes, Peas (snap, shell, snow), Lettuce, Collards, Chard, Carrots, Bok Choy and Beets.


Vegetables to Plant in March ArizonaVegetables to Plant in March – Dill, Cilantro, Watermelon, Spinach, Radishes, Peanuts, Melons, Corn, Carrots, Beets, Beans (snap).
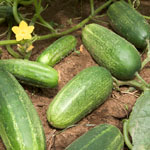
 

Vegetables to Plant in April ArizonaVegetables to Plant in April – Dill, Cilantro, Watermelon, Summer Squash, Spinach, Scallions, Radishes, Peas (southern), Peanuts, Okra, Melons, Cucumbers, corn, Carrots, Cantaloupe, Beans (snap).


Vegetables to Plant in May ArizonaVegetables to Plant in May – Cilantro, Watermelon, Scallions, Radishes, Peas (southern), Peanuts, Okra, Melons, Gourds, Cucumber, Corn, Cantaloupe, Beans (snap).
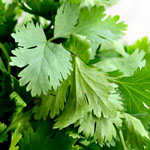
 

Vegetables to Plant in June ArizonaVegetables to Plant in June – Cilantro, Watermelon, Peas (southern), Peanuts, Okra, Melons, Gourds, Cucumber, Corn, Cantaloupe, Beans.


Vegetables to Plant in July ArizonaVegetables to Plant in July – Dill, Cilantro, Basil, Squash (summer and winter), Pumpkin, Peas (southern), Melons, Cucumber, Corn, Cantaloupe, Beans.
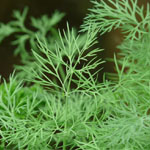
 

Vegetables to Plant in August ArizonaVegetables to Plant in August – Dill, Cilantro, Basil, Turnip, Spinach, Rutabaga, Radish, Peas, Onions, Mustard, Lettuce, Kohlrabi, Kale, Cucumbers, Corn, Collards, Chinese Cabbage, Chard, Carrots, Beets, Bean (bush and snap).


Vegetables to Plant in September ArizonaVegetables to Plant in September – Parsley, Dill, Cilantro, Turnip, Spinach, Rutabaga, Radish, Peas, Parsnip, Onions, Mustard, Lettuce, Leeks, Kohlrabi, Kale, Escarole/Endive, Collards, Chinese Cabbage, Chard, Carrots, Pac Choi, Bok Choy, Beet, Arugula.


Vegetables to Plant in October ArizonaVegetables to Plant in October – Spinach, Shallots, Onions, Mache, Garlic, Arugula.


Here’s 10 Tips for Gardening In Mesa, Arizona’s Spring Planting Season Guide

Know your Timing & Planting Seasons
Fall and Spring are Mesa Arizona’s 2 distinct growing seasons. Both seasons have specific vegetables that grown best in warmer or colder temperatures.
Gardeners from the Midwest or East part of the US should try to think of Arizona summers as winter time. This is not the time to sow seeds. Summer is by far the harshest season in Mesa. But unlike other parts of the US, vegetables can grow in the summer in AZ in you plant early enough in the spring and chose the right type of warmer-weather vegetables.

Go to https://apnursery.com/blog/garden-planting-schedule/ for when and what to plant.

1. Location, Location, Location

Location matters in vegetable growing just like location matters in real estate. Make sure and pick the right spots for growing, too much shade will keep from growing and too much sun can kill your vegetables.

2. Adequate Sunlight

Vegetable plants need at least 6-8 hrs of sunlight every day. It’s easy to have too much sunlight than it is to have too much shade. You can always purchase shade close which is very inexpensive but you can’t buy sunlight so make sure and plant your vegetables in a place where they can get the 6-8 hours of light they need and if it’s too much, add the shade cloth.

3. Bed Size

Start small. Even the most experienced gardeners can become frustrated when raising vegetables in Arizona. They take a while to get accustomed to the demands and rhythms of the Desert climate.

Start with a 4X4 raised bed. Many local plant and garden nurseries sell readymade beds. You can also construct one yourself. Other gardeners recommend digging garden beds instead of raised ones because your are using the natural soil and will avoid build-up of salt typically associated with raised beds.

4. Soil Types

Arizona soil has lots of miners but almost no organic matter. Most gardeners in AZ recommend a blend of 50-50 mixture of compost and native AZ soil. Local plant nurseries sell compost mixtures. IF you are digging your own garden, water the spot first to soften the soil and then add in your compost material.

5. Watering

Most vegetables need to be watered at least one foot deep. A good way to check the water depth is by using a screw driver. You may think your plants need more water than they do due to the dry climate but this can be just as harmful as under watering them. Plants with too much water lose oxygen. Giving them too much water can cause diseases to your vegetable and surrounding plants.

6. Master Gardener Hotline

Keep this number in your contact list: 602-827-8200, ext. 301. This master gardener hotline is operated by  master gardeners who are volunteers and it may take up to 48 hours to get a response from them.

7. Selecting Plants

Pay attention to the variety of plants you are choosing and if they are appropriate for the current season in which you are growing in. Dont plant tomatoes too late in the spring season because they take at least 90 days to produce fruit. You would be harvesting your tomatoes in 110+ heat. If you plan on planting in March, make sure and choose varieties of tomatoes that take 45-60 days to harvest.

8. Harvest Time Pacing

Due to the 2 growing seasons in Arizona, you can pace their harvest time.

It may be getting too late to plant lettuce in August, you can plant every two weeks to ensure you will have a continual harvest in the spring season.

9. Yield And Scale

Use plants that don’t take up a lot of space, unless your family likes watermelons of course. Expecially do this if you are starting a small garden. You can also space out your planting so that you and your family will have a continuous harvest of the fruit or vegetable of your liking.

Thank you for visiting, we hope you enjoyed out top 10 Tips for Gardening In Mesa, Arizona’s Spring Planting Season Guide. 

Nursery & Gardening Supplies

If you’re thinking about starting a new garden or want to improve one you’ve already started A&P Nursery can help!  Let our team help you select the best plants and seeds to get your garden thriving.  Whether you are looking for purely display type plants or want to grow your own produce, we can help!
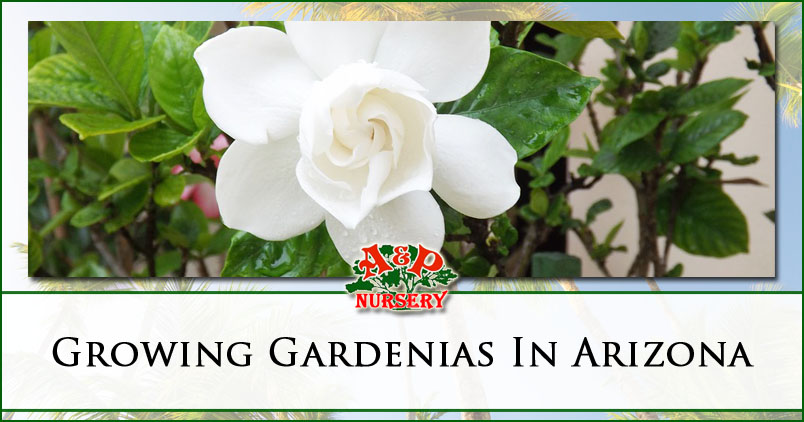
Growing Gardenias In Arizona

Would you like to grow gardenias in Arizona?  A lot of people love the plant but seem to struggle in our uniquely hot and arid environment.  This post will give you insight into how to do it.

Choosing Gardenia | Plant LocationSoil Prep
Watering | When To Plant 

Gardenia shrubs are hugely popular with gardeners because of their wonderfully fragrant flowers and glossy, bright, evergreen foliage which is attractive all year long. The gardenia is a heat loving shrub and will grow very well when planted and cared for properly. Growing gardenias in Arizona is one of the more successful landscaping shrubs you can choose. It takes preparation and choosing the right place in your landscape to put the gardenia and knowing how to care for it.

Choosing The Right Gardenia

The gardenia can play different roles in your garden and landscape. They grow to different widths and heights, so considering what role your want it to play will help you with choosing the right gardenia for your yard. All gardenias feature the wonderful fragrant flowers, however there can be differences between when they will bloom and how big their mature size will be.

If you want the gardenia to be the crowning jewel of your flora you will need to plan plenty of room for a larger variant to stretch out and grow. Some varieties of gardenia only mature to be a low, tidy plant that is well used to edge a flower bed or walkway. The Everblooming Gardenia only matures to 4 feet high and can be a wonderful boarder or walkway plant. In contrast the Cape Jasimine Gardenia can grow to a massive 8 feet wide, and just as tall.

The Right Shrub In the Right Zone

Plants are divided into the geographical zones that they grow best in. This is usually printed on the plant label or container. If you are unsure of either the zone you live in, or what zone a particular plant grows in, as your nursery professional.

Arizona is a large state that covers a few different zones based on geography and topography. Knowing your zone will help you choose the right types for your garden. Most gardenias grow well in zone 9, which covers a large portion of Southern Arizona. Northern Arizona includes zones 8, 7, 6, and in very small areas zone 5. Choose plants that are rated for your area and you will see greater success.

Some professional landscapers or passionate gardeners choose a variety of gardenias that have different bloom times. This means that there are more days per year where the landscape will have that wonderful aroma. When done properly, you can have blooming gardenia all the way from May through August.

Choosing The Right Place To Plant

Even when you have chosen the right shrub for your zone, where your plant it in your landscape can affect how it will grow. There are three main considerations for choosing the right place to plant your gardenia. These are which zone you are in, the soil quality, controlling moisture content, and how much light the plant will receive.

Knowing The Soil

The pH balance of the soil is particularly important for the successful growing of the gardenia. You will want the pH to be between 5.0 and 6.5. This is considered a slight acidic soil which might not be compatible with other plants in your landscape, or be naturally present in your native soil. Soil testing kits should be used in preparation for the planting of gardenias to measure the pH of the soil and to know if or how much adjustment needs to be done. If your pH is too high you can add sulfur to your soil. There are different types of sulfur available at local nurseries. Soil pH should be done months in advance if possible. If the soil is excessively sandy or filled with clay deposits you will want to amend the soil with plenty of organic compost. Be sure to test the soil where you going to plant your gardenia, since the quality of soil varies throughout your yard, especially near the foundation of homes.

Knowing The Moisture

Well draining soil and consistent watering is absolutely necessary for the gardenia. These are not drought tolerant shrubs and will not happily wait for the next monsoon season for their water. Soaking the soil isn’t an option either; soggy roots can cause serious problems with gardenias. The compost you add to the soil will help retain the water needed while allowing the rest of the water to drain away.

Setting up soaking hoses around the gardenias that are on timers will help take the guess work out of keeping track of watering the gardenia. This means one inch of water per week.  Clearly Arizona doesn’t always get that from rain, so be prepared to make sure they get just what they need, and don’t overwater.

Knowing The Daily Light

While the gardenia thrives in heat and light in Arizona full sun all day isn’t a good idea. It is best to protect the gardenia from the intense heat and afternoon direct sunlight. This means choosing sites that are on the north or east facing exposures. That will help get the morning light while only allowing some midday sunlight and be protected for the afternoon.

When To Plant The Gardenia

The best time to plant the gardenia is when temperatures are moderate. This means in the fall or spring. When planting in higher elevations or Northern Arizona it is best to plant the gardenia in the spring so the root system will be developed before the fall and colder days.

Gardenias like to be planted a little high compared to the surface of your soil. This means digging a hole as wide and deep as the root ball. However make sure you firmly pack in around 4 inches of soil at the bottom of the hole before you place the plant in the ground. Place the soil from the hole you dug back in around the root ball and cover the section that stands above the soil. Complete the planting by adding a layer of mulch compost. Make sure that it isn’t placed touching the stem of your gardenia. Apply the mulch every year to help prevent harsh temperatures or weeds from affecting your gardenia.

Gardenia Nurseries In The East Phoenix Valley

A&P Nursery has 4 locations that can help you with all of your gardening needs. From the large yard to small urban farming type set ups we have the plants, the tools, the knowledge to help get you going and keep your gardening thriving!

How To Protect Plants From Frost

While there aren’t as many days in Phoenix Valley that get frost per year, it does happen.  If your plants are damaged by frost it can seriously harm or kill them.  This means you won’t have the fresh fruit or vegetables you expect from your garden.  Learn how to protect plants from frost in the Phoenix Valley.

Protecting Plants From Frost

In the Phoenix Valley the average first day of frost varies from Nov 21st in Buckeye to around December 12th in central Phoenix.  End of frost risk days also vary throughout the valley from around the 3rd of April in Mesa and 7th of February in central Phoenix.  The difference in climate is due to a number of factors such as population density, pavement, concrete, and elevation.

While the average lows hover around in the 40’s during the colder parts of the year, serious gardeners will want to prepare for the occasional winter frost.   To do so you need to understand cold weather, how plants react to cold, the transfer of heat, how to avoid frost damage, frost damage symptoms, and how to treat plants that have been damaged by frost.

Cold Weather

Understanding how cold weather, wind, humidity, and heat loss is important to preventing frost in your garden.  Knowing when to take action and the factors that will affect the risk for frost will help you protect your hard work and investment.

  • During the day the sun warms soil and then that heat is radiated into the cool atmosphere at might.
  • The coldest part of virtually every day is just before daybreak
  • Cloudy nights insulate and reflect that heat back down.
  • The greatest risk for frost is on calm clear nights. This is because there is no wind to mix warmer air and no clouds to reflect heat back down.
  • Humidity dictates how slowly the temperature can change. The drier the air the faster the temperature can swing low at night.  This is obviously a major factor for the Phoenix Valley with our arid climate.
  • By comparing the temperatures reported on the news verses temperature readings you collect in your garden you can predict potential frost nights. If the news is consistently 5 degrees higher, you know you should expect frost event when the news says it will be 37°F.
  • Cold air always flows downward through canyons and even around your landscape. That means that if you have a slope or low point in your garden this section is at greater risk.
  • While some winds might help bring warmer air cold north winds during the winter can compound the heat loss in your garden.

How Plants React To Cold

The way that plants react to cold will vary with a few different factors.  Plants of different kinds, age, stage of growth, water content, and general health will react differently.  The plants that are dehydrated, actively growing, flowering, or are young will be more vulnerable to frost. While short days and colder weather typically put most plants in a state of dormancy, it is not always the case in Phoenix as we do have some unseasonably warm days.  This increases the need to be vigilant in preventing frost if your plants are actively growing during frost risk days of winter.

How To Protect Your Plants From Frost

The first thing you can do is choose plants for your garden which are naturally frost tolerant.  A second option is to place the more frost sensitive plants or trees on the southern and western sides of your garden where they typically get the most sunlight and warmth.  Also placing these plants near patios, rocks, or block walls will help keep them warm as these structures collect and radiate heat.

For plants which are frost tolerant it is best to put them in the lower and colder areas of your landscape to keep them dormant as long as possible. This helps avoid flowering too early and potential damage to fruit.

Frost Cloth & Covering Plants

You can help keep plants warm and avoid frost by using frost cloth or paper, never use plastic to cover your plants.   Frost cloth can be purchased from your local nursery, or you can use blankets and sheets for the coldest nights.  Frost cloth typically protects your plants down to about 30°F, while the most effective are rated for 20°F.

Make sure you completely cover the plant over the top and so the cloth or blanket reaches the ground.  Trap the warm air effectively and it will protect your plant.  Property applied cloths will trap the humidity and heat to insulate your plant.  Let the cloth or sheet naturally drape straight down to the soil, never draw it in and tie it around the trunk or base.

Note on sheets and blankets – If you’ve used sheets or blankets for frost protection you must remove them each morning when the temperature reaches 50°F.  In southern Arizona it is harmful to plants to keep them covered with blankets or sheets for extended periods of time. While it is unlikely that the temperature inside the blanket cover will not “cook” your plant it may be enough to wake it from winter dormancy.

Proper Care Helps Avoid Frost

While no level of care will make your plants invulnerable to frost proper care for them will make them more resistant and resilient. It’s important to avoid dehydrated plants by keeping them well watered.  Plants are damaged when ice crystals form on leaves surfaces.  The plant is dehydrated and damages itself trying to absorb ice crystals.

It’s also important to keep a careful eye on the distribution of water, keep it even throughout your garden.  Your soil will also retain more heat if it is dry, loose, and is covered with vegetation or mulch.  You can invest in frost cloth and covers to help avoid the worst of the frost, but don’t over protect.  Plants which are exposed to some colder temperatures will be more resilient to cold weather.

East Phoenix Valley Nurseries

For the best stock in trees and plants for your garden and landscape trust A&P Nursery.  We grow our stock locally right here in the east valley, so you know it is already ready to survive in our climate.  We can help you choose frost resistant plants, plant out your placement, and provide frost cloths for the coldest parts of the year.

Call or visit one of our 4 locations today

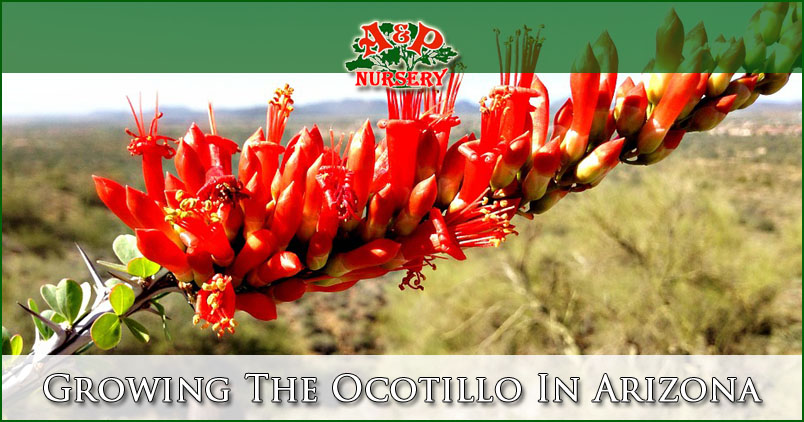
Growing The Ocotillo In Arizona

The ocotillo is one of the most beautiful and otherworldly plants seen in Arizona landscapes.  With long thin columns and bright red or orange blooms they add a real punch to the visual appearance of your landscape. While many think of it as a succulent it is technically a woody shrub, and must be cared for differently than succulents.

Mature ocotillo are grown in the desert and then transferred to containers for sale at nursery locations.  This process does leave the plant with a challenged root system so proper care is critical to successfully growing your ocotillo.

Selecting Ocotillo For Your Arizona Landscape

Ocotillo sold at local Arizona nurseries typically sell them as bare-root specimen.  The vertical canes will be tied together and they will be standing up against a wall or stacked for you to view them.  When there is space some nurseries will plant the ocotillo in beds of sand.  It is important to inspect the ocotillo to get the best specimen.

Check The Roots

The root system is a major factor in choosing which ocotillo to purchase.  The bigger the root system, the better chance you have of successfully planting your new ocotillo.  Not only should you pay attention to the size of the root system, but you should watch out for broken or damaged roots.

Buy Fresh Stock

A key of getting the best stock is to find out which are the freshest ocotillo.  While big box nurseries many times have their stock shipped in from out of state, Arizona enjoys having local nurseries which grow ocotillo locally in the Phoenix Valley.  These local nurseries only harvest ocotillo when needed to replenish stock at locations, allowing for the freshest plants anywhere.

Choosing Between Great Stock

If everything is equal, all of great roots, and they are all fresh, how do you choose?  Lift the plants to find the heaviest ocotillo possible.  The weight is an indication of how much water is in the plant and the more water you have, the better chance you have.  You may be able to request an ocotillo and specific the largest root system possible.

How To Plant The Ocotillo

With you ocotillo chosen and transported to your home or office it’s time to get it in the ground. Follow these steps to get it done right and have the best chance of it growing healthy. Make sure you leave the canes (vertical columns) tied up so handling is easier.

Remove Broken Roots

No matter how carefully the ocotillo is removed from the soil it was grown in, there will be some damaged roots.  It is important to prune the damaged sections off.  But it is equally important to leave as much as possible, so don’t get carried away like Edward Shearhands.

Condition The Roots

Before planting in the soil it is a good idea to revitalize the roots with root hormone and to let the roots soak.  This “wakes” the roots up and gets the plant ready for spreading out into the soil in your landscape.  The success of your plant depends on the size, condition, and how quickly your root system takes hold its new habitat.

Dig The Hole & Amend Soil

The hole you dig for your ocotillo should be a foot wider and deeper than the roots of the ocotillo.  The soil you dig out of the ground should be amended with sand if you don’t already have a well draining soil.  The ocotillo is accustomed to living in arid environments and watering in urban or suburban locations provide more water than they would ever experience in nature.  This makes well draining soil critical to avoiding root rot. The sand content of your soil should be at about 30%.

Planting It In The Hole

Before setting your ocotillo into its new home, you should place some of your backfill soil in the bottom of your hole to begin.  Then set the ocotillo so that the base of the plant is level with the rest of the ground.  Backfill the rest of the soil around the plant and tamp it down around the roots.  Be exceedingly careful not to damage the roots while planting your ocotillo. Create a moat around the edge of the hole to help with new watering.

Untie & Check For Position

Once your ocotillo is standing on its own it is time to untie the canes and check to make sure it is standing up straight. It should look upright and not lean to either side.  If it does gentle correct the lean and have a friend tamp the soil as you do this to help secure it.

How To Water Newly Planted Ocotillo

As will all plants the ocotillo has need for water, and should be done immediately after planting.  As the ocotillo is a shrub it will need deep watering along with spraying or misting the canes.  The cane are believed to naturally absorb surface water from rainstorms, so spraying them adds moisture directly to the plant.

Year Round Watering For New Ocotillo

The ocotillo should be watered about once a month in cooler months.  For the hot months the ocotillo should be watered about once a week for the first year or two.  It’s important to provide the water but it is also important to have well draining soil and not overdo it.  Excessive or constant water will lead to root rot, and ultimately kill your ocotillo.  This makes drip systems less than ideal as they are designed to provide constant watering.

Established Ocotillo Watering

The ocotillo, once fully established, will not need supplemental watering unless it is an excessively hot and dry summer.  While it may bloom in its first year, this is not a sign that it is established and does not need watering. They also leaf out follow rain storms, which is a great sign, but does not mean it is established.  It is important to allow 2 years for it to establish itself before ceasing watering.  For the largest plants you should do 3 years of supplemental watering.

Buy Ocotillo In Arizona

If you’re looking for the best place to buy ocotillo in Arizona, A&P Nursery is your source for the best specimen.  We grow our stock locally in the Phoenix Valley, so you’re getting the freshest plants who are already accustom to growing in the area.  We have all the tools and fertilizers you need to get started and even offer planting services.  Stop by one of our 4 locations to view our stock of ocotillo and choose your’s today!

Call or visit one of our 4 locations today

Square Foot Gardening Pros & Cons

If you’re searching for “square foot gardening” or “pros & cons of square foot gardening, you’re probably just trying to plan your new garden.  They offer gardeners a orderly and neat looking garden, but are they the best way to grow vegetables?

What Is A Square Foot Garden?

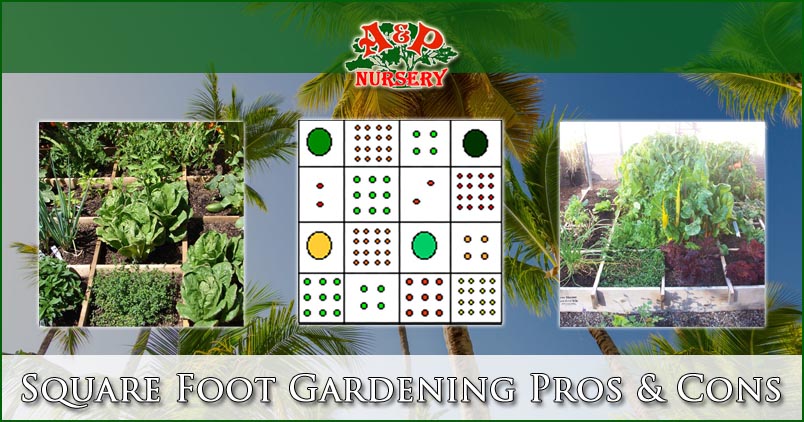
If you’ve browsed through gardening magazines or watched some HGTV you’ve probably seen a few raise garden beds which are divided perfectly into squares.  Each little square has its own type of plant.  It looks incredibly organized, yet is it the best way to grow vegetables?  We will explore if square foot gardening is the best way to grow your veggies in this post to help you decide what kind of garden you want to set up.

Who Started Square Foot Gardening?

Square foot gardening is an incredibly popular method of gardening which involved making highly productive kitchen gardens with limited space.  The technique was developed and invented by Mel Martholomew and introduced to the public in 1981.  It involved sectioning off a raised garden bed into 1 foot by 1 foot squares to grow individual types of plants.

Square Foot Gardening Concept

The idea is to create a small garden and divide it into a grid of 1 square foot sections. The size of the gardens vary but are usually 4 foot wide and either 4 foot long, or 8 foot long.  This is done so you can reach the plants in the middle by not exceeding a reasonable reach.  Seedlings or seeds of each kind of vegetable are planted in each square.

Plant Density Per Square Foot

How many individual plants is dictated by how large each type of plant will grow.  An example is a tomato plant takes up a lot more space than radishes, so you’d only plant one tomato plant.  Whereas with radishes you could pack a whopping 16 seeds in that same square foot. One huge advantage of square foot gardening is that there are no paths between rows, and no wasted space.  The soil also stays loose and there’s no chance of you stepping on plants.

Square Foot Gardening Pros

Square foot gardening offers gardeners a quick way to grow a lot of veggies with minimal effort.

Quick Set Up

For people wanting to jump into gardening quickly square foot gardening is a great option. Easy gardening kits can be set up just about anywhere including over pavement or grass.  This means it takes less than a day to set it up, fill with soil, and plant your garden.  Even if you aren’t planning to use a raised garden or easy gardening kit a square foot garden makes it easy to section off your existing soil and get started.

Highly Productive

When you plan and use your space efficiently you will get more out of your garden per square foot.  Seeds and plants are carefully selected and planted in greater density which means a greater yield.  When you want to maximize your gardening efforts, square foot gardening is a great tool to get your biggest bang from your gardening buck.

Virtually No Weeding

If you use a raised gardening set up with a soilless mix for your plants there will be very few if any weeds.  This is because there won’t be any weed seeds in the soil you buy and fill your square foot garden with.  Over time they can blow into your garden, but if it is raised or laid on concrete there is less chance of it compared to a regular traditional garden.

Minimal Effort

As the gardens are smaller and there are only so many types of plants it requires less effort and maintenance per day.  The time required for planting, and harvesting your veggies is considerably less. This is made even easier should you decide to have a raised square foot garden which removes the need to kneel or bend down to do your gardening.

Square Foot Gardening Cons

The downsides to this type of gardening is they may require more watering, have limited size, and may cost more than just planting in the ground.

Intensive Watering

Soil in raised garden beds does dry out faster than soil on the ground. In hotter weather it may mean that daily watering becomes part of your routine.  Automatic watering options such as drip irrigation or soaker hoses can make this much easier and require less manual watering.  Combined with organic mulch you can manage your need for watering.

Limited Depth

Many popular plants need more than 6” of depth to grow properly.  This means that gardeners wanting to grow their favorite plants may need to ensure that they have enough room in their raised beds by building deeper containers.  Some gardeners prefer to double the depth and go to a full foot deep.  Keep in mind the supports for your raised garden bed must be built to support the additional weight.

Limited Width

Some popular plants take up an incredible amount of room and are not ideal for square foot gardening.  Things like sweet corn, winter squash, or asparagus should be grown in traditional row gardens.  Square foot gardening is ideal for things like radishes, carrots, tomatoes, and herbs.  Plan ahead and consider the mature size of each of the different types of plants you want to grow.  Use your square foot garden for the more compact options in your garden.

Potentially Costly Build

If the soil you have in your garden isn’t of good quality you should consider purchasing soil from your local nursery.  Soilless mix also is more costly and is a option that many avoid to keep the cost of their garden down.  The cost of building the raised garden bed is also a factor which can be avoided by either growing on the ground, or by buying an inexpensive gardening kit.

Starting Your Square Foot Garden In Arizona

If you live in the Phoenix Valley and want to start you own square foot garden A&P Nursery has 4 locations in the Phoenix Valley to serve you.  With the best locally grown plants and easy gardening kits we can give you a head start at vegetable gardening in Arizona.  Visit our easy gardening kit page to see our options, call us with questions, or simply stop by one of our locations to get started!

Call or visit one of our 4 locations today

Stop Fall Tree Pruning | Save The Trees!

If you’re wondering how much pruning your tree needs in the fall, this post will make clear exactly how much you need.

Fall is that time of year that really makes people want to start pruning more than a vampire craves blood. With the fall garden clean up starting, maybe it might be all the mulching raking that is causing people to go insane. Before you begin hacking at your bushes and trees, take a bit of advice from a gardening expert.

Fall Tree Pruning

The rules for fall pruning is simple. Just don’t prune during the fall. That means nothing, zilch, zero, nada during the fall. That goes for plants and shrubs and even trees. Make a sign that states leave the pruning alone until winter or spring. There isn’t any type of exceptions. Don’t prune during the fall.

If you feel as if you got scolded by a teacher, then let that be a reminder that fall isn’t the time that you are supposed to trim your shrubs and trees, even though that the leaves that have fallen off have really exposed the imperfections. Put those pruning shears back into your shed until winter or longer. Below are a few pruning basics that you can use whenever it is time to trim back your shrubs and trees which is much safer:

Understand why Fall isn’t the best time to prune

It should be stressed that pruning your shrubs and trees now will stimulate new growth when your plants are trying to go dormant and this will weaken your plant. If you prune during a warm day then sap will rise up through your plant then the temperature drops to below freezing at night and then you don’t have anything that is pretty.

Instead of pruning in the fall, prune in the dead of winter or during early spring. That is if you can stop yourself. Spring bloomers will often get their haircut after they have finished flowering, but get over this weird obsession with pruning, you need to know that there are fruit trees and only a few plants that actually need to be pruned and many gardeners will prune too much and not too little.

Still, properly pruning overgrown fruit tress or flowering shrubs near your home will help those plants to produce more fruit and flowers, which benefits wildlife. Doing it wisely can even help your trees and plants a way to fend of pests and diseases. Just remember, don’t prune during the fall. Waiting until it is winter means that your plants are mostly dormant and because the leaves have fallen, you can easily see what you are doing. For those early spring bloomers that only need light pruning, it is best to do so right after they have finished blooming. For the overgrown shrubs, winter pruning is much better.

Don’t Prune when it is wet

Just a general rule, don’t prune anything if it is damp outside. Don’t prune if it is wet because it will spread diseases. Damp weather actually encourages microbe growth which makes the most of the damage that pruning does. You will want to wait until the sun has been out for a while and then it dries out and kills the bacteria and mold.

Know how to Hack

Pruning can actually add more air and sunlight to filter through your shrubs and trees, which helps to keep them really healthy. Whenever it is time for you to prune, you need to focus on removing dying or dead branches. If you see a sick brank, cut between the healthy and diseases spot. It is also recommended that you prune whenever branches cross each other or rub each other, or if the branch is growing vertically. You can take off the low branches that mess with foot traffic or your lawnmowers. Cut the branch as close to the source of the plant as you can. It is best to prune back to the main stem. If you leave a stub that is sticking out, it is a place where insects and bacteria can live. You also want to cut at the same angle that your branch collar is, which is near the furrow of bark where the trunk and branch meet. If you have done it right, then a circle of healthy callus will swell up around that spot.

Know what you are hacking

There is a really long list of shrubs and trees that you can prune from winter until sap starts back up in spring. Some of them are beauty berries, Callory pears, poplar, junipers, cherries, glossy abelia, hydrangeas, crabapples, Bradford pears, spruce, sumac and plums. But, just because some trees can ooze sap whenever they are pruned in the winter, you are best to wait until summer to prune elm, dogwoods, maples, walnuts and birches.

Keep your tools clean

It doesn’t matter what type of pruning tools you are going to use; you need to make sure that you are keeping them clean. If you happen to have cut out diseased branches, you want to make sure that you have thoroughly cleaned your tools before you move onto another tree, which helps to avoiding spreading diseases. You should disinfect your tools by using one to two teaspoons of bleach to warm water. You can also use soapy hot water which will kill most germs and remember to dry your tools very well afteryou have washed them. If you are unable to trim from the ground using a pole pruner or if you need to prune around a power line, then hire a professional instead of climbing up high and doing it all on your own.

Do your homework

We offer general pruning guidelines, but if you are wanting more specific information on your shrubs and trees that are growing on your property, then ask your master gardeners who are involved with your local tree nursery.

Trees & Tree Pruning Tools

If you need to get new tools for when it’s the right time to prune your trees, or you want to add new trees to your landscape, A&P Nursery has everything you need.  From the trees to gloves and fertilizer we can cover every step of the process.  In fact we partner with a number of landscaping companies that can do the work for you in planting  a new tree, tree trimming, and even tree pruning.

Call or visit one of our 4 locations today

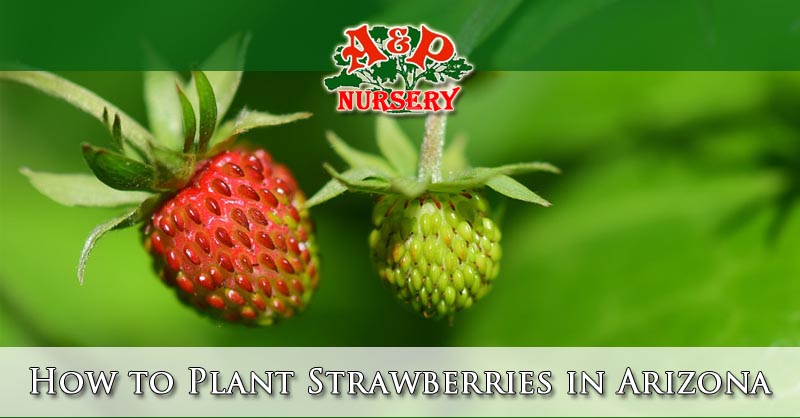
How to plant strawberries in Arizona

If you’re searching for “How to plant strawberries in Arizona” you’ve come to the right post.  Gardeners in Arizona that are feeling adventurous won’t let the challenging conditions keep them from growing juicy, plump strawberries within the hardiness zones of 3-10. The diverse soils and climates mean that strawberries will need some extra TLC. The growing zones in Arizona go from 4b – 10, which have average winter lows from 40F to -25F. Whatever region you are in, proper planting will get Arizona strawberries started right.

Planting Strawberries In Arizona

Strawberry flowers are very vulnerable to frost, so the time of year you plant them will vary depending on where you live in Arizona.  It is a best practice to wait until you are completely sure the frost is over for the spring before starting to plant your frost sensitive plants such as strawberries.

Site Selection

In the low desert in Arizona, unexpected frosts may damage tender strawberry blossoms and destroy spring crops. The earliest blooms will create the largest berries, so having the right protection is vital.

You should plant your strawberries on elevated slopes, this will be where cold air will drain away and it lessens the chance of damage from frost.  The north-facing, cooler slopes will start later blooms, which adds a buffer to any bloom lost.

Strawberries will fruit best in locations that are in full sun, but the low desert berries will need protection from the intense sun. Locations that are close to homes will help to protect against frost, just be sure to avoid any west facing walls that will reflect the Arizona heat.

Soil Adjustments

Strawberries love low-saline, well-drained, organic soil that has a slightly acidic to neutral pH around 6.5. Many Arizona soils are saline and alkaline, with very little organic matter and without adjustments, the strawberries will have nutrient deficiencies.

Test your soil and follow the recommendations to the letter. Many Arizona gardens will need their pH lowered for strawberries, but some will have acidic soil. This is because the soil contains calcium carbonate, the average pH lowering products like sulfur won’t work. Using the wrong amounts or amendments can cause your soil to be toxic. Don’t just guess, test your soil.

You should layer up to 3 inches but no less than 2 inches of organic compost in the bed, as well as for ever 100 square feet, using a pound of 12-24-12 fertilizer. Be sure to wear protective clothing such as goggles and gloves and mix the layers to be 8 inches deep and be sure to avoid any manure based compost which often add salts.

Planting Time

Start planting your strawberries in late winter or spring, after the last frost date for your area. In the low desert of Arizona, this is often in February and the mountain regions need to wait until June.

Trim the roots to about 6 inches long, and keep them moist at all times. Be sure to use sharp garden pruners or scissors and use a household disinfectant to sterilize the blades before and after you use them.

Your planting depth is vital. Bury the roots but keep the crown of the plant exposed at the surface of the soil. If they are planted too low, then the strawberries will rot. If they are planted too high, then the crown dries out. Space your strawberries at 12 – 18 inches apart, and be sure to water them thoroughly.

Initial Care

Remove all the flowers during the first season so that your strawberries will focus on their roots and not the fruits. When the new growth starts, for ever 100 square feet use a half of a pound of 21-0-0 ammonium sulfate. Be sure that you are wearing protective clothing and lightly scratch the soil to add the fertilizer so that you don’t disturb the roots. Water it thoroughly and wash the fertilizer from the leaves.

Drip irrigation works best for Arizona strawberries. Overhead watering will promote disease, wastes water to evaporation and fuels the growth of weeds. Adding organic mulch like straw or pine needles will help to retain soil moisture, keep it cool, and keep weeds from growing.

Strawberry roots will stay in the top 6 inches of the soil. The shallow roots will need to be consistently moist at 1 inch per week. Water the strawberries every 3 – 5 days, with up to 2 inches of water weekly during the hot weather.

Strawberry Selection

With the diversity of Arizona, match your berry types to your elevation. Strawberries will fall into 3 groups: day-neutral, June-bearing, and everbearing.

June-Bearing Strawberries

June-bearing strawberries will flower and fruit early. If frost gets to them, then your crop will be lost. They work best in warmer, lower elevations with a few late frosts. The cold hardy, Mesabi June-bearing strawberry does quite well in high pH southwest soil.

Everbearing Strawberries

Everbearing strawberries have few runners, but will produce smaller crops in fall and spring. Autumn harvest follows if the spring frost destroys the spring crop, but everbearers have trouble in low desert heat. Cooler, higher elevations work best for them, but have shorter growing seasons. The Ogalla everbearing strawberry works well in these conditions.

Day-Neutral Strawberries

Day-neutral strawberries will flower and fruit for all growing season with smaller berries and fewer runners. Their flowers will fail if the temperatures go above 70F. They work best in the moderate elevations and moderate climates. The Tribute day-neutral strawberry is disease resistant and tolerates alkaline soils and does well with short growing seasons.

Phoenix Valley Plant Nursery

If you are looking for strawberry plants to plant in your garden A&P Nursery has everything you need to get started.  With quality seeds and plants we can get you started right.  In addition we carry a wide assortment of tools, fertilizers, and even offer starter raised gardening kits.  No matter what your gardening project A&P Nursery has the valley’s best plants, helpful staff, and everything you need to grow fresh fruit, produce, and beautiful plants in Arizona.

Call or visit one of our 4 locations today

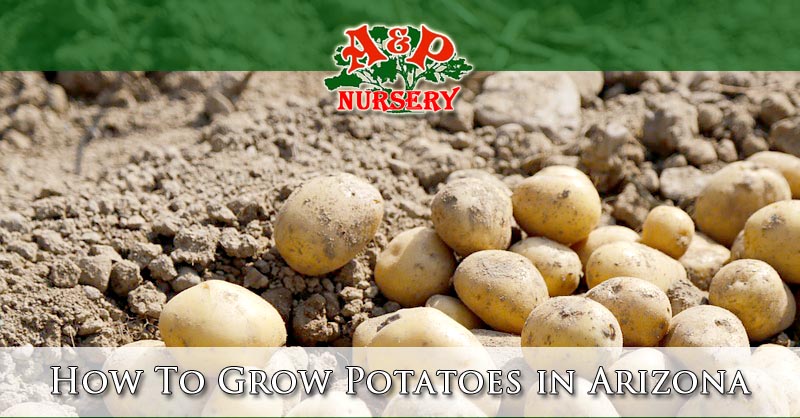
How To Grow Potatoes in Arizona

If you’re searching for a guide on How to grow potatoes in Arizona this post is for you!  Potatoes are cool-season crops that provide various minerals, vitamins, and protein. The best time to plant are early spring, and late fall.

Origin Of The Potato

It’s not really known exactly how potatoes got from Andes to Ireland, but prior to disaster striking the potato was firmly rooted in Irish soil. It as grew and part of culture for centuries.

During 1846 to 1847, Ireland was hit by an unseasonably cool and wet year, with millions of tons of potatoes becoming rotten due to an opportunistic fungus. It also resulted in thousands of deaths and tens of thousands of emigrations. This event has become known as the Great Potato Famine, and could be the only drastic human catastrophe named after a plant.

It does not matter how you pronounce ‘potato’, it is likely that the birthplace is considered to be Ireland. However, potatoes actually originated on the other side of the world, in South America’s Andes mountains.

Thousands of years ago, wild potatoes were discovered by early Incan tribes and were considered life-sustaining storehouses for nutrients and energy. Using the environment that had less alkaline and humidity in the soil, similar to that of the Southwest U.S, they were able to domesticate more than 100 varieties.

Potato Nutritional Value

When considering the per unit of land, a potato provides more calories and protein than other grown foods. They are able to store many vital minerals and vitamins as well.

When To Grow Potatoes in Arizona

The potato plant will grow best during late fall or early spring as days are warm, but have cooler nights. While being a cool-season crop, edible sections of the potato are under the ground, while the tops are above ground and unable to handle frost. Therefore, timing the planting of potatoes is important.

You will need to plant them early as possible to obtain the most crop possible before summer heat kicks in, or the winter cold takes the plant.

Within Phoenix, AZ the month of March is an ideal planting time for potatoes, or in late September. However, within Albuquerque, NM or Denver, CO the potatoes should be ordered in, and ready for planting in mid-late April.

Potato Growing Conditions

Soil: Potatoes often do better in loose acidic soil that is well-drained. Because of the alkaline in Southwestern soil, compost should be added to the area to assist with acidifying the soil. Also, soils with heavy alkaline or poor drainage can result in undersized and lower yielding crops.

Fertilizer: The potato plant requires fertilizer during the early stages of growth, therefore, apply the majority of your fertilizer prior to planning. You should ensure the fertilizer is balanced. If pre-planting applications are missed, you should wait to fertilize until after sprouts begin producing leafs.

Light: A minimum of six hours of light is required by the potato plant, full sun.

Water: For the best possible yields, you want to maintain an evenly damp soil, not wet. You want to allow some drying prior to watering again.

Starting: For larger seed potatoes (bigger than a chicken egg), you want to cut them into pieces, roughly 1 inch across. Once being cut, allow the seed potato to heal/cure for several days prior to planting, or it could rot underground.

Each of the pieces need at least one bud (eye) where stems grow. If possible, having two eyes would be better. Potatoes that are egg size or smaller are able to be planted whole.

Selecting: You want to ensure that you buy seed potatoes that are certified disease-free from a trusted online catalog, mail in catalog, or garden market to get the best results. You should avoid planting potatoes bought at the supermarket due to being less vigorous and easier for them to become diseased.

Phoenix Valley Nursery & Gardening

If you want to grow potatoes or any other kind of vegetable in your Phoenix Valley garden A&P Nursery has everything you need to get started.  If you already have a garden started you can get more out of it with better soil, fertilizers, and other quality gardening products.  We also offer gardening kits to help you get a head start and organize your gardening.  With friendly and knowledgeable staff A&P Nursery is your stop for helpful gardening advice for Arizona.

Call or visit one of our 4 locations today

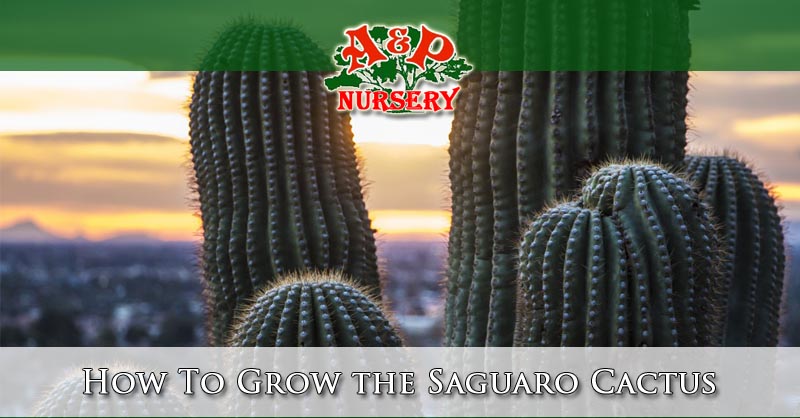
How To Grow the Saguaro Cactus

If you’re searching “How to Grow the Saguaro Cactus” this post is for you.  The Saguaro Cactus is an iconic cactus common to Southern Arizona and Northern Mexico, also known as the Sonoran Desert.  The area these giants grow in and thrive is limited to regions that do not experience freezing temperatures during winter.  They are generally limited to areas below 4,000 feet above sea level but do grow on south facing slopes where sun is more plentiful higher than that.

How Saguaros Grow – Buying Your Saguaro – Watering Your Saguaro

How Saguaros Grow

The Saguaro is one of the most impressive and iconic cacti in the world and it grows under unique conditions which are common in Southern Arizona.  Read below to get information about where they grow, how quickly, when they flower, and their average lifespan.

Nurse Trees

In the wild the Saguaro Cactus typically grows next to a “nurse tree” such as the ironwood, mesquite, or palo verde.  When they first germinate and grow from a seed they can be quite tiny and hard to spot. Scientists have speculated that many times this nurse tree dies as it beings to compete with the Saguaro for water and nutrients in the surrounding soil.

Growth Rates

Studies done in the Saguaro National Park have shown that they grow about 1 to 1.5 inches per year for the first 8 years of life.  Growth rates for the Saguaro do depend on the climate they are planted in.  Studies have shown however that the most active growing is done before there are branches from the main trunk.  Branches typically begin to appear after the first 50 to 75 years in well saturated areas, and up to 100 years in more arid climates.

First Saguaro Cactus Flowers

The first flowers on the Saguaro begin to appear after 35 years of growth.  They generally appear at the terminal ends of the primary trunk, but can grow on the sides of the plant.  Once the flowers begin to appear you can expect to see them for the remainder of the Saguaro’s lifespan.

Saguaro Cactus Lifespan

While the adult age of a Saguaro is considered to be about 125 years they can live to be more than 200 years in the right conditions. Average lifespan varies from 150 to 175 years of age.  These impressive giants can grow as tall as 150 feet and weigh as much as 6 tons!

Buying Your Saguaro Cactus

It is best to choose a Saguaro to purchase which has not yet reached maturity as the transplant rate for mature Saguaro Cactus is not favorable.  It is also illegal to procure a Saguaro cactus from the desert to bring home, so purchasing your Saguaro from a Saguaro Cactus Nursery is the best way to one for your landscape.

Watering Your Saguaro Cactus

These giants require very little water to grow well.  They cannot however grow indefinitely without water, yet it should be given sparingly and owners should avoid excessive incidental watering while watering lawn and other plants. Read below for instructions on how to water at different stages of the cactus’ life and times of year.

New Saguaro Cactus Watering

When the new Saguaro is being planted some water is typically added to the hole prior to planting. After the soil is firmly packed around the saguaro it will not have a need for water for about 2 weeks. During the hotter summer months between May and October a deep watering should be done every 2 to 4 weeks.

The soil should be watered to a depth of around 1 foot. Never water when there are rainstorms and completely cease watering during the winter months. Generally the Saguaro will have good roots within 6 months yet is not completely established for another year or two.

Established Saguaro Cactus Watering

Once your cactus has been planted for a year or two the ribs will stay spread out.  This means that your Saguaro roots are established and have found water.  Established cactus build up a water store inside them so you can cut your watering down during the hot months to about once a month.  Again, don’t water if there has been rainstorms or during the fall or winter months.

Saguaro Cactus Watering Technique

The Saguaro’s root system is only about a foot below the surface of the soil which enables it to benefit from even small rainstorms. Due to how shallow the roots are for the Saguaro Cactus it is watered differently than other plants.

The best technique for the Saguaro Cactus is to place the hose on the ground about 5 or 10 feet from the trunk of the cactus and let the water flow for about 30 minutes.  Never water directly onto or around the base of the cactus as you want the roots to reach out around and grow to support the fully grown weight of the cactus.  Watering directly around it will prevent a stronger network of roots.

Root Rot & Overwatering

In residential and commercial landscaping that includes plants such as grass which need watering via sprinklers Saguaro Cactus should be planted at a distance from these elements to avoid overwatering.  Not only can the Saguaro Cactus experience root rot but it can steal water from other plants if placed too close.  Experts recommend about 10 feet from the base of the Saguaro and other plants and landscaping that need frequent watering.

Saguaro Cactus for Sale – Phoenix Valley

If you want to plant a new Saguaro Cactus in your landscape A&P Nursery has locally grown Saguaro Cactus at our nursery.  We offer wide selection of sizes and can have your Saguaro Cactus delivered to your home or business along with professional planting by our landscaping company partners.  We make it easy to include one of these iconic beauties in your landscape in the Phoenix Valley.

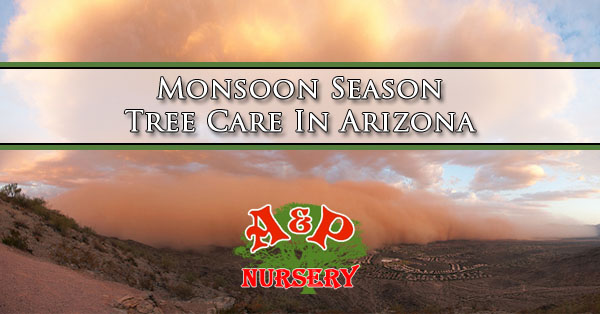
Monsoon Season Tree Care In Arizona

Monsoon Season Tree Care In Arizona
Photo by – Alan Stark

If you are searching for “Monsoon Season Tree Care In Arizona” you are most likely looking to preserve your trees before the storm, or are looking for information about helping care for trees after a monsoon has been through the Phoenix area.

When Is Monsoon Season?

The period between June 15th to September 30th is considered the Monsoon season.  This is an estimated period of time and strong storms can and do occure before and after these dates.

The term monsoon comes from the Arabic word Mausim, which means wind shift or season. It is basically a shift in the wind direction that has caused a meteorological event. Depending on the size and duration, the downburst can be called a microburst. The time between June 15th and September 30th has been called the Monsoon season. This is a time during the summer that will normally bring extreme heat, which can be followed up by excessive amounts of moisture in the air which causes large thunderstorms that are caused by fast winds. These thunderstorms will give a lot of danger that will strike suddenly and with very violent forces.

What Is A Microburst?

The national weather service describes a microburst as a localized column of sinking air within a thunderstorm.  Generally they are equal to or less than 2.5 miles in diameter.  With the concentrated winds and potential for enormous sudden precipitation they can be extremely dangerous and life threatening.  There are 2 types of mircrobursts, a dry microburst and wet microburst.

When a sudden downdraft of wind is accompanied with significant and sudden rainfall it is a wet microburst.  A dry microburst is when the wind is not accompanied by rain. With winds that can reach up to 100 mph or higher there is no surprise that they can cause significant damage.  In fact that kind of wind is equal to a EF-1 Tornado!  This can damage homes and completely destroy trees in your landscape.

How Does It Damage My Trees?

Whenever it is followed up with heavy rain, the tree will become more vulnerable to the heavy winds. The heavy rain causes over saturation in the soil, so even if the tree has healthy roots it will have a weaker hold. In this type of case, most of the root system will be exposed if the tree happens to fall over. Your best efforts will not be able to prepare the tree to withstand extreme winds that come with monsoons. Although, there is a lot of preparation that you should and can do to help lower your storm damage potentials to the trees. The most important tip of all is to pay attention: be sure to monitor your trees whenever there is heavy wind or rain, and then take the right steps as needed. You may contact us if you have any issues.

Basic Tips for avoiding storm damage:

  • Fertilize, water, and mulch your trees properly and regularly; healthy trees will be able to withstand the elements a lot better. Prevent the trees soil from becoming compacted.
  • Be sure to prune annually even when the tree is still young. Having the trees trimmed by professionals who understand healthy tree structure is the best way to go for avoiding issues. A poorly pruned tree may lead to snapping trunks and limbs in high winds.
  • Be sure to practice protective care; any cash that has been spent on preventative measures for your tree will be a lot less than having to replace them, especially if it has caused damages to roofs, structures, or cars when they come down.
  • Clear the yard of landscape or leaf trash. This prevents more work whenever high winds begin to blow debris into the yard, and it also helps to keep pool filters from being clogged and then burning out.

Staking Trees

Staking helps to provide younger trees with the right support it needs until the trunk has become strong enough to hold its canopy upright. Many trees will not need to be staked longer than a year, but the stakes need to be left for at least one growing season. As soon as your tree can stand on its own, remove the stakes.

Follow these tips for staking your tree properly:

  • Use an 8-foot lodge pole or stakes. These need to be at least 6 to 8 feet tall and around 3 inches wide.
  • Find the direction of the winds and insert your stakes opposite of each other and about 2-feet from the stem, as well as being in line with the wind. For instance, if the wind is blowing west, place the stakes facing south and north.
  • Be sure to drive the stakes at least 2-feet into the ground. Then try to bury the stakes so that they are the same size above ground. Whenever you are finished the stakes should be about 4 feet above ground.
  • Cut 2 pieces of flexible wire that measure 5-foot long. Use rubber to create 18-inch lengths. Slip these over the wire and then wrap the hose around the trunk to protect the trunk of the tree. Pull wire that is parallel to the ground and then attach it to the stakes. Twist the wires together on the outside of the stake to ensure that the wire is tight and then cut off the excess.

Tree Care and Maintenance

Simple maintenance and care will make the trees grow stronger during bad weather, below are things that you should watch out for:

  • Cracks are a clear indicator of branch failure, where there will be splitting, so prune to prevent further cracking.
  • Dead trees are considered very unpredictable due to the fact that it’s brittle and isn’t able to give or bend under pressure such as a living branch does.
  • Pests may cause health issues for your trees, these pests may target the sickly trees.
  • Decay from hollow cavities or fungal growth is a sign of weakness.

Keeping the trees thin is an important thing to storm proof your tree. The thicker that a tree is, it will be more likely to be damaged during heavy winds. Even if the tree is perfectly healthy, having dense foliage will cause safety hazards during storms. Dense canopies won’t allow the wind to pass through, and the wind resistance can cause the branches to break or cause the tress to fall. This applies to the weighted ends of branches, which is why stripping the lower parts of the branches is not adequate enough. The leaves will return once it has survived the monsoon.

Phoenix Valley Tree Care & Tree Nurseries

A&P Nurseries have the right tools, fertilizers, tree care knowledge and new trees for you to plant in your landscape. We also have great relationships with highly rated professional landscaping companies that care for many Arizona resident’s trees. If you need advice about how to prevent damage to your trees during strong storms or how to care for damaged trees after the experts at A&P Nursery are just a phone call away. Stop by or call one of the convenient east valley locations.