How To Water Your Vegetable Garden

If you’re searching for a guide to how to water your vegetable garden, here it is!  When it comes to watering the garden, there are all sorts of advice available, and it can become confusing for gardeners. However, the question “When should I be watering my vegetable garden?” has a correct answer. There are a few things to consider when determining the best time to water your vegetable garden, meaning there are two responses to this question.

To learn more, you can read up about it at Gardening Know How: Best Time to Water Plants – When Should I Water My Vegetable Garden?

Watering Your Vegetable Plants – Morning

Early morning is the best possible time to water your plants, while temperatures are still cool. This allows water to soak into soil, reaching the plant’s roots while reducing the amount of water loss from evaporation. In addition, watering during early morning provides plants with a longer water source throughout the day, enabling plants to handle hotter temperatures of the day from sunlight.

One common gardening myth is that early morning watering can result in plants becoming scorched. This isn’t true. First, most regions of the world will not have enough sun to result in water scorching plants. Secondly, even in regions with intense sunlight, water droplets evaporate way before to causing scorching.

Because work schedules can sometimes hinder early morning watering, watering plants in the afternoon is the second-best option. Watering in the late afternoon or evening is the second-best time to water your vegetable garden. When watering in late afternoon, most of the heat from the day should be past, but the plants could still be dried before night time when temperatures are high. Also, watering during this time of day reduces the water evaporation, allowing plants many hours with no sun to take in the water.

When watering in the late afternoon, one thing to be cautious about is that leaves have time to dry prior to night fall. Damp leaves at night increase fungus growth risks, such as sooty mold or mildew. These can harm the plants. When using a soaker or drip irrigation system, watering up until night fall can be done, as leaves will not get wet with this method.

How Much Water Do My Vegetable Plants Need?

Generally, a good rule of thumb is to provide plants with one inch of water weekly, either by watering or rain. However, in more arid climates this amount should be doubled. Meanwhile, in warmer weather, vegetable plants require more water, roughly half an inch more water weekly for every 10 degrees above 60 degrees. So, in 90 degrees plants require 1 inch, plus 1.5 inches for a total of 2.5 inches weekly.

Typically, the average daytime temperature highs, and the night time lows is divided by 2. Therefore, with a high of 95 degrees, and a low of 73 degrees, to get the average add 95 + 73 (168) divided by 2, equaling 84. Thus, your garden will require at least one more inch of water. Because of this formula, many vegetable gardeners within hotter climates often laugh about 1 inch of water per week being the recommended amount.

For plants such as eggplants, squash, tomatoes and others requiring more water with leaves that easily wilt, the one-inch suggestion is often considered an underestimate.

To gauge the amount of watering, you can use a rain gauge or plastic container that will catch water from the sprinkler or watering source used. When the container or gauge collects 1-inch of water, or the needed amount based on the above formula, you have successfully provided enough water.

You may also like:

Growing a Vegetable Garden in Arizona

East Phoenix Valley Nursery

If you’re looking for the best vegetables and herbs to grow in the valley, A&P Nursery has the plants, potting soil, fertilizers, and gardening tools you need.  Our friendly and knowledgeable team can help you achieve virtually any gardening goal.


How to Grow Grapes In The Phoenix Valley

If you are searching how to grow grapes in the Phoenix Valley you’re one of many Arizona residents that want to grow their own grapes.  Grapes are a great addition to any garden and are a welcomed refreshing snack.  Not only do grape vines produce the fruit but they add lots of greenery to make your landscape more lush and green.

Right Location For Growing Grapes

The first step in growing grapes in your Phoenix landscape is choosing the right location.  While most plants need some shade throughout the day grapes are the exception.  They thrive in full sun and at worst a leaf or two might dry up.  You can minimize this by staying on top of your watering. You should also choose a location where there will be room for the grape vine to grow up and spread out without overrunning other plants or your property.

If you need shade for other plants in your landscape grapes can actually be used to provide a sunscreen to protect the more sun sensitive plants.

Grape Vine Support & Training

Grapes grow best when the vine has something to grow up and expand on such as a trellis, fence, arch or even single stake. You should avoid using hurricane or chain link fences as the plant will overcome the openings in the fencing.

Training your grapevine will help you establish a straight trunk and better root system.  After your vine has grown new shoots during the first growing season you will need select the straightest one and tie it off to your stake, fence, or trellis. It may seem scary but remove all other shoots after tying off your best one.  Let your chosen shoot grow to about 5 feet and cut it back to about 42 inches at the end of the growing season.

Watering Your Grape Vines

Growing plump and delicious grapes starts with getting the watering right. While some plants need lots of specific attention grapes do well on your grass watering schedule. So if you choose a location that already gets water from your sprinklers you may not need to worry about any supplemental watering for your grape vines.

Protect Your Grapes From Pests

It isn’t just you and your family that crave the flavor of grapes, bugs and birds around your landscape will want a bite.  To protect your grapes it is a good idea to use mesh bags to keep the birds away from your grapes. Attach the bags securely with ties, rubber bands, and check them often to ensure they aren’t getting untied or loose.

Insects are also an issue that you need to be proactive about.  If you see leaves getting areas that are lighter or transparent you should flip the leaf over to check for caterpillars. If you see black flying bugs which are slow, aimless, and seem harmless you need to take action. Your local nursery will have pesticides which will help keep the bugs off and your grapes healthy.

Pruning Your Grape Vines

Pruning can be done by two different methods, cane pruning and spur pruning.  Cane pruning is usually the best for home gardens while spur pruning is most common with commercial grape growing.  We’re going to focus on can pruning as full time grape growers already have their techniques mastered.

Cane Pruning Grapes

You need a wire support system to get started that is 42 inches high and another 14 inches above that. The wire acts as a place to tie your vines to and to help prevent shoot breakage.  For the best grape vines you should wait until the 3rd year to grow fruit.  You’ll need to resist letting the grapes grow in the second year and remove the clusters before they bloom. If you don’t do this your vine will be stunted and not grow as much or as well when mature.

Call or visit one of our 4 locations today

Low Maintenance Easy Gardening Secrets

If you’re searching “easy gardening” this post is just for you.  While a lot of homeowners love having a garden full of vegetables, flowers, and beautiful plants many do not enjoy the weeding, watering, digging, fertilizing, and other chores that come with the territory.  These easy gardening secrets will help you get the biggest bang for gardening efforts with planning and intelligent design.

Easy Gardening Secrets

Enjoying a lush garden need not be a full time job and these tips will help you make gardening easier.  Get the most out of your effort and decide before hand how much effort you want to spend on your garden.  It will help you plan for it and know that you will have the time, energy, and desire to take care of what you plant.

Planning & Design

The biggest secret to easy gardening is planning before you get started and not getting overwhelmed with the entire project.  It is best to have an overall idea of what you want in your landscape and garden and refine over time instead of getting overwhelmed.

  • Start Small – While it might seem like a good idea to start a large vegetable garden in your yard starting with an edible planter is a great way to get started. Once you are comfortable with the upkeep and have the confidence you can add to your garden.  It’s a good idea to keep your planter near your kitchen for easy access.
  • Expand Your Garden – With confidence from a single edible planter you can expand into a larger container garden. This keeps the effort and work of managing a larger space out of the equation. The salad greens or herbs you grow and harvest will be a welcomed bit of fresh produce.
  • Garden Comfortably – To make gardening easy it is best to use raised gardens, hanging pots, or set your containers on a sturdy and stable raised surface. This makes it easier to water and take care of your garden.

Pace Your Gardening

It is easy to stack too much on your plate going for gold with your gardening.  Be realistic and add elements individually when you feel like you have enough space, time, and energy.  If you feel like you have already done too much cut back and down-scale.

  • Garden with friends, family, or neighbors to share the load and enjoy gardening more.
  • Enjoy well designed small gardening that grows well and gives you herbs or vegetables you can harvest.
  • Pay attention to the types of plants you love most and focus on growing them.
  • Prep gardening beds for future use by laying a layer of mulch.

Select The Right Plants

The items you choose to grow like vegetables and fruits become responsibilities.  Some of them can be very little effort while others will need more regular maintenance.   You choose how much time and effort your garden will need when you are selecting your plants!  Be realistic about how much time and effort you will want to spend and start with easier plants to achieve easy gardening.

Choose Easy Plants

Choose plants that seed themselves, grow back each year, and don’t need as much maintenance.

  • Self seeding herbs and leafy greens will save time planting seeds.
  • Disease and pest resistant plants that are edible.
  • Nutrient and flavor full plants for stir fry or salads.
  • Tough perennials return each year once established.
  • Dwarf plants that don’t need to be stalked to stand up.

Don’t Dig It

While most of us picture tilling and turning soil as an integral part of gardening it isn’t part of easy gardening.  It can cause extra work aside from being back breaking and time consuming.

  • Digging is labor intensive and takes up a lot of time.
  • Use straw bale gardens, raised beds, and containers to avoid having to turn soil.
  • Digging destroys fungi and other networks of microorganisms that help your plants grow.
  • You might disturb dormant weed seeds that begin to grow.

Enrich Your Soil

While plants do grow better with nutrient rich soil it need not be expensive or labor intensive.  You can easily spread compost and mulch to your containers or gardening beds.

  • Add mulch and organic matter to cut down on watering, weeding, and effort.
  • Good soil helps avoid pest and disease problems which would require more work.
  • Make compost, it takes less effort and money than buying it and brining it home.

Pest Control Is For The Birds

Enlisting nature’s army to help manage pests is the easy gardening way of keeping your garden healthy.  Birds are one of nature’s most effective harmful insects.  Many gardeners set up bird baths, water, and even provide bird houses.   There are also plants that are pest repellent

East Phoenix Valley Gardening Supply

If you are starting a new garden or if you just want to get more of our your garden A&P Nursery has the best plants, seeds, soils, and products to help you get the most out of your time and effort.  Stop by and choose your containers and plants to start your easy gardening today!

Call or visit one of our 4 locations today

Beginners Guide To Hydroponic Gardening

If you’re searching for a beginners guide to hydroponic gardening you’re likely one of the many Arizona residents looking for a way to maximize your vegetable gardening efforts.  Being able to produce more vegetables faster helps offset the extra costs of rising food prices and ensure that you and your family are eating the freshest and most healthy vegetables available.

Hydroponics History

Hydroponics is a based on 2 Greek words – “hydro” and “ponics” meaning water- labor. The whole concept of soilless gardening has been around for thousands of years. The Floating Gardens of China and Gardens of Babylon are early examples of hydroponics. Scientists began to experiment with soilless gardens in the 1950s. Since then, other countries like Australia, Holland and Germany have been using hydroponics for producing crops with really great results.

Benefits of Hydroponics

Hydroponics have proved various advantages over soil gardening. The growth rate for Hydroponic plants are 30%-50% faster than a soil plant that is gardened under the same conditions. The plant yield is also more. Scientists believe that there are a lot of reasons for the big differences between soil plants and hydroponic plants. The extra oxygen in the hydroponic growing mediums really help to stimulate root growth, so if there is ample oxygen in the root system it will absorb nutrients quicker.

The plant won’t have to search within the soil for the required nutrients. The nutrients are delivered directly to the plant several times daily. A hydroponic plant will require little energy to find and then break down the food. The plant will use this stored energy to grow faster and produce more fruit. Another positive effect of hydroponics is that they have less issues with funguses, diseases, and bug infestations. Basically, a hydroponic plant is much happier and healthy.

Hydroponics Is Environmentally Friendly

Hydroponic gardening also has benefits for the environment. Since it doesn’t use much water unlike soil because of a reuse of nutrient solutions. Because of the lack of need, there are less pesticides used on these crops. Since there isn’t a use for topsoil, there isn’t an issue with topsoil erosion. Although, if the agricultural trends continue to waste water and erode the topsoil, then hydroponics may be the only way to go.

Growing Mediums

The overall purpose for a growing medium is to support and aerate the root system of the plant and to help channel the nutrients and water. Different growing mediums will work well in various hydroponic systems. Fast draining systems such as expanded shale or Hydrocorn works well for a flow and ebb type of system.

The hydrocorn is expanded clay aggregate that is very light. It is airy and light growing medium that lets plenty of oxygen to penetrate the root system. Both types of grow rocks are able to be reused, however the shale has a tendency to not last as long and break down unlike hydrocorn. These rocks are quite stable and will hardly affect the pH of the nutrient solution.

Rockwool Growing Medium

Rockwool is a very popular growing medium. It was originally used as insulation in construction. There is now a Rockwool that is a horticultural grade. Unlike Rockwool insulation, this type is pressed into growing blocks and cubes. It is made from limestone and volcanic rock and they are melted together at 2500 degrees or higher.

The melted solution is poured into a spinning cylinder, like cotton candy and then pressed into cubes, sheets or blocks. Because Rockwool will hold 10 to 14 times more water than soil and it retains 20% air, it can be used in just about any hydroponic system. However, you must watch the pH, since Rockwool has a pH of 7.8, it could raise your pH in your nutrient solution. It also can’t be used indefinitely and many gardeners only get 1 use per cube and it is used for propagation.

Alternative Growing Mediums

Other growing mediums are vermiculite, perlite, and different sand grades. These are the 3 mediums are stable and will rarely affect the pH of the nutrient solution. However, they will hold too much moisture and need to be used with plants that can tolerate these conditions. Sand, perlite and vermiculite are inexpensive and work in wick systems, but they are not the most effective growing mediums.

Nutrients

Many of the principles that apply to a soil fertilizer will apply to hydroponic fertilizers aka nutrient solutions. The nutrient solution for hydroponics will contain all the elements that a plant gets from the soil. These nutrients are available at a hydroponic store. Many are highly concentrated and use 2-4 teaspoons per gallon of water.

They come in powdered or liquid mixes and usually for 2 different containers, one for bloom and one for grow. The liquids are more expensive, but easier to use. They dissolve completely and quickly in the reservoir and will have a pH buffer. The powdered mixes are cheaper and require a bit more attention. They have to be mixed thoroughly and won’t dissolve completely in the reservoir.They also don’t have a pH buffer.

pH

Many plants are able to grow hydroponically in a pH range of 5.8-6.8 but 6.3 is considered best. The pH within a hydroponic system is easier to check than the pH of soil. Most pet, hardware and even hydroponic stores will have a pH testing kit. They range from $4-$15, depending on the type and range of test. Testing the pH is easy and important for a hydroponic system.

If the pH is too low or too high, it may not be able to absorb its nutrients and will begin to show deficiencies. The pH needs to be checked weekly and it is easy to adjust it by adding soluble phosphoric acid to lower the pH or Potash to raise the pH.There are even pH meters out there. These will give you a digital reading of your pH, but these meters cost around $100 and are not needed in many cases.

Gardening Supply & Nursery East Phoenix Valley

If you’re interested in growing your own vegetables and need help getting started A&P Nursery has 4 locations in the Phoenix Valley to serve you.  We sell the seeds, plants, and tools you need to get started with your gardening needs.  Call us today or come by and see what we can do to help get you started growing your own vegetables or fruits.

Growing Peaches In Arizona

Growing Peaches In Arizona

Having fresh peaches from your own backyard is a delicious way to save on your yearly grocery bill. They are great fresh and can be dried and canned. Even jams made with peaches can be a great way to make the most of growing peaches in Arizona.

When to fertilize peach trees

You should never plant your peach trees in low areas that are known to be frost pockets. If you are wanting to delay your blooms in areas that have frequent spring frosts, then you should plant on the north side of a building. The building will be able to shade the tree in late winter, which delays the bloom, but allows the tree to get the needed sunlight of summer. Peaches tend to do quite well in sandy, well-drained soils. You should plant the trees in the spring so that it will be well established by winter. Be sure that you are spacing your trees 15-20 feet apart.

Fertilizing Peach Trees Arizona

Fertilizing the peach tree

You should fertilize your young trees with a fertilizer that contains nitrogen like a pound of 10-10-10 or an equivalent after it has been planted for 6 weeks. During the second year, you should add three-quarters of a pound of fertilizer in spring and then the same amount during summer. Seeding your lawn around the tree with grass and white clover or with crimson clover or bird’s foot trefoil will give your tree extra nitrogen. Trefoil and clover are nitrogen fixing legumes. Once your tree begins to bear fruit, it won’t grow as fast and won’t need a lot of nitrogen. During the third year and up, you will need only a pound of nitrogen yearly, and it should be applied during spring when the growth is starting. Slowing the growth of a tree is a great way to ensure that it will be stronger, hardier in the winter, and live longer. Don’t apply any fertilizer within 2 months of the first fall frost and let your lawn grow up around the tree in late summer/early fall. Be sure that you don’t apply a lot of water during this time and don’t prune your tree in the fall.

Caring for your peach tree
Caring For Peach Trees

In order to keep your tree from getting winter sun-scald, you may paint the tree trunk white. Be sure to remove the old mulch from the base in order to avoid it attracting any type of rodents and then be sure to place mouse guards around the trunk as needed. During late winter and early spring, once the ground finally has been thawed, you should place heavy layers of mulch around your tree to ensure that the soil remains cool which in turn delays blooming.

Pruning Peach Trees
Pruning Peach Trees

You can train peaches to open in the center and then prune them annually. Be sure that you remove the diseased or dead wood first, then prune the branches that are drooping down or growing straight up. Nectarines and peaches will only bear fruit from lateral buds on year old branches. They will need to be pruned yearly during dormant season to stimulate fruit wood growth and to keep the fruit bearing branches closer to the trunk. Whenever the bloom is heavy, you should lightly head back the longer fruit bearing branches in order to reduce fruit load and prevent breaking branches. The summer pinching will help to control your tree size, which encourages the formation of the next year buds and will improve the quality of fruit. Whenever the tree is around 5-6 years old, remove the wood that has been produced in the last 2 years. This will keep your tree from getting too tall and will restore growth to older wood.

IN about 4-6 weeks after the bloom, you should thin out some of the excess fruit if you have a lot of peaches. Remove and then destroy the fruit that has signs of insect punctures. Thin the fruit so that they are spaced between 6-8 inches apart on the branch. The left over fruit will be sweeter and larger than they would have been without thinning the fruit.

Harvesting and then storing peaches
Harvesting & Storing Peaches

You should never shortchange yourself by picking the peaches way too early. The reward for all your hard work is special, home grown flavors of a tree ripened fruit and not one that has to sit on your kitchen windowsill. If there is a bit of green on your peach, then it isn’t ready to be picked. A peach should easily come off the branch with just a slight twist and nothing harder than that. Be careful while you are harvesting because many types of varieties such as the Champion and Reliance are soft fleshed and will bruise quite easily when they are ripe. In order to store your peaches, be sure that they are in a cool, dry place to prevent them from ripening further.

Peach Trees For Sale in East Phoenix Valley

If you want to get the most out of your peach tree, or are thinking about planting your own peach tree A&P Nursery has you covered from start, to fertilizer, and to harvest. We can help you choose the right tree for your landscape, get you the tools you need, and help you with tips on how to get the most out of your gardening. Call or come by one of our nurseries today.

Growing Succulents In Arizona

Many landscapes in Arizona don’t feature lawns and the typical American iconic plants. The arid environment of the desert makes the care arduous and expensive. Desert landscapers create unique and visually exciting yards by including succulent plants. They have unique and unusual appearance that set the desert gardens and landscapes apart from just about anywhere else in the world. Growing succulents in Arizona is one of the best ways to make a visually stunning landscape.

On This Page:

What Is A Succulent?

While cactus is a succulent, not all succulents are cactus. Succulents or succulent plants are known in botany as plants that have some parts that are more fleshy and thickened. Typically these thicker areas are designed to retain water in arid climates, like Phoenix. The area in which the plant stores the water varies. Some succulents store the water in their leaves or stems. Other succulents might not appear as thick or fleshy above ground, because they store their water in their root system.

Succulents Add Unique Landscaping Appeal

There are about 50 plant families that fit the definition of succulent. While the term gets a little arbitrary when really nailing down exactly which plants are and which plants are not succulents there are some that people are familiar with. Agaves and cactus are two of the most well known and common types of succulents.

Lesser known succulents are a way that many gardeners and landscape companies choose to create unique interest in the landscaping. A lot of the more obscure styles of succulents deliver unique, somewhat alien forms and shapes that make the landscape stand out and add value to the curb appeal of your home.

Due to the interesting structural shapes of the succulents many can provide interesting silhouettes and totally unique appeal. If a gardener wants to make a one of a kind type of yard succulents can help achieve this goal like few other landscaping options.

Which Types Of Succulents Grow Well In Phoenix?

Ponytail Palm
Aloe Vaombe
Madagascar palm

A Madagascan palm is a great succulent option for the desert. It is a moderately faster grower and grows well with partial shade.

The Aloe Vaombe is an aloe tree that grows well in our low desert environment. It has red flowers and pure green leaves. This combination provides beautiful contrast and visual interest. It does require some shade but tolerates the desert fairly well.

Planting a Ponytail Palm is a great way to get some real interest in your landscape. This is because of how big these palms grow. At their mature height you can expect one of these palms to reach as high as 25 feet! The base of a full grow Ponytail Palm also reaches about 6 foot in diameter.

Smooth Agave
Ocotillo
Agave_lechuguilla

The Smooth Agave is another wildly popular succulent plant for Arizona.  It grows quickly and best when it is in partial sun or shade. The size when mature is about 3 feet wide and 3 feet tall. The Smooth Agave flowers in the spring with bright yellow blooms and has low litter to keep your landscape cleaner.

Ocotillo is a staple for many of the commercial, public, and residential landscapes in Arizona.  It is an incredibly hardy plant and can survive temperatures down to 10°F. It enjoys growing in full sun and can grow to be 10 feet wide and 12 feet high!  The Ocotillo blooms in the spring with orange to red clusters and is a great plant to attract humming birds.

Lechuguilla Verde is another low water use succulent that grows very well in Arizona.  They grow to about 3 feet high by 3 feet wide and grow best in partial sun.  Yellow flowers bloom during late winter and spring on the Lechuguilla Verde.  The plant does feature sharp thorns, so care should be taken when planting where children will play.

Planting Succulents

The majority of succulents are not native to Arizona and need to be cared for a bit differently. While cactus and agave are at home here other varieties of succulents will need to be planted where they do not receive the full day’s sun. The key is planting the succulents so they do not get the afternoon sun, when the heat and light is at its. Shade given by bushes is an easy and effective way to offer these interesting and beautiful plants the environment they will thrive in.

Succulent Care

One of the biggest keys of caring for succulents is having well draining soils. Clay type soils that tend to hold water for extended periods of time are detrimental to the root systems of succulents. Gritty or sandy soils are some of the best for these types of plants as they really do prefer to be in the dry climates.

Watering Succulents

During the growing season monitoring the soil is critical to getting the watering right. Once the soil is dry more than a couple of inches down a deep watering is necessary. After that watering allow the soil to dry out again before applying more water. Base watering for succulents is preferable to sprinklers or applying the water directly to the leaves, stems or other above ground structures.


Buying Succulents In The Phoenix Area

A&P Nursery has locations in Mesa, Gilbert and Queen Creek, Arizona. With a wide selection of Succulents gardeners and landscapers in Arizona can customize their landscapes and make something truly unique and breathtakingly beautiful.

Stop by one of our locations to see our selection or give us a call if you are looking for a specific type of succulent.

How to Care for Your Succulent Terrarium

How to Care for Your Succulent Terrarium

When starting out with succulents, we have managed to kill our fair share by either too much sun or too much water. However, after gaining some needed experience, we have learned that they are very forgiving and do not live at the same pace as we do. While we get hungry after a few hours, it may take them over a week to grow hungry. Overcompensating for a less than perfect look of your plants can be disastrous, when caring for your juicykits.com terrarium is simple. Try not to screw it up!

When to Water Your Succulents

A commonly asked questions is why succulents are dying, the answer would probably be too much water.  When should you water your succulents? When the soil is completely dry, it is dependant on where the succulents live. Being desert plants, they do not require much water. Actually, the prefer not to sit in wet soil. Soil in moisture grows bacteria, the roots of these succulents are sensitive to this. That being said, the main three things to keep in mind when caring for your juicykits.com terrarium is water, light, and death.

The Right Light

The right lighting is a no brainer, and your succulents need a lot of light. How much? Your plants can tell you this.

Too Little- Commonly refereed to as ‘stretching’ or etiolation, plants tend to grow tall or bend in a particular direction looking for light. Though it looks funny, it isn’t harmful. Also, there can be a lack of color or a pale look to your plants with to little light.

In the event of too little light, there are a couple things you can do to remedy this. For starters, if you haven’t been growing your succulents in direct sunlight, avoid exposing them to it for lengthy periods of time. This could burn them, instead, train them to the sunlight slowly. Starting off with an hour or two each day, then slowly extending the time they spend in the direct sunlight will cause them to adapt safely to it. If you live in a naturally dark part of the world, try using artificial lighting (Grow Lights) to help them compensate for the too little light issue. It is important to remember not to keep these light directly over your succulents. No more than 12 inches from the plants is ideal.

Too Much- Please note that too much light is a dangerous thing, especially to the baby succulents. Many small succulents will also burn in direct, hot sunlight if exposed to a long period of time. Spotty burn marks, and dry leaves will be visual evidence of this, even the glass to the terrarium could magnify direct sunlight into heated death beams for the plant.

In this instance, do not worry too much over burnt leaves, more will grow and the old ones will die. The best reaction is to move the terrarium away from areas that are too bright. Do not give it a great quantity of water, this is a common mistake. On really sunny days, try fitting a piece of thin fabric or plastic grocery bag over the terrarium. Make sure it has sufficient air flow.


The Correct Amount of Water

We are often asked for the ‘perfect’ amount of water for succulents, however, the perfect amount of water is a flexible idea. We usually respond with ‘More water, Less often.’ As a general idea of when to water your succulents, pay attention to the soil itself. If the soil is completely dried out, water it thoroughly and do not add water till it is completely dry once more. The soil, or cactus mix, that succulents love tend to drain quite quickly. Pouring water in a concentrated area will cause it to just drain to the bottom without moistening the rest of your terrarium. This isn’t ideal at all, terrariums by definition have no drains or openings. The proper way to water your succulents is with a low flow of water over a large area. As stated before, do not over water your succulents. Don’t water them too often, unlike house plants, changes will not happen over night. Here are some signals from your succulents, in reference to their watering needs.

Too Little- The leaves of the plant will wilt downwards, or look shriveled. This is common with a younger variety of succulents such as the jelly beans, or donkey tail.

In the event of too little water, stay calm and do not give it a ton of water yet. A dry succulent isn’t a doomed succulent. They are desert plants, and naturally are designed to withstand long time periods without water. If you house your succulents in a terrarium with no drainage, make sure you are cautious with the amount of water provided to your plants. Use a low flow watering spout, go slowly to moisten the soil in a large area and not a concentrated spot. Patients when watering is important. If you try to just dump it and move on, the water will immediately drain to the bottom. They will plump up again over the following weeks. If your succulent lives in a draining container, you are able to soak the entire planter/pot for 5-10 minutes with water. Large amounts of water will not cause them to rot and die as long as they are draining out.

Too Much- Signs of too much water are simple, the bottom leaves will start to die or rot. This is a common mistake with succulents that people tend to make, and we do not like this. When rotted, the leaves are gross and squishy, only you can prevent a soggy death to your plants. Honestly, think of plants in the deserts, they are dry most of the time. Enjoying the very occasional rainstorm, and a light mist at night, they do not require much water to strive healthily.  With that being said, a ‘dry’ succulent terrarium shouldn’t be completely closed, some drainage is ideal.

In the event of overwatering, just let the terrarium sit without watering it. When the soil dries, then you can proceed to water it properly. In order to make sure that the soil is dry, a few tells it will have is a lighter color and dusty nature. You can also use a toothpick or moisture meter to test the levels. Kind of like baking a batch or brownies. If you made the mistake of putting WAY too much water in causing water to fill up the bottom vessel, or dirt becoming soggy, consider more extreme methods. A trip to your local computer store or pharmacy to procure a large syringe with a long needle is ideal. These needles are the ones used to refill cartridges of ink. You are able to stick that syringe into the watery part of the vessel and suck out as much of this moisture as you can. Now let your terrarium set in a bright, great aired area to dry out. No direct sunlight. Once dry, continue to properly water your plants. Do not be discouraged if some parts of the plants die, this is normal and doesn’t mean the entire plant is dead. Some nurturing will bring these parts back in time.

The Death Talk

No Dead Allowed- It is very natural for parts of your succulents to die with time. A sign of healthy leaf growth in the plant is that bottom leaves die as tops leaves grow in. Having a set of long tweezers is not a bad idea to remove all dead pieces regularly, these dead pieces will cause bacteria and rot near the roots.

The Death of a Plant- If you find that a whole plant has died, no crying allowed. Make sure to promptly remove the dead plant, afterwards replace it at the local garden center. You may also have pests involved if you find little fuzzy dots on your plants.

Flimsy, Weak Looking Plants- after some elapsed time, if you find your plants looking thin and flimsy, the reasoning may be a lack of light or food. The nature of these terrariums being so small can cause succulents to use the nutrients in the soil. If the event occurs where they have devoured all these nutrients, you can provide more goodies for them in the soil with our plant food formula. Our formular is gentle on the roots, where as heavy-duty formula like Miracle Gro is made for house and garden plants that require more food and water. The heavier formulas can cause chemical burns on the roots of your succulents. A good feeding process to follow is to do so once a month for the majority of the year, and every two weeks in the summer time while they grow rapidly. If they require sunlight, they will grow upwards in search of it. With the right light, however, they will remain chubby and short. As you will read in posts about artificial lighting for succulents, preference remains that the plant receives more sun and less food, this can bring out the color in the leaves more.

East Phoenix Valley Nurseries

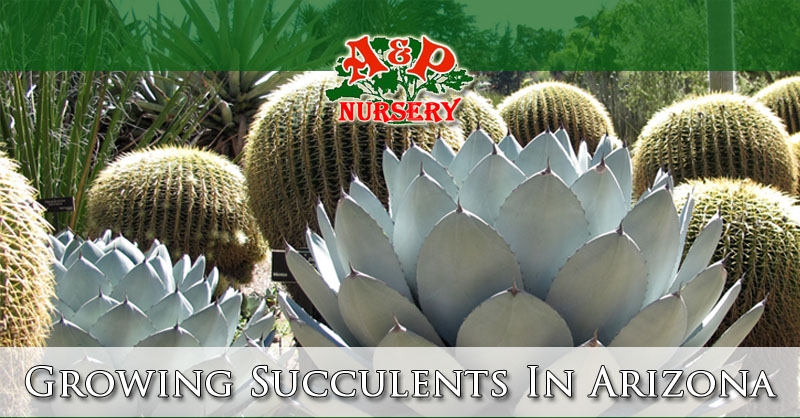
If you are looking for new succulents to add to your office, home, or business A&P Nursery has a great selection.  Succulents offer interesting structures, shapes, and textures as well as being easy to care for.  We offer help in choosing the right succulents, advise on how to care for them, and can recommend fertilizers and adjustments to watering which will help you make the most of the succulent plants in your living or working spaces.

Call or visit one of our 4 locations today!

Growing The Palo Verde Tree In Arizona

Many people loving growing the Palo Verde Tree in Arizona, not just because it is the State Tree of Arizona, but it is a visually stunning tree.  During spring in Arizona the Palo Verde blooms out with bright yellow flowers and puts on an amazing display.

The Palo Verde is also known as the “green stick” as it translates in Spanish and is called this because it has a lot of chlorophyll in the flesh of the truck. The chlorophyll is what makes the bark green, and the bark is actually responsible for three quarters of the tree’s photosynthesis.

Arizona Palo Verde Species

There are two Palo Verde trees which are common in Arizona.  These two species grow wild but are also featured in both residential and commercial landscaping.

Blue Palo Verde

The Blue Palo Verde is a water loving tree and is more commonly found near water and features a bluish green trunk.

Foothills Palo Verde

As the name suggests the Foothills Palo Verde is found commonly on rocky slopes on the foothills of mountains.  The trees feature tiny leaves, yellow green trunks, and have pods which hold the seeds.

Planting Your Palo Verde Tree

Planting any tree takes a little work, a little planing, and some preparation.  If you are buying your Palo Verde Tree at a local nursery you will usually have the option of taking it home yourself and planting it, or having the nursery come and do the work for you.  If you choose to do the job yourself, here is a guide of things to keep in mind.

When To Plant

You can plant your container grown Palo Verde Tree any time of year.  Summer does present the challenge of a little extra watering, but it is possible.  For days which are more windy or especially hot it is critical to keep newly planted trees watered.  Colder months can also be tricky if you live in a part of Arizona that is prone to freezing.

How To Plant

A big part of planting any tree is planning ahead for how big it will be in height and width.  Most Palo Verde trees grow to about 10 to 20 feet tall, depending on species and vary in width depending on how they are trimmed, pruned, and shaped.

Safety In Planning

The biggest keys in planting is keeping the tree away from overhead power lines or being too close to any structures.  Before digging it is also critical that you check to make sure there are not utility lines, foundations, or pipes where you are planning on planting your tree.

Digging The Hole

When digging the hole make sure that it is about 4 times the diameter of your tree container.  The depth should be deep enough that the soil in the container is level with the soil in your landscape. Take the time to inspect the soil where you are planting for drainage problems.  To test it fill the hole with water and if it has not drained within an hour you might have a caliche problem.  If this is the case holes might need to be punched through the layer to allow proper drainage.

Setting The Tree

Once you have your hole dug and draining properly you can start by removing the tree and root ball from the container.  To do this you will want to gently squeeze the container to loosen the soil around the root ball.  Carefully remove the tree, roots, and soil and set it in the hole. If the soil is too loose and falling apart you will need to set the tree in the hole and cut the container away to preserve the soil around the roots.  After you have the tree in the hole you backfill in the dirt.  Wet the soil as you backfill but avoid overwatering and creating sludge.  Once all of the dirt is back around the tree you can create a raised edge around the tree of dirt which will collect runoff.

Harvesting The Palo Verde

While a lot of Arizona residents just use the Palo Verde tree as a centerpiece for landscapes, it does product edible seeds and flowers. Much like edamame or peas the seeds from the Palo Verde should be sweet when ripe and the pod can be pulled off and collected.  The best time to collect the edible parts of the Palo Verde is when the pods are green and the seeds are tender, small, and green. If they are chalky it is too late to harvest them this way and they should be allowed to dry on the tree and picked when they are dry and brown.

What To Do With Seeds

If you have picked them fresh and when they are green they need to be blanched as soon as possible on the day you pick them.  To blanch your Palo Verde seeds you will need to wash them in cold water, set them in boiling water for 90 seconds, and then switch them to ice water for another 90 seconds.  Drain and put them in freezer bags.

What To Do With Flowers

The flowers of the Palo Verde can be eaten fresh in salads or they can even be included in desserts when they are candied.  The bright yellow flowers offer a sweet taste and are non-poisonous.  Care should be taken if the tree has been sprayed for bugs using any pesticides which are not designed for fruit producing trees.

Palo Verde Trees For Sale

If you are looking for a place to purchase your Palo Verde Tree in the Phoenix area, A&P Nursery has what you need.  We grow our stock locally so you know it is ready for the sun, heat, wind, and will thrive in your landscape. We have knowledgeable and friendly staff who will help you plan where the tree should go, help with selecting a tree, and we will even deliver and plant your Palo Verde Tree for you.  Call or visit one of the 4 locations in the East Phoenix Valley today!

Phoenix Valley Citrus Tree Easy Care Guide

Phoenix Valley Citrus Tree Easy Care Guide

If you are searching “Phoenix Valley Citrus Tree Easy Care Guide”, you are looking for a guide that will help you understand how to care for your citrus trees in the heat of the Phoenix Valley.  Growing citrus trees in the desert environments that are common in Phoenix, Mesa, Gilbert, Queen Creek, and other Phoenix Valley cities is different than other areas of the state and country.

Appropriate Watering is Key

Master gardeners in the state of Arizona explain that the biggest problem for home gardeners growing healthy citrus trees is watering. When you water your citrus trees the area on the ground that you water should be about a foot wider than the canopy of the tree. Generally this is about how far the root system extends and is where your tree is searching for the moisture and nutrients it needs.

How To Water

It is best to water slowly and deeply to help push salt build-up past your roots. Watering should be slow and long enough that the depth reaches about 2 feet into the soil around your tree. Newer trees should be watered deeper for the first 3 years after they are planted. It is important to water deeply yet allow your soil to dry before you water again.

New Tree Pruning

Newly planted trees do not produce fruit for the first number of years after you plant them. The fruit that does grow on newly planted, young trees should be removed. Suckers and dead branches should be the limit of your pruning with young fruit trees. Any shoots that are growing quickly and headed straight up are described as suckers and should be removed. They should be pruned below the bud union. This will depend on the type of rootstock you choose, and not the fruit tree variety you buy or have planted.

Citrus Tree Pruning Tips

Typically in the Phoenix Valley the best time to prune citrus trees is from about mid February until March. You just want to wait until there is zero chance that there will be a freeze.  It is best to get this done before it is warm and your tree starts to have new growth.

Provide Some Shade

Leaving enough branches and leaves to create a skirt around your tree is an important factor in growing healthy citrus trees in the Phoenix Valley. Leave enough new growth to provide shade for the trunk of your tree so it does not get sunburned. If your tree trunk gets too much sun it can affect how healthy your tree is, and how much fruit it can produce.  Even if you are watering properly too much sun will hold you back. Young trees can be covered with a shade cloth that helps block the intense afternoon sun.

Protecting The Tree

There will be branches, new growth, and parts of your trunk you will be unable to provide enough shade for with the canopy. For these areas you can cover them with a specially formulated paint which is made for trees and helps protect them from over exposure to sunlight. You can purchase this tree trunk paint at your local citrus tree nursery.

Fertilizing Citrus Trees

Newly planted citrus trees don’t need to be fertilized for the first few years. Nitrogen can be used once the tree has had a chance to establish itself and you see new growth. Trees that have been planted for 2 years or more need to be fertilized 3 times per year. A lot of Phoenix Valley citrus tree lovers choose to make it easy and just apply fertilizer on 3 easy to remember holidays: Valentine’s Day, Mother’s Day, and Labor Day.

Citrus Tree Problems & Solutions

When we plant our citrus trees we all have different visions of how we will use the fruit, but share a hope that there will be a lot of it and it will taste great!  Being able to pile fresh and healthy line, oranges, or lemons into a basket is the goal of every citrus tree owner. Making this a reality in the low desert of the Phoenix Valley is definitely possible with the right watering and application of fertilizer.

Fruit Dropping Too Early

Some fruit dropping from citrus trees is normal as they tend to set more fruit than can be carried to maturity. When a citrus tree drops an excessive amount it is typically a sign that there is a problem with fertilizing or watering.

Thick Fruit Rinds

It is fairly normal for young orange or grapefruit trees to have thick rinds here that protect the tree against out dry and hot climate. If gardeners continue to experience thick rinds in their mature trees it many times can point to excessive nitrogen fertilizer being used. While thick rinds might not be ideal it does not usually affect the taste of the fruit.

Curling Leaves

When your citrus tree leaves start curling inward from the edges or turning to a dull green you need to step up your watering.  It is best to remember slow and deep watering that completely saturates the soil about 2 to 3 feet deep and then letting the soil dry out. Avoid trying to “catch up” by over watering.

Splitting Fruit

When your fruit is reaching maturity and cracks it is a sign that watering wasn’t sufficient earlier on during development. Dry or hard rinds are caused by improper watering and cannot expand as fruit grows. It’s best to establish a watering schedule, and keep it with calendar reminders or automated watering systems.

Granulated or Dry Fruit

Some types of grafting will result in trees that are more sensitive to drought conditions. Adhering to a consistent watering schedule and fertilizer program will help avoid or alleviate these issues in subsequent years of growth.  When you know you have this challenge it is best to pick the fruit as soon as it is ripe.

Yellow or Brown Leaves

There are two types of scenarios when leaves can be an indication that something is wrong with your citrus tree. You will find that these conditions manifest themselves by either being just the tip of leaves, or entire leaves. Read more below to nail down which problem you might be having.

Yellow Leaves

When the whole of the leaves are turning yellow or pale green instead of just the tips you can guess that you have a problem with over-water or a nitrogen deficiency.  This can be corrected by adjusting your watering schedule to allow soil to dry between watering, and increasing your soil’s nitrogen content.

Yellow Leaf Tips

When you have leaves that have tips or edges that have yellow that fades into brown it is a sign that you have an accumulation of salt in the tree tissues. Desert water supply and soil has a high content of mineral  salts which can pose a challenge for citrus tree lovers. This problem is resolved by, you guessed it, watering correctly. When water is too frequent and shallow the salt tends to collect near roots and get pulled into the tree.

Citrus Tree Care Help

If you live in the Phoenix Valley and need help getting started, growing healthy fruit, or have questions the our team is there to help at 4 Phoenix Valley locations.  We grow our stock right here in the Phoenix area and know what it takes to plant, grow, and harvest the best fruit. Let us help you get the most out of your gardening by calling one of our stores, or just stop by.

5 Spring Gardening Tips

5 Spring Gardening Tips Arizona

For a gardener, nothing gets us up in the morning like upcoming growing seasons or attending a flower and garden show during this time. If you are familiar with this show, you will know that there are a few that rival the Philadelphia Flower Show, which happens in march and is known for being the worlds longest running and largest indoor flower show.

I have attended the show almost every year for the last 2 decades. I remember the first year I went, I came home energized and ready to begin gardening right away, just to find that there were around 3 inches of snow on the ground. It was too early, or at least that is what I thought. In the following years, I learned that there are a lot of things that you can do to start gardening season before the frost, and that will save you time and money.

Get an Early Start Indoors

Some plants and flowers should be started as seeds weeks prior to it becoming warm enough to transplant them outside. Plants that are started from seeds will normally cost a lot less than what you will pay at a nursery for those seedling containers once gardening season begins.

Cut the bottoms out of plastic jugs to protect your seedlings. Finding when you should start your plants indoors will depend on when the last frost happens, then counting backwards based on t he type of plants you want to grow. Seed packets for your plants will often have instructions on starting your plant indoors which states how and when to plant. In most of the country, March is the month for starting seedlings indoors.

You can also repurpose throw away items such as cardboard boxes, newspaper, toilet paper rolls, half-egg shells, egg cartons to make mini biodegradable seedling pots. Some of the common plants that need to start as seeds indoors are eggplant, squash, melons, peppers, tomatoes and a variety of herbs and flowers. If you don’t really have a sunny space which is a necessity for starting plants inside, you should consider creating a cold frame in the yard as a place to start your seeds. You can find cold frame designs online and how you can build them with inexpensive materials like old windows, plastic sheeting, scrap lumber, and even bales of hay.

Prepare your garden and lawn equipment

Being ready for the yearly upkeep of our landscapes starts with having our lawn and garden equipment serviced.  Depending on your landscape and how much rain we get there can start to be a wait for tune ups and repairs, so the earlier you have your lawn mower or gardening equipment served, the better.

There’s nothing worse than getting started on a hot day with a lawn that is overdue to be mowed, only to be stopped by a dull lawn mower blade or other issue with your equipment.  Get a jump on the season and be ready with your freshly serviced lawn mower, edger, and other gardening equipment.

Declare war on weeds early

Whenever the first signs of plants and new growth come back to life in the spring, you can also bet that there will be a variety of weeds with them. Once the soil is no longer frozen normally weeks before the last frost is when you need to start preparing the soil in areas that are prone to weeds. Cover this area in mulch to help keep weeds at bay. Also begin pulling up hard to kill weeds such as dock weed, dandelions and poison ivy. Weeds will just get stronger, bigger, and harder to get rid of as the growing season continues, so taking care of them now will save you money and time for the spring season. You should stock up on rock salt, which should be marked down and then sprinkle it on side walks and driveways in the spring to keep weeds from popping up.

Remove yard debris and leaves

If you haven’t gotten around to raking the leaves and yard debris during the fall, that is okay. In some situations, leaves can become a protective barrier like mulch which can help some plants to make it through the winter. When new plant growth starts, the leaves from last year can stop the growth and cause pest issues and even some plant diseases. You should consider composting the leaves and yard debris or shred it to make mulch. If you have a mulching lawn mower, just mow over the leaves so that the nutrients return to the soil.

Tend to the perennials

Most of your perennials, plants that continue to grow for years, including shrubs and trees, could do with some attention. Perennials can add value to your home, so consider giving them some TLC as an investment for your future. Later winter and early spring are the best times to prune shrubs and trees in most areas. Ornamental grasses should be cut before the new growth starts, and thinning and pruning fruit trees should be done prior to the new growth starting. You can even divide some perennials like asters, hostas, yarrow, and Siberian Iris in the early spring which makes a whole new barrel of plants for free. Now that is music for a cost friendly garden.

East Phoenix Valley Nurseries
Spring Gardening Tips from AP Nursery

If you need to have your lawn mower serviced, want to find plants or seeds to use in your garden, need some fertilizer, or have anything garden product A&P Nursery has 4 locations in Arizona in Mesa, Gilbert, and Queen Creek.  We carry everything you need to start, maintain, and get the most out of your garden. With partnerships with local landscapers we can also organize services to plant and maintain your gardens and landscapes.