How To Harvest Vegetable Gardens

If you’re searching for how to harvest vegetable gardens you’re probably right at the end of a growing season looking for the best tips.  A lot of different kinds of vegetables mature around the same period of time so it can be a task for backyard vegetable gardeners to keep up.

When Are Vegetables Ready?

The majority of veggies are ready and at their peak of flavor and tenderness when they are smaller.  Zucchini is one of the veggies that is best to pick smaller than wait for them to grow into giants.  They are best when they are about 6 or 7 inches long.  When they are grown too long they get woody and tough.

Keep Track Of Your Vegetables Planting

Seed packets indicate how long it will take for your seeds to grow and mature into the veggies you are excited about growing.   Keep your seed packets, mark your calendar, or use an online calendar to mark the approximate date the plants should be close to ready to harvest.

Keep Track Of Vegetable Varieties

Different varieties of fruits and veggies are designed to grow to different sizes before they are harvested.  One variety of beans might be ready when they are quite short while others can grow to more than a foot before they are ready.  Even watermelon varieties can differ a lot between when they are ready to harvest.  Know what you planted, keep track of their progress, and mark your calendar.

Harvesting Tips

As your garden grows and once it is ready to harvest it is important to keep an eye out for trouble and easier to harvest in small steps.  All of your veggies will probably not be ready on the same day, so picking what is ready daily will take less time and effort than dedicating an entire day to doing all of it at once.

Harvest Daily

One way to stay on top of harvesting is doing a little each day by taking your basket out and inspecting your vegetables to see what is ready to pick.  If you pick your veggies as soon as they are rip it encourages the plant to keep growing more.

Watch For Trouble

As you tend your garden or harvest it is important to watch for trouble in your garden.  Rotting fruit or yelling leaves are signs of problems and should be removed.  Even if the problem is serious such as a branch having cracked from excessive rain or a blossom end rot its best to remove the problem areas.  If you don’t your plant is wasting resources on fruits you won’t be able to eat.

Common Vegetable Harvesting

There are some varieties of vegetables which end up in practically every backyard garden.  Things like tomatoes, herbs, green beans, sweet corn, peas, and root veggies. Read below for tips for harvesting specific types of veggies.

Harvesting Sweet Corn

The key to sweet corn is when you harvest.  This is a variety of corn which beings to lose that wonderful sweet flavor the moment it is picked.  That means growing it in your garden is the ultimate way to get the absolute best sweet corn flavor.  In fact in years past many families wouldn’t pick it until a pot of water was already boiling and ready to blanch it.  Your sweet corn is ready to harvest when you can feel the kernels are full and round beneath the husk, a kernel produces a milky sap when squished, and the silk at the top of is drying out.

Harvesting Tomatoes

There are so many different varieties of tomatoes that it is impossible to list exactly when to harvest each of them without a post dedicated to harvesting tomatoes.  There are larger slicer types that take much longer than cherry tomatoes and even more variety.  Follow the seed packets carefully to know when to check these tomatoes.  Tomatoes produce the best flavor when they are allowed to fully ripen on the vine, but do continue to ripen even after being picked.

Harvesting Herbs

Unlike other kinds of veggies or fruit harvesting herbs is an ongoing and frequent process.  Cut back or pinch herbs often to encourage them to grow new stems and leaves.  These are the parts we eat and the more shoots your herbs have to produce, they more you will get. This means you will probably have an excess of things like basil or oregano but they can be used for recipes like pesto or oregano can be dried in brown paper bags.

Vegetable Gardening Nursery & Supply

If you want to get the most out of your vegetable garden our team has the knowledge to grow local, best plants, best seeds, and even carry easy gardening kits to get you started.  No matter what stage you’re at we can help you maximize your backyard gardening efforts!

Call or visit one of our 4 locations today

Low Maintenance Easy Gardening Secrets

If you’re searching “easy gardening” this post is just for you.  While a lot of homeowners love having a garden full of vegetables, flowers, and beautiful plants many do not enjoy the weeding, watering, digging, fertilizing, and other chores that come with the territory.  These easy gardening secrets will help you get the biggest bang for gardening efforts with planning and intelligent design.

Easy Gardening Secrets

Enjoying a lush garden need not be a full time job and these tips will help you make gardening easier.  Get the most out of your effort and decide before hand how much effort you want to spend on your garden.  It will help you plan for it and know that you will have the time, energy, and desire to take care of what you plant.

Planning & Design

The biggest secret to easy gardening is planning before you get started and not getting overwhelmed with the entire project.  It is best to have an overall idea of what you want in your landscape and garden and refine over time instead of getting overwhelmed.

  • Start Small – While it might seem like a good idea to start a large vegetable garden in your yard starting with an edible planter is a great way to get started. Once you are comfortable with the upkeep and have the confidence you can add to your garden.  It’s a good idea to keep your planter near your kitchen for easy access.
  • Expand Your Garden – With confidence from a single edible planter you can expand into a larger container garden. This keeps the effort and work of managing a larger space out of the equation. The salad greens or herbs you grow and harvest will be a welcomed bit of fresh produce.
  • Garden Comfortably – To make gardening easy it is best to use raised gardens, hanging pots, or set your containers on a sturdy and stable raised surface. This makes it easier to water and take care of your garden.

Pace Your Gardening

It is easy to stack too much on your plate going for gold with your gardening.  Be realistic and add elements individually when you feel like you have enough space, time, and energy.  If you feel like you have already done too much cut back and down-scale.

  • Garden with friends, family, or neighbors to share the load and enjoy gardening more.
  • Enjoy well designed small gardening that grows well and gives you herbs or vegetables you can harvest.
  • Pay attention to the types of plants you love most and focus on growing them.
  • Prep gardening beds for future use by laying a layer of mulch.

Select The Right Plants

The items you choose to grow like vegetables and fruits become responsibilities.  Some of them can be very little effort while others will need more regular maintenance.   You choose how much time and effort your garden will need when you are selecting your plants!  Be realistic about how much time and effort you will want to spend and start with easier plants to achieve easy gardening.

Choose Easy Plants

Choose plants that seed themselves, grow back each year, and don’t need as much maintenance.

  • Self seeding herbs and leafy greens will save time planting seeds.
  • Disease and pest resistant plants that are edible.
  • Nutrient and flavor full plants for stir fry or salads.
  • Tough perennials return each year once established.
  • Dwarf plants that don’t need to be stalked to stand up.

Don’t Dig It

While most of us picture tilling and turning soil as an integral part of gardening it isn’t part of easy gardening.  It can cause extra work aside from being back breaking and time consuming.

  • Digging is labor intensive and takes up a lot of time.
  • Use straw bale gardens, raised beds, and containers to avoid having to turn soil.
  • Digging destroys fungi and other networks of microorganisms that help your plants grow.
  • You might disturb dormant weed seeds that begin to grow.

Enrich Your Soil

While plants do grow better with nutrient rich soil it need not be expensive or labor intensive.  You can easily spread compost and mulch to your containers or gardening beds.

  • Add mulch and organic matter to cut down on watering, weeding, and effort.
  • Good soil helps avoid pest and disease problems which would require more work.
  • Make compost, it takes less effort and money than buying it and brining it home.

Pest Control Is For The Birds

Enlisting nature’s army to help manage pests is the easy gardening way of keeping your garden healthy.  Birds are one of nature’s most effective harmful insects.  Many gardeners set up bird baths, water, and even provide bird houses.   There are also plants that are pest repellent

East Phoenix Valley Gardening Supply

If you are starting a new garden or if you just want to get more of our your garden A&P Nursery has the best plants, seeds, soils, and products to help you get the most out of your time and effort.  Stop by and choose your containers and plants to start your easy gardening today!

Call or visit one of our 4 locations today

How to plant strawberries in Arizona

If you’re searching for “How to plant strawberries in Arizona” you’ve come to the right post.  Gardeners in Arizona that are feeling adventurous won’t let the challenging conditions keep them from growing juicy, plump strawberries within the hardiness zones of 3-10. The diverse soils and climates mean that strawberries will need some extra TLC. The growing zones in Arizona go from 4b – 10, which have average winter lows from 40F to -25F. Whatever region you are in, proper planting will get Arizona strawberries started right.

Planting Strawberries In Arizona

Strawberry flowers are very vulnerable to frost, so the time of year you plant them will vary depending on where you live in Arizona.  It is a best practice to wait until you are completely sure the frost is over for the spring before starting to plant your frost sensitive plants such as strawberries.

Site Selection

In the low desert in Arizona, unexpected frosts may damage tender strawberry blossoms and destroy spring crops. The earliest blooms will create the largest berries, so having the right protection is vital.

You should plant your strawberries on elevated slopes, this will be where cold air will drain away and it lessens the chance of damage from frost.  The north-facing, cooler slopes will start later blooms, which adds a buffer to any bloom lost.

Strawberries will fruit best in locations that are in full sun, but the low desert berries will need protection from the intense sun. Locations that are close to homes will help to protect against frost, just be sure to avoid any west facing walls that will reflect the Arizona heat.

Soil Adjustments

Strawberries love low-saline, well-drained, organic soil that has a slightly acidic to neutral pH around 6.5. Many Arizona soils are saline and alkaline, with very little organic matter and without adjustments, the strawberries will have nutrient deficiencies.

Test your soil and follow the recommendations to the letter. Many Arizona gardens will need their pH lowered for strawberries, but some will have acidic soil. This is because the soil contains calcium carbonate, the average pH lowering products like sulfur won’t work. Using the wrong amounts or amendments can cause your soil to be toxic. Don’t just guess, test your soil.

You should layer up to 3 inches but no less than 2 inches of organic compost in the bed, as well as for ever 100 square feet, using a pound of 12-24-12 fertilizer. Be sure to wear protective clothing such as goggles and gloves and mix the layers to be 8 inches deep and be sure to avoid any manure based compost which often add salts.

Planting Time

Start planting your strawberries in late winter or spring, after the last frost date for your area. In the low desert of Arizona, this is often in February and the mountain regions need to wait until June.

Trim the roots to about 6 inches long, and keep them moist at all times. Be sure to use sharp garden pruners or scissors and use a household disinfectant to sterilize the blades before and after you use them.

Your planting depth is vital. Bury the roots but keep the crown of the plant exposed at the surface of the soil. If they are planted too low, then the strawberries will rot. If they are planted too high, then the crown dries out. Space your strawberries at 12 – 18 inches apart, and be sure to water them thoroughly.

Initial Care

Remove all the flowers during the first season so that your strawberries will focus on their roots and not the fruits. When the new growth starts, for ever 100 square feet use a half of a pound of 21-0-0 ammonium sulfate. Be sure that you are wearing protective clothing and lightly scratch the soil to add the fertilizer so that you don’t disturb the roots. Water it thoroughly and wash the fertilizer from the leaves.

Drip irrigation works best for Arizona strawberries. Overhead watering will promote disease, wastes water to evaporation and fuels the growth of weeds. Adding organic mulch like straw or pine needles will help to retain soil moisture, keep it cool, and keep weeds from growing.

Strawberry roots will stay in the top 6 inches of the soil. The shallow roots will need to be consistently moist at 1 inch per week. Water the strawberries every 3 – 5 days, with up to 2 inches of water weekly during the hot weather.

Strawberry Selection

With the diversity of Arizona, match your berry types to your elevation. Strawberries will fall into 3 groups: day-neutral, June-bearing, and everbearing.

June-Bearing Strawberries

June-bearing strawberries will flower and fruit early. If frost gets to them, then your crop will be lost. They work best in warmer, lower elevations with a few late frosts. The cold hardy, Mesabi June-bearing strawberry does quite well in high pH southwest soil.

Everbearing Strawberries

Everbearing strawberries have few runners, but will produce smaller crops in fall and spring. Autumn harvest follows if the spring frost destroys the spring crop, but everbearers have trouble in low desert heat. Cooler, higher elevations work best for them, but have shorter growing seasons. The Ogalla everbearing strawberry works well in these conditions.

Day-Neutral Strawberries

Day-neutral strawberries will flower and fruit for all growing season with smaller berries and fewer runners. Their flowers will fail if the temperatures go above 70F. They work best in the moderate elevations and moderate climates. The Tribute day-neutral strawberry is disease resistant and tolerates alkaline soils and does well with short growing seasons.

Phoenix Valley Plant Nursery

If you are looking for strawberry plants to plant in your garden A&P Nursery has everything you need to get started.  With quality seeds and plants we can get you started right.  In addition we carry a wide assortment of tools, fertilizers, and even offer starter raised gardening kits.  No matter what your gardening project A&P Nursery has the valley’s best plants, helpful staff, and everything you need to grow fresh fruit, produce, and beautiful plants in Arizona.

Call or visit one of our 4 locations today

How To Grow Potatoes in Arizona

If you’re searching for a guide on How to grow potatoes in Arizona this post is for you!  Potatoes are cool-season crops that provide various minerals, vitamins, and protein. The best time to plant are early spring, and late fall.

Origin Of The Potato

It’s not really known exactly how potatoes got from Andes to Ireland, but prior to disaster striking the potato was firmly rooted in Irish soil. It as grew and part of culture for centuries.

During 1846 to 1847, Ireland was hit by an unseasonably cool and wet year, with millions of tons of potatoes becoming rotten due to an opportunistic fungus. It also resulted in thousands of deaths and tens of thousands of emigrations. This event has become known as the Great Potato Famine, and could be the only drastic human catastrophe named after a plant.

It does not matter how you pronounce ‘potato’, it is likely that the birthplace is considered to be Ireland. However, potatoes actually originated on the other side of the world, in South America’s Andes mountains.

Thousands of years ago, wild potatoes were discovered by early Incan tribes and were considered life-sustaining storehouses for nutrients and energy. Using the environment that had less alkaline and humidity in the soil, similar to that of the Southwest U.S, they were able to domesticate more than 100 varieties.

Potato Nutritional Value

When considering the per unit of land, a potato provides more calories and protein than other grown foods. They are able to store many vital minerals and vitamins as well.

When To Grow Potatoes in Arizona

The potato plant will grow best during late fall or early spring as days are warm, but have cooler nights. While being a cool-season crop, edible sections of the potato are under the ground, while the tops are above ground and unable to handle frost. Therefore, timing the planting of potatoes is important.

You will need to plant them early as possible to obtain the most crop possible before summer heat kicks in, or the winter cold takes the plant.

Within Phoenix, AZ the month of March is an ideal planting time for potatoes, or in late September. However, within Albuquerque, NM or Denver, CO the potatoes should be ordered in, and ready for planting in mid-late April.

Potato Growing Conditions

Soil: Potatoes often do better in loose acidic soil that is well-drained. Because of the alkaline in Southwestern soil, compost should be added to the area to assist with acidifying the soil. Also, soils with heavy alkaline or poor drainage can result in undersized and lower yielding crops.

Fertilizer: The potato plant requires fertilizer during the early stages of growth, therefore, apply the majority of your fertilizer prior to planning. You should ensure the fertilizer is balanced. If pre-planting applications are missed, you should wait to fertilize until after sprouts begin producing leafs.

Light: A minimum of six hours of light is required by the potato plant, full sun.

Water: For the best possible yields, you want to maintain an evenly damp soil, not wet. You want to allow some drying prior to watering again.

Starting: For larger seed potatoes (bigger than a chicken egg), you want to cut them into pieces, roughly 1 inch across. Once being cut, allow the seed potato to heal/cure for several days prior to planting, or it could rot underground.

Each of the pieces need at least one bud (eye) where stems grow. If possible, having two eyes would be better. Potatoes that are egg size or smaller are able to be planted whole.

Selecting: You want to ensure that you buy seed potatoes that are certified disease-free from a trusted online catalog, mail in catalog, or garden market to get the best results. You should avoid planting potatoes bought at the supermarket due to being less vigorous and easier for them to become diseased.

Phoenix Valley Nursery & Gardening

If you want to grow potatoes or any other kind of vegetable in your Phoenix Valley garden A&P Nursery has everything you need to get started.  If you already have a garden started you can get more out of it with better soil, fertilizers, and other quality gardening products.  We also offer gardening kits to help you get a head start and organize your gardening.  With friendly and knowledgeable staff A&P Nursery is your stop for helpful gardening advice for Arizona.

Call or visit one of our 4 locations today

Does Every Cactus Grow Flowers?

Cacti are common in Arizona and the Phoenix Valley, but does every cactus grow flowers?  When they do they are some of the most beautiful displays imaginable.  If you own a cactus or are thinking of growing one you will want to read this to make sure you understand which cacti grow flowers, how long it will take, and how often they will bloom.

Which Cactus Grow Flowers?

Cacti are flowering plants, and that means all cacti are able to grow flowers when they are mature.  The key to your cactus growing flowers is waiting for age and caring for it the right way.  Some cacti species don’t reach maturity for 30 years, such as the Saguaro Cactus, which means it’ll take that long to see the first blooms.

Other cacti will not bloom even once they are mature if they are not getting the right watering, light conditions, and fertilization.   Cacti grown indoors are notorious for not blooming as they many times do not get the right balance of short days and long nights.

Cacti Flowering by Size

The time it will take for your cactus to flower depends largely on the size of the cactus.  Giant cactus such as the Saguaro will take 10 times as long to reach maturity and have the ability to flower.  Keep in mind that each cactus must have a balance between the right light per day, correct watering, good soil, and be fertilized correctly.

Round Cacti

Some of the cacti that bloom the most are in the round category of cacti.  They can bloom as early as 3 to 4 years after they sprout.  Two of the most popular cacti are the Rebutia and Pincusion cactus.  They both produce beautiful flowers once they have reached maturity.  The flowers they grow can range in color from white, magenta, pink to red, green, yellow, purple and orange.

Short Stem Cacti

Stems on short columnar cacti typically flower within 5 years of germination.  The Hedgehog Cactus, Easter Lily Cactus, and Peanut Cactus are 3 of the most popular examples of short stem cacti that grow well in USDA zones 8 through 11.  Flowers for this type of cactus range in size and color yet offer owners an amazing display of color.

Columnar Cacti

The taller growing columnar cacti many times take longer to mature, which means longer to grow flowers.  However cacti grown from rooting branches from mature cacti that are already blooming will continue to flower, if the water, light, and fertilizing is right. Saguaro branches will not root so all Saguaro are grown from seed as it is against federal law to remove them from habitat.  That means that Saguaro can take 40 to 55 years to flower when they start as a seed.

Best Indoor Flowering Conditions

To grow flowering cacti indoors in pots you will want to ensure that your cactus is getting at least 4 hours of sunlight per day.  Morning sunlight is best as it is less harsh as afternoon sunlight, so if you have a patio or window that is east facing it is a great place to put your cactus.  Water your cactus regularly for the season of growing.

It’s important to allow the top 2 inches of water to dry out before you water again and make sure water is coming through the drainage holes on the pot.  For indoor growing using a soilless option is a great cactus growing medium.  Use equal parts of vermiculite, peat, and perlite which will be well draining and easy to fertilize.  Each month fertilize your cactus during the spring and summer using a half strength high phosphorous, low nitrogen formula that helps encourage flowering.

Phoenix Valley Cactus Nursery

If you are looking to buy a new cactus, get the best fertilizers, or learn how to get your cactus to bloom, we can help!  Having a cactus in your home or yard is a way to have a living piece of the Southwest and when they bloom the color is vibrant and beautiful.  Get all the help you need to get your cactus to flower in Arizona with the help of A&P Nursery!

Call or visit one of our 4 locations today

How To Grow the Saguaro Cactus

If you’re searching “How to Grow the Saguaro Cactus” this post is for you.  The Saguaro Cactus is an iconic cactus common to Southern Arizona and Northern Mexico, also known as the Sonoran Desert.  The area these giants grow in and thrive is limited to regions that do not experience freezing temperatures during winter.  They are generally limited to areas below 4,000 feet above sea level but do grow on south facing slopes where sun is more plentiful higher than that.

How Saguaros Grow – Buying Your Saguaro – Watering Your Saguaro

How Saguaros Grow

The Saguaro is one of the most impressive and iconic cacti in the world and it grows under unique conditions which are common in Southern Arizona.  Read below to get information about where they grow, how quickly, when they flower, and their average lifespan.

Nurse Trees

In the wild the Saguaro Cactus typically grows next to a “nurse tree” such as the ironwood, mesquite, or palo verde.  When they first germinate and grow from a seed they can be quite tiny and hard to spot. Scientists have speculated that many times this nurse tree dies as it beings to compete with the Saguaro for water and nutrients in the surrounding soil.

Growth Rates

Studies done in the Saguaro National Park have shown that they grow about 1 to 1.5 inches per year for the first 8 years of life.  Growth rates for the Saguaro do depend on the climate they are planted in.  Studies have shown however that the most active growing is done before there are branches from the main trunk.  Branches typically begin to appear after the first 50 to 75 years in well saturated areas, and up to 100 years in more arid climates.

First Saguaro Cactus Flowers

The first flowers on the Saguaro begin to appear after 35 years of growth.  They generally appear at the terminal ends of the primary trunk, but can grow on the sides of the plant.  Once the flowers begin to appear you can expect to see them for the remainder of the Saguaro’s lifespan.

Saguaro Cactus Lifespan

While the adult age of a Saguaro is considered to be about 125 years they can live to be more than 200 years in the right conditions. Average lifespan varies from 150 to 175 years of age.  These impressive giants can grow as tall as 150 feet and weigh as much as 6 tons!

Buying Your Saguaro Cactus

It is best to choose a Saguaro to purchase which has not yet reached maturity as the transplant rate for mature Saguaro Cactus is not favorable.  It is also illegal to procure a Saguaro cactus from the desert to bring home, so purchasing your Saguaro from a Saguaro Cactus Nursery is the best way to one for your landscape.

Watering Your Saguaro Cactus

These giants require very little water to grow well.  They cannot however grow indefinitely without water, yet it should be given sparingly and owners should avoid excessive incidental watering while watering lawn and other plants. Read below for instructions on how to water at different stages of the cactus’ life and times of year.

New Saguaro Cactus Watering

When the new Saguaro is being planted some water is typically added to the hole prior to planting. After the soil is firmly packed around the saguaro it will not have a need for water for about 2 weeks. During the hotter summer months between May and October a deep watering should be done every 2 to 4 weeks.

The soil should be watered to a depth of around 1 foot. Never water when there are rainstorms and completely cease watering during the winter months. Generally the Saguaro will have good roots within 6 months yet is not completely established for another year or two.

Established Saguaro Cactus Watering

Once your cactus has been planted for a year or two the ribs will stay spread out.  This means that your Saguaro roots are established and have found water.  Established cactus build up a water store inside them so you can cut your watering down during the hot months to about once a month.  Again, don’t water if there has been rainstorms or during the fall or winter months.

Saguaro Cactus Watering Technique

The Saguaro’s root system is only about a foot below the surface of the soil which enables it to benefit from even small rainstorms. Due to how shallow the roots are for the Saguaro Cactus it is watered differently than other plants.

The best technique for the Saguaro Cactus is to place the hose on the ground about 5 or 10 feet from the trunk of the cactus and let the water flow for about 30 minutes.  Never water directly onto or around the base of the cactus as you want the roots to reach out around and grow to support the fully grown weight of the cactus.  Watering directly around it will prevent a stronger network of roots.

Root Rot & Overwatering

In residential and commercial landscaping that includes plants such as grass which need watering via sprinklers Saguaro Cactus should be planted at a distance from these elements to avoid overwatering.  Not only can the Saguaro Cactus experience root rot but it can steal water from other plants if placed too close.  Experts recommend about 10 feet from the base of the Saguaro and other plants and landscaping that need frequent watering.

Saguaro Cactus for Sale – Phoenix Valley

If you want to plant a new Saguaro Cactus in your landscape A&P Nursery has locally grown Saguaro Cactus at our nursery.  We offer wide selection of sizes and can have your Saguaro Cactus delivered to your home or business along with professional planting by our landscaping company partners.  We make it easy to include one of these iconic beauties in your landscape in the Phoenix Valley.

Monsoon Season Tree Care In Arizona

Monsoon Season Tree Care In Arizona
Photo by – Alan Stark

If you are searching for “Monsoon Season Tree Care In Arizona” you are most likely looking to preserve your trees before the storm, or are looking for information about helping care for trees after a monsoon has been through the Phoenix area.

When Is Monsoon Season?

The period between June 15th to September 30th is considered the Monsoon season.  This is an estimated period of time and strong storms can and do occure before and after these dates.

The term monsoon comes from the Arabic word Mausim, which means wind shift or season. It is basically a shift in the wind direction that has caused a meteorological event. Depending on the size and duration, the downburst can be called a microburst. The time between June 15th and September 30th has been called the Monsoon season. This is a time during the summer that will normally bring extreme heat, which can be followed up by excessive amounts of moisture in the air which causes large thunderstorms that are caused by fast winds. These thunderstorms will give a lot of danger that will strike suddenly and with very violent forces.

What Is A Microburst?

The national weather service describes a microburst as a localized column of sinking air within a thunderstorm.  Generally they are equal to or less than 2.5 miles in diameter.  With the concentrated winds and potential for enormous sudden precipitation they can be extremely dangerous and life threatening.  There are 2 types of mircrobursts, a dry microburst and wet microburst.

When a sudden downdraft of wind is accompanied with significant and sudden rainfall it is a wet microburst.  A dry microburst is when the wind is not accompanied by rain. With winds that can reach up to 100 mph or higher there is no surprise that they can cause significant damage.  In fact that kind of wind is equal to a EF-1 Tornado!  This can damage homes and completely destroy trees in your landscape.

How Does It Damage My Trees?

Whenever it is followed up with heavy rain, the tree will become more vulnerable to the heavy winds. The heavy rain causes over saturation in the soil, so even if the tree has healthy roots it will have a weaker hold. In this type of case, most of the root system will be exposed if the tree happens to fall over. Your best efforts will not be able to prepare the tree to withstand extreme winds that come with monsoons. Although, there is a lot of preparation that you should and can do to help lower your storm damage potentials to the trees. The most important tip of all is to pay attention: be sure to monitor your trees whenever there is heavy wind or rain, and then take the right steps as needed. You may contact us if you have any issues.

Basic Tips for avoiding storm damage:

  • Fertilize, water, and mulch your trees properly and regularly; healthy trees will be able to withstand the elements a lot better. Prevent the trees soil from becoming compacted.
  • Be sure to prune annually even when the tree is still young. Having the trees trimmed by professionals who understand healthy tree structure is the best way to go for avoiding issues. A poorly pruned tree may lead to snapping trunks and limbs in high winds.
  • Be sure to practice protective care; any cash that has been spent on preventative measures for your tree will be a lot less than having to replace them, especially if it has caused damages to roofs, structures, or cars when they come down.
  • Clear the yard of landscape or leaf trash. This prevents more work whenever high winds begin to blow debris into the yard, and it also helps to keep pool filters from being clogged and then burning out.

Staking Trees

Staking helps to provide younger trees with the right support it needs until the trunk has become strong enough to hold its canopy upright. Many trees will not need to be staked longer than a year, but the stakes need to be left for at least one growing season. As soon as your tree can stand on its own, remove the stakes.

Follow these tips for staking your tree properly:

  • Use an 8-foot lodge pole or stakes. These need to be at least 6 to 8 feet tall and around 3 inches wide.
  • Find the direction of the winds and insert your stakes opposite of each other and about 2-feet from the stem, as well as being in line with the wind. For instance, if the wind is blowing west, place the stakes facing south and north.
  • Be sure to drive the stakes at least 2-feet into the ground. Then try to bury the stakes so that they are the same size above ground. Whenever you are finished the stakes should be about 4 feet above ground.
  • Cut 2 pieces of flexible wire that measure 5-foot long. Use rubber to create 18-inch lengths. Slip these over the wire and then wrap the hose around the trunk to protect the trunk of the tree. Pull wire that is parallel to the ground and then attach it to the stakes. Twist the wires together on the outside of the stake to ensure that the wire is tight and then cut off the excess.

Tree Care and Maintenance

Simple maintenance and care will make the trees grow stronger during bad weather, below are things that you should watch out for:

  • Cracks are a clear indicator of branch failure, where there will be splitting, so prune to prevent further cracking.
  • Dead trees are considered very unpredictable due to the fact that it’s brittle and isn’t able to give or bend under pressure such as a living branch does.
  • Pests may cause health issues for your trees, these pests may target the sickly trees.
  • Decay from hollow cavities or fungal growth is a sign of weakness.

Keeping the trees thin is an important thing to storm proof your tree. The thicker that a tree is, it will be more likely to be damaged during heavy winds. Even if the tree is perfectly healthy, having dense foliage will cause safety hazards during storms. Dense canopies won’t allow the wind to pass through, and the wind resistance can cause the branches to break or cause the tress to fall. This applies to the weighted ends of branches, which is why stripping the lower parts of the branches is not adequate enough. The leaves will return once it has survived the monsoon.

Phoenix Valley Tree Care & Tree Nurseries

A&P Nurseries have the right tools, fertilizers, tree care knowledge and new trees for you to plant in your landscape. We also have great relationships with highly rated professional landscaping companies that care for many Arizona resident’s trees. If you need advice about how to prevent damage to your trees during strong storms or how to care for damaged trees after the experts at A&P Nursery are just a phone call away. Stop by or call one of the convenient east valley locations.


How Hydroponics Works

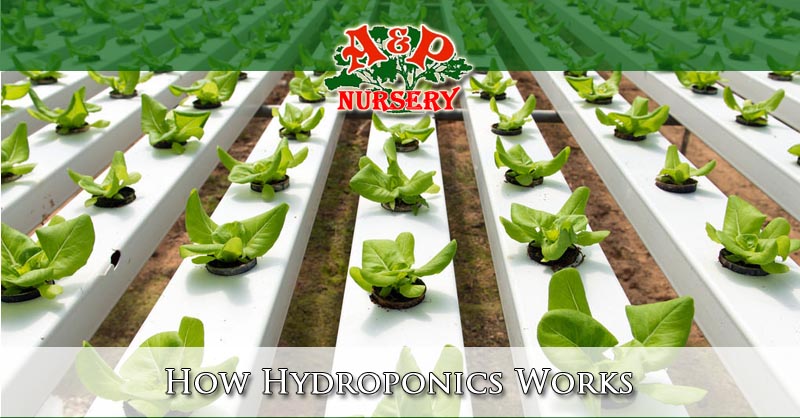
If you’re searching the phrase “How Hydroponics Works” this post is to help you understand what hydroponics is and how it works.  Hydroponics offers gardeners a way to grow more, more quickly.  Read more below to get the full description of how hydroponics can help you grow more vegetables and other healthy plants.

What is Hydroponics?

By definition, hydroponics is a technique for growing plants in a solution that is rich in nutrients and water based. Hydroponics is a method that doesn’t use soil, root systems are supported by inert mediums, such as rockwool, perlite, peat moss, clay pellets, or vermiculite. The basis of hydroponics is to enable the roots of plants to be directly in contact with nutrient rich solution, and oxygen that is important for healthiest growth.

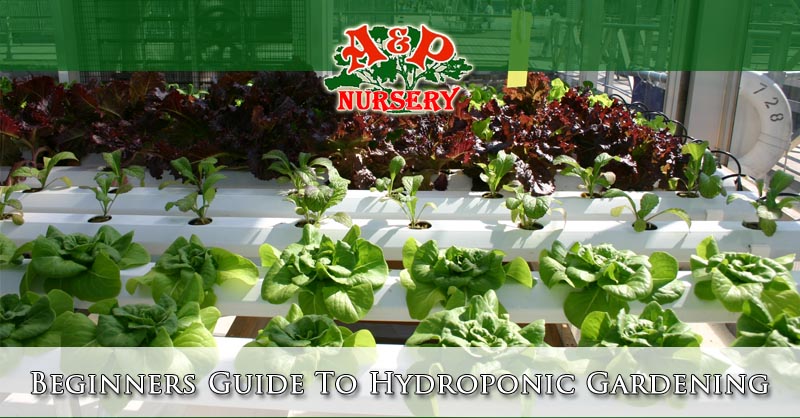
It is highly recommended that this guide is read through, allowing you to learn the most about hydroponics as possible prior to beginning your garden. If you do not plan on using a hydroponics garden, the guide can still be worth reading, as you will learn what plants require in different stages of their growth, all by reading about hydroponic basics.

Advantages of hydroponics

Using hydroponics to grow provides several advantages, with the largest being an increase growth rate for plants. Having the proper setup can allow plant to mature at a faster rate, up to 25%. Faster maturity means quicker and more produce, up to 30% compared to the same plant in a soil based garden.

Plants are able to grow quicker, and larger due to reduced stress to obtain the required nutrients. With hydroponics, even a small root system can provide plants with what it requires. This allows plants to focus towards growth above the surface, rather than root system expanding below the surface.

This is possible because of careful control over pH levels and the nutrient solution. Using a hydroponic garden system reduces the amount of water used compared to soil based gardens. Being an enclosed setup, it has a lower amount of evaporation. Finally, hydroponics is actually more environmentally friendly, as it reduces the amount of pollution and waste associated with soil runoff.

Disadvantages

Although there are several advantages to a hydroponics system, as with anything, there are some disadvantages too. The largest disadvantage most people run into with having a quality hydroponics system, no matter the size, is the cost. A hydroponics setup is more expensive than a soil setup, but you get what you pay for and dirt is not very expensive.

Hydroponics setups on a larger scale can be time consuming to get started, especially if you are not very experienced as a grower. Also, managing a hydroponics system is time consuming to maintain. The nutrient and pH levels must be monitored and balanced, daily.

The largest risk factors with having a hydroponics system are mechanical failures, such as a pump. Depending on the scale of your system, a pump failure could kill your plants in a few hours. The reason plants can quickly die, is due to the medium being unable to absorb and store water, unlike soil. Therefore, plants in a hydroponics system depend realty on fresh water supply.

Types of Hydroponic Systems

Hydroponics offer several different types of systems. Some of the highest quality, and popular hydroponic systems available are hybrid hydroponic systems which combine various types of hydroponic setups. What makes hydroponics unique, is the various methods available to get nutrient solution to plants.

Deepwater Culture

The Deepwater Culture (DWC) method is also referred to as the reservoir method. It is the easiest technique to grow plants using a hydroponic system. The Deepwater Culture hydroponics system allows roots to suspend directly in the nutrient solution, which then gets oxygenated with an aquarium air pump to avoid roots of plants from drowning. It is important to prevent any light from entering this system, as it can result in algae growth. Algae wreaks havoc on hydroponic systems.

With Deepwater Culture systems, the main advantage is not having a pray or drip emitter that can clog. Therefore, DWC is a great option for those wanting an organic hydroponic system, because organic nutrients have a higher clog rate.

Nutrient Film Technique

The Nutrient Film Technique (NFT) is a form of hydroponics that uses a continuous flow, where the nutrient solution constantly flows over roots of plants. Generally, the setup has a slight tilt so that gravity forces the flow of nutrient solution.

This setup works well as plant roots will absorb more oxygen from air, rather than nutrient solution. This provides plants with the nutrients they require, as only root tips are in contact with the nutrient solution. However, growth rate is increased as plants are able to obtain more oxygen.

Aeroponics

An aeroponics hydroponics setup uses a misting technique to get the nutrient solution to the roots, which are suspended in the air. There are two main methods for getting solution on the exposed roots. First, misting the roots using a fine spray nozzle. Second, using a pond fogger. When using a pond fogger, you want to use one with a Teflon coated disc to lower the amount of required maintenance.

One commercialized aeroponics system you may have heard of is the AeroGarden. When starting out with aeroponics, the AeroGarden is a good entry point. This turn-key system has limited setup requirements, and has greater supplies and support to get going.

Wicking

The wicking method is the least expensive, and easiest method of hydroponics. The concept of wicking includes having a material, such as cotton. The roots of your plants grow around one end of the material, while the other end is placed within the nutrient solution and gets transported to the roots via the material.

Although, this method can be simplified even more if you remove the wicking material and apply a medium which provides the ability of wicking the nutrients directly to the roots. To do this, suspend the bottom of the medium material in the nutrient solution. We highly recommend using a medium such as vermiculite or perlite. You should avoid mediums such as coconut coir, Rockwool, and peat moss due to their absorption rates being too high, which can result in plants being suffocated.

Ebb & Flow

Ebb & Flow hydroponic systems are also called flood and drain systems. They are a good system to grow plants with hydroponics. It works by flooding the growth area at certain intervals with nutrient solution. The solution then drains slowly, back in the reservoir. Using a pump hooked to a timer, it repeats the process at certain intervals to provide the amount of desired nutrients.

The Ebb & Flow hydroponic system is an ideal method for plants used to times of dryness. Specific plants will flourish when going through slight dry spells, as it results in the root systems growing to find moisture. With the roots growing bigger, plants are able to grow quicker due to more nutrients being absorbed.

Drip System

They drip system hydroponic setup is basic, as drips systems work by providing the hydroponic medium with a slow flow of nutrient solution. It highly recommends a slow draining medium, such as coconut coir, Rockwool, or peat moss. If you use a medium with a faster drain rate, you will want to use a faster drip emitter.

One of the major disadvantages to a drip system is the emitter/dripper is popular for clogs. Although we prefer to avoid using a drip system, they can be very effective for growing with hydroponics, if you can prevent clogs that are common with this method. The drip system clogs due to particle build up from the nutrients. There is an increased risk of clogging for those using organic nutrients.

Useful Tips

We recommend that you change the nutrient solution out of your system’s reservoir every two or three weeks.

Reservoir water temperature should remain between 65 and 75 degrees. The water temperature can be maintained using a water chiller or heater.

By using an air pump equipped with a flexible tube and air stone can increase the circulation while keeping nutrient solution properly oxygenated.

In situations where plants do not appear healthy, either distorted or discolored, the first step you should take is checking and adjusting pH levels. If you find the pH levels are not the issue, flush the system using a solution, such as Clearex.

It is recommended that you follow feeding cycles that the nutrients’ manufacturer provided.

Once your growing cycle is finished, flush, clean and sterilize the whole hydroponic system. Your reservoir should be drained and any debris removed, followed by running the whole system for a day using a combination of non-chlorine bleach and water. You should use 1/8th cup non-chlorine bleach per gallon of water. Finally, drain the system again, and remove any bleach by flushing it using clean water.

Why Choose Hydroponics?

A hydroponic system is a great option for all forms of growers. The reason it is such a good option is due to it providing the ability to control variables which impact your plant growth. Finely tuned hydroponic systems are able to surpass the plant quality of soil based systems, and yields more produce.

Hydroponics is the best option if you want to grow the largest, healthiest, and tastiest plants possible. Initially it can appear intimidating with the work and equipment involved, but once you familiar with the setup it will seem much simpler. Begin small, keeping things simple, and you will be amazed with your hydroponic system.

Phoenix Valley Gardening Supply

If you are looking for the best quality vegetable seeds, plants, or nutrients for your hydroponic system A&P Nursery carries the healthiest locally grown plants, has helpful and friendly staff, and can help you with all of your gardening and landscaping needs.  Visit one of our 4 locations or call with your questions.

Lawn Mower Won’t Start | Troubleshooting Guide

If you’re searching the phrase “Lawn Mower Won’t Start” this trouble shooting guide is for you.  It will help you solve some of the most common problems that DIY’ers can typically handle.  It’s important to follow the owner’s manual for your brand of lawn mower and your model.

Phoenix Valley residents rely on lawn mowers to start up and keep going all summer long.  But when they won’t start, stall, run rough, or surge it’s clear that something is wrong. Follow this comprehensive guide to troubleshoot your lawn mower.

Lawn Mower Engine Won’t Start

Most of us who have done lawn care in our lives have experienced a lawn mower that just wouldn’t start, no matter how hard you pulled the cord.  This is common when starting your lawn mower after its been stored for a period of time, such as the winter or off season.

First Step: Check The Fuel

Engines don’t start or run without fuel, and it can be an obvious but easy detail to overlook.  It’s also best to start the season with fresh fuel as stale fuel has debris and dirt that can make starting more difficult. In fact storing your lawn mower with fuel can lead to damaging the engine.  It’s a good practice to siphon out the fuel at the end of a season to ensure you start the year with fresh fuel and preserve your engine.

Second Step: Check Ignition & Spark Plugs

If your spark plugs are dirty or disconnected it can cause an engine to run rough or not start at all.  Generally spark plugs are good for a season or about 25 hours of run time.  Spark plugs also have a “gap” where the arc of electricity is created to ignite the fuel. Check the gap to ensure that it is set for the right distance.  If it isn’t the spark plug and the spark plug lead is securely attached you might have a flywheel key problem or shorted kill switch.

Third Step: Clean Your Carburetor

Lawn mowers still use carburetors like older vehicles instead of fuel injection.  The carburetor creates the air to fuel mixture in your engine and if it is dirty it will cause your engine to run rough, stall, or simply not start.

Fourth Step: Check the Compression & Valves System

The compression of the air fuel mixture is critical for powering your lawn mower.  It consists of a system of a piston, cylinders, valves, and rings which control how the air fuel vapors move through your lawn mower engine. The valves are responsible for letting the air into and out of the engine while the pistons cycle back and forth during the intake, ignition, and exhaust process.  The piston rings are responsible for sealing up the system and keeping the engine air tight.

Leaks in your seals or improper valve clearance will mean that compression isn’t right and your engine will not start.  A test can be performed by your local lawn mower repair shop with a leak down tester.

Phoenix Valley Lawn Mower Repair

If you have a lawn mower that won’t start, runs rough, keeps stalling, or has other problems A&P Nursery offers lawn mower repair & maintenance to Arizona residents.

We sell, service, and repair all types of lawn mowers and other outdoor power landscaping equipment.  Our lawn care equipment repair and maintenance team will find and fix whatever is wrong with your lawn mower quickly and affordably.  Call if you have questions or would like to schedule a time to bring your lawn mower in for repair or regular maintenance.

A & P Nursery &
Lawnmower Shop
2601 E. Baseline Rd.
Gilbert, Arizona 85234
480-892-7939

Beginners Guide To Hydroponic Gardening

If you’re searching for a beginners guide to hydroponic gardening you’re likely one of the many Arizona residents looking for a way to maximize your vegetable gardening efforts.  Being able to produce more vegetables faster helps offset the extra costs of rising food prices and ensure that you and your family are eating the freshest and most healthy vegetables available.

Hydroponics History

Hydroponics is a based on 2 Greek words – “hydro” and “ponics” meaning water- labor. The whole concept of soilless gardening has been around for thousands of years. The Floating Gardens of China and Gardens of Babylon are early examples of hydroponics. Scientists began to experiment with soilless gardens in the 1950s. Since then, other countries like Australia, Holland and Germany have been using hydroponics for producing crops with really great results.

Benefits of Hydroponics

Hydroponics have proved various advantages over soil gardening. The growth rate for Hydroponic plants are 30%-50% faster than a soil plant that is gardened under the same conditions. The plant yield is also more. Scientists believe that there are a lot of reasons for the big differences between soil plants and hydroponic plants. The extra oxygen in the hydroponic growing mediums really help to stimulate root growth, so if there is ample oxygen in the root system it will absorb nutrients quicker.

The plant won’t have to search within the soil for the required nutrients. The nutrients are delivered directly to the plant several times daily. A hydroponic plant will require little energy to find and then break down the food. The plant will use this stored energy to grow faster and produce more fruit. Another positive effect of hydroponics is that they have less issues with funguses, diseases, and bug infestations. Basically, a hydroponic plant is much happier and healthy.

Hydroponics Is Environmentally Friendly

Hydroponic gardening also has benefits for the environment. Since it doesn’t use much water unlike soil because of a reuse of nutrient solutions. Because of the lack of need, there are less pesticides used on these crops. Since there isn’t a use for topsoil, there isn’t an issue with topsoil erosion. Although, if the agricultural trends continue to waste water and erode the topsoil, then hydroponics may be the only way to go.

Growing Mediums

The overall purpose for a growing medium is to support and aerate the root system of the plant and to help channel the nutrients and water. Different growing mediums will work well in various hydroponic systems. Fast draining systems such as expanded shale or Hydrocorn works well for a flow and ebb type of system.

The hydrocorn is expanded clay aggregate that is very light. It is airy and light growing medium that lets plenty of oxygen to penetrate the root system. Both types of grow rocks are able to be reused, however the shale has a tendency to not last as long and break down unlike hydrocorn. These rocks are quite stable and will hardly affect the pH of the nutrient solution.

Rockwool Growing Medium

Rockwool is a very popular growing medium. It was originally used as insulation in construction. There is now a Rockwool that is a horticultural grade. Unlike Rockwool insulation, this type is pressed into growing blocks and cubes. It is made from limestone and volcanic rock and they are melted together at 2500 degrees or higher.

The melted solution is poured into a spinning cylinder, like cotton candy and then pressed into cubes, sheets or blocks. Because Rockwool will hold 10 to 14 times more water than soil and it retains 20% air, it can be used in just about any hydroponic system. However, you must watch the pH, since Rockwool has a pH of 7.8, it could raise your pH in your nutrient solution. It also can’t be used indefinitely and many gardeners only get 1 use per cube and it is used for propagation.

Alternative Growing Mediums

Other growing mediums are vermiculite, perlite, and different sand grades. These are the 3 mediums are stable and will rarely affect the pH of the nutrient solution. However, they will hold too much moisture and need to be used with plants that can tolerate these conditions. Sand, perlite and vermiculite are inexpensive and work in wick systems, but they are not the most effective growing mediums.

Nutrients

Many of the principles that apply to a soil fertilizer will apply to hydroponic fertilizers aka nutrient solutions. The nutrient solution for hydroponics will contain all the elements that a plant gets from the soil. These nutrients are available at a hydroponic store. Many are highly concentrated and use 2-4 teaspoons per gallon of water.

They come in powdered or liquid mixes and usually for 2 different containers, one for bloom and one for grow. The liquids are more expensive, but easier to use. They dissolve completely and quickly in the reservoir and will have a pH buffer. The powdered mixes are cheaper and require a bit more attention. They have to be mixed thoroughly and won’t dissolve completely in the reservoir.They also don’t have a pH buffer.

pH

Many plants are able to grow hydroponically in a pH range of 5.8-6.8 but 6.3 is considered best. The pH within a hydroponic system is easier to check than the pH of soil. Most pet, hardware and even hydroponic stores will have a pH testing kit. They range from $4-$15, depending on the type and range of test. Testing the pH is easy and important for a hydroponic system.

If the pH is too low or too high, it may not be able to absorb its nutrients and will begin to show deficiencies. The pH needs to be checked weekly and it is easy to adjust it by adding soluble phosphoric acid to lower the pH or Potash to raise the pH.There are even pH meters out there. These will give you a digital reading of your pH, but these meters cost around $100 and are not needed in many cases.

Gardening Supply & Nursery East Phoenix Valley

If you’re interested in growing your own vegetables and need help getting started A&P Nursery has 4 locations in the Phoenix Valley to serve you.  We sell the seeds, plants, and tools you need to get started with your gardening needs.  Call us today or come by and see what we can do to help get you started growing your own vegetables or fruits.