How to Care for Your Succulent Terrarium

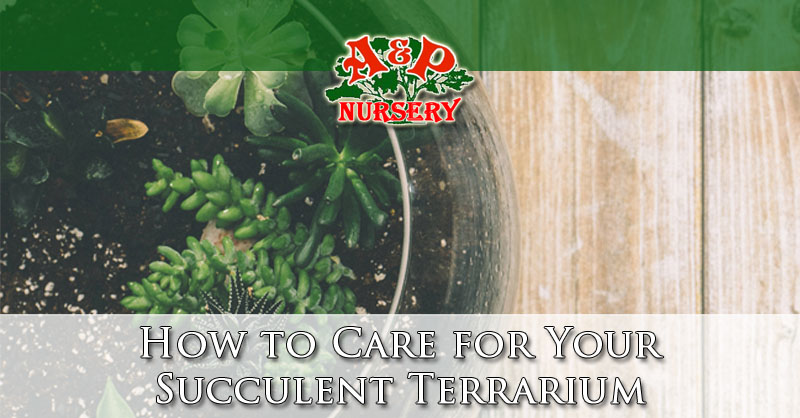
How to Care for Your Succulent Terrarium

When starting out with succulents, we have managed to kill our fair share by either too much sun or too much water. However, after gaining some needed experience, we have learned that they are very forgiving and do not live at the same pace as we do. While we get hungry after a few hours, it may take them over a week to grow hungry. Overcompensating for a less than perfect look of your plants can be disastrous, when caring for your juicykits.com terrarium is simple. Try not to screw it up!

When to Water Your Succulents

A commonly asked questions is why succulents are dying, the answer would probably be too much water.  When should you water your succulents? When the soil is completely dry, it is dependant on where the succulents live. Being desert plants, they do not require much water. Actually, the prefer not to sit in wet soil. Soil in moisture grows bacteria, the roots of these succulents are sensitive to this. That being said, the main three things to keep in mind when caring for your juicykits.com terrarium is water, light, and death.

The Right Light

The right lighting is a no brainer, and your succulents need a lot of light. How much? Your plants can tell you this.

Too Little- Commonly refereed to as ‘stretching’ or etiolation, plants tend to grow tall or bend in a particular direction looking for light. Though it looks funny, it isn’t harmful. Also, there can be a lack of color or a pale look to your plants with to little light.

In the event of too little light, there are a couple things you can do to remedy this. For starters, if you haven’t been growing your succulents in direct sunlight, avoid exposing them to it for lengthy periods of time. This could burn them, instead, train them to the sunlight slowly. Starting off with an hour or two each day, then slowly extending the time they spend in the direct sunlight will cause them to adapt safely to it. If you live in a naturally dark part of the world, try using artificial lighting (Grow Lights) to help them compensate for the too little light issue. It is important to remember not to keep these light directly over your succulents. No more than 12 inches from the plants is ideal.

Too Much- Please note that too much light is a dangerous thing, especially to the baby succulents. Many small succulents will also burn in direct, hot sunlight if exposed to a long period of time. Spotty burn marks, and dry leaves will be visual evidence of this, even the glass to the terrarium could magnify direct sunlight into heated death beams for the plant.

In this instance, do not worry too much over burnt leaves, more will grow and the old ones will die. The best reaction is to move the terrarium away from areas that are too bright. Do not give it a great quantity of water, this is a common mistake. On really sunny days, try fitting a piece of thin fabric or plastic grocery bag over the terrarium. Make sure it has sufficient air flow.


The Correct Amount of Water

We are often asked for the ‘perfect’ amount of water for succulents, however, the perfect amount of water is a flexible idea. We usually respond with ‘More water, Less often.’ As a general idea of when to water your succulents, pay attention to the soil itself. If the soil is completely dried out, water it thoroughly and do not add water till it is completely dry once more. The soil, or cactus mix, that succulents love tend to drain quite quickly. Pouring water in a concentrated area will cause it to just drain to the bottom without moistening the rest of your terrarium. This isn’t ideal at all, terrariums by definition have no drains or openings. The proper way to water your succulents is with a low flow of water over a large area. As stated before, do not over water your succulents. Don’t water them too often, unlike house plants, changes will not happen over night. Here are some signals from your succulents, in reference to their watering needs.

Too Little- The leaves of the plant will wilt downwards, or look shriveled. This is common with a younger variety of succulents such as the jelly beans, or donkey tail.

In the event of too little water, stay calm and do not give it a ton of water yet. A dry succulent isn’t a doomed succulent. They are desert plants, and naturally are designed to withstand long time periods without water. If you house your succulents in a terrarium with no drainage, make sure you are cautious with the amount of water provided to your plants. Use a low flow watering spout, go slowly to moisten the soil in a large area and not a concentrated spot. Patients when watering is important. If you try to just dump it and move on, the water will immediately drain to the bottom. They will plump up again over the following weeks. If your succulent lives in a draining container, you are able to soak the entire planter/pot for 5-10 minutes with water. Large amounts of water will not cause them to rot and die as long as they are draining out.

Too Much- Signs of too much water are simple, the bottom leaves will start to die or rot. This is a common mistake with succulents that people tend to make, and we do not like this. When rotted, the leaves are gross and squishy, only you can prevent a soggy death to your plants. Honestly, think of plants in the deserts, they are dry most of the time. Enjoying the very occasional rainstorm, and a light mist at night, they do not require much water to strive healthily.  With that being said, a ‘dry’ succulent terrarium shouldn’t be completely closed, some drainage is ideal.

In the event of overwatering, just let the terrarium sit without watering it. When the soil dries, then you can proceed to water it properly. In order to make sure that the soil is dry, a few tells it will have is a lighter color and dusty nature. You can also use a toothpick or moisture meter to test the levels. Kind of like baking a batch or brownies. If you made the mistake of putting WAY too much water in causing water to fill up the bottom vessel, or dirt becoming soggy, consider more extreme methods. A trip to your local computer store or pharmacy to procure a large syringe with a long needle is ideal. These needles are the ones used to refill cartridges of ink. You are able to stick that syringe into the watery part of the vessel and suck out as much of this moisture as you can. Now let your terrarium set in a bright, great aired area to dry out. No direct sunlight. Once dry, continue to properly water your plants. Do not be discouraged if some parts of the plants die, this is normal and doesn’t mean the entire plant is dead. Some nurturing will bring these parts back in time.

The Death Talk

No Dead Allowed- It is very natural for parts of your succulents to die with time. A sign of healthy leaf growth in the plant is that bottom leaves die as tops leaves grow in. Having a set of long tweezers is not a bad idea to remove all dead pieces regularly, these dead pieces will cause bacteria and rot near the roots.

The Death of a Plant- If you find that a whole plant has died, no crying allowed. Make sure to promptly remove the dead plant, afterwards replace it at the local garden center. You may also have pests involved if you find little fuzzy dots on your plants.

Flimsy, Weak Looking Plants- after some elapsed time, if you find your plants looking thin and flimsy, the reasoning may be a lack of light or food. The nature of these terrariums being so small can cause succulents to use the nutrients in the soil. If the event occurs where they have devoured all these nutrients, you can provide more goodies for them in the soil with our plant food formula. Our formular is gentle on the roots, where as heavy-duty formula like Miracle Gro is made for house and garden plants that require more food and water. The heavier formulas can cause chemical burns on the roots of your succulents. A good feeding process to follow is to do so once a month for the majority of the year, and every two weeks in the summer time while they grow rapidly. If they require sunlight, they will grow upwards in search of it. With the right light, however, they will remain chubby and short. As you will read in posts about artificial lighting for succulents, preference remains that the plant receives more sun and less food, this can bring out the color in the leaves more.

East Phoenix Valley Nurseries

If you are looking for new succulents to add to your office, home, or business A&P Nursery has a great selection.  Succulents offer interesting structures, shapes, and textures as well as being easy to care for.  We offer help in choosing the right succulents, advise on how to care for them, and can recommend fertilizers and adjustments to watering which will help you make the most of the succulent plants in your living or working spaces.

Call or visit one of our 4 locations today!

Growing The Palo Verde Tree In Arizona

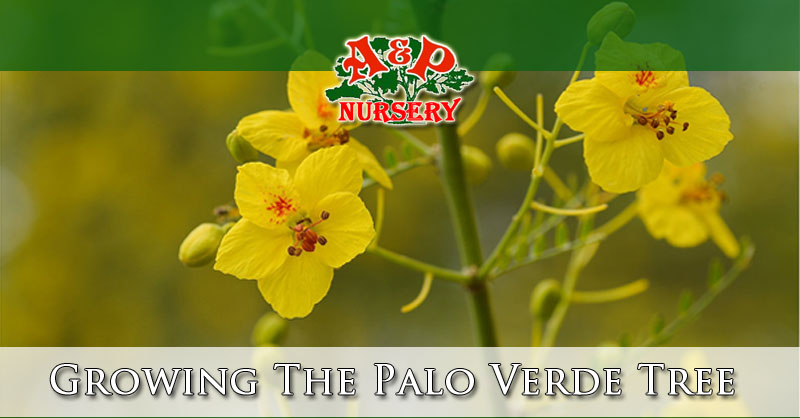
Many people loving growing the Palo Verde Tree in Arizona, not just because it is the State Tree of Arizona, but it is a visually stunning tree.  During spring in Arizona the Palo Verde blooms out with bright yellow flowers and puts on an amazing display.

The Palo Verde is also known as the “green stick” as it translates in Spanish and is called this because it has a lot of chlorophyll in the flesh of the truck. The chlorophyll is what makes the bark green, and the bark is actually responsible for three quarters of the tree’s photosynthesis.

Arizona Palo Verde Species

There are two Palo Verde trees which are common in Arizona.  These two species grow wild but are also featured in both residential and commercial landscaping.

Blue Palo Verde

The Blue Palo Verde is a water loving tree and is more commonly found near water and features a bluish green trunk.

Foothills Palo Verde

As the name suggests the Foothills Palo Verde is found commonly on rocky slopes on the foothills of mountains.  The trees feature tiny leaves, yellow green trunks, and have pods which hold the seeds.

Planting Your Palo Verde Tree

Planting any tree takes a little work, a little planing, and some preparation.  If you are buying your Palo Verde Tree at a local nursery you will usually have the option of taking it home yourself and planting it, or having the nursery come and do the work for you.  If you choose to do the job yourself, here is a guide of things to keep in mind.

When To Plant

You can plant your container grown Palo Verde Tree any time of year.  Summer does present the challenge of a little extra watering, but it is possible.  For days which are more windy or especially hot it is critical to keep newly planted trees watered.  Colder months can also be tricky if you live in a part of Arizona that is prone to freezing.

How To Plant

A big part of planting any tree is planning ahead for how big it will be in height and width.  Most Palo Verde trees grow to about 10 to 20 feet tall, depending on species and vary in width depending on how they are trimmed, pruned, and shaped.

Safety In Planning

The biggest keys in planting is keeping the tree away from overhead power lines or being too close to any structures.  Before digging it is also critical that you check to make sure there are not utility lines, foundations, or pipes where you are planning on planting your tree.

Digging The Hole

When digging the hole make sure that it is about 4 times the diameter of your tree container.  The depth should be deep enough that the soil in the container is level with the soil in your landscape. Take the time to inspect the soil where you are planting for drainage problems.  To test it fill the hole with water and if it has not drained within an hour you might have a caliche problem.  If this is the case holes might need to be punched through the layer to allow proper drainage.

Setting The Tree

Once you have your hole dug and draining properly you can start by removing the tree and root ball from the container.  To do this you will want to gently squeeze the container to loosen the soil around the root ball.  Carefully remove the tree, roots, and soil and set it in the hole. If the soil is too loose and falling apart you will need to set the tree in the hole and cut the container away to preserve the soil around the roots.  After you have the tree in the hole you backfill in the dirt.  Wet the soil as you backfill but avoid overwatering and creating sludge.  Once all of the dirt is back around the tree you can create a raised edge around the tree of dirt which will collect runoff.

Harvesting The Palo Verde

While a lot of Arizona residents just use the Palo Verde tree as a centerpiece for landscapes, it does product edible seeds and flowers. Much like edamame or peas the seeds from the Palo Verde should be sweet when ripe and the pod can be pulled off and collected.  The best time to collect the edible parts of the Palo Verde is when the pods are green and the seeds are tender, small, and green. If they are chalky it is too late to harvest them this way and they should be allowed to dry on the tree and picked when they are dry and brown.

What To Do With Seeds

If you have picked them fresh and when they are green they need to be blanched as soon as possible on the day you pick them.  To blanch your Palo Verde seeds you will need to wash them in cold water, set them in boiling water for 90 seconds, and then switch them to ice water for another 90 seconds.  Drain and put them in freezer bags.

What To Do With Flowers

The flowers of the Palo Verde can be eaten fresh in salads or they can even be included in desserts when they are candied.  The bright yellow flowers offer a sweet taste and are non-poisonous.  Care should be taken if the tree has been sprayed for bugs using any pesticides which are not designed for fruit producing trees.

Palo Verde Trees For Sale

If you are looking for a place to purchase your Palo Verde Tree in the Phoenix area, A&P Nursery has what you need.  We grow our stock locally so you know it is ready for the sun, heat, wind, and will thrive in your landscape. We have knowledgeable and friendly staff who will help you plan where the tree should go, help with selecting a tree, and we will even deliver and plant your Palo Verde Tree for you.  Call or visit one of the 4 locations in the East Phoenix Valley today!

Best Perennials For Arizona

Best Perennials For Arizona

Perennials are a favorite for gardeners who want to have plants that come back year after year.  The category of perennials includes shrubs and trees as well as many succulents and flowers.  Plants where the stems, leaves, and flowers die each winter or frost are referred to as herbaceous perennials.  The roots however live on through the colder months and when the spring comes, the plants rise again.  Plants which can live through the winter and come back are also referred to as hardy.

Choosing Your Perennials

When you are planning your landscape and want to include perennials you should consider what purpose the plants will be serving.  Will they be included to offer a splash of color, plants for edging, or accents around larger trees like the Evergreen?  When you know what you want the plants to do you will have an easier time choosing the best plants.

Below you will find a selection of what the local perennial nursery will carry. Each have their own place in landscapes.  For specific information on when each species will bloom so you can ensure your landscape blooms the way you want, speak with your local nursery experts about the perennials you like best.

Agave

Agave is at home in Arizona as it is native to arid and hot regions.  It is found naturally in the southwestern United States and Mexico as well as parts of south America.   As a perennial succulent the Agave has fleshy leaves which come to a sharp point along with a tall stem during flowering. During blooming a number of tubular, short flowers.

Western Columbine

The Western Columbine covers a large spread of western North America.  Stretching from Alaska all the way down to Baja California it grows wild and adds welcomed splashes of orange, red, and yellow to the landscape. The flowers generally appear between April and August, depending on the weather.

Geraniums

The range of geraniums is filled with variety; in fact there are over 200 different species of geraniums. They can be shrubs, perennials, and even succulents. Choosing the right Geraniums will depend on your goals for water conservation.  A popular variant of the geranium is the Zonal geranium. These examples are genetically advanced and feature stronger and sturdier leaves.

Primrose

There are 2,790 species of Primrose, which gives gardeners an incredibly wide selection to choose from.  Virtually all primrose are perennial, but keep an eye on your labels when shopping at your local nursery.  For Arizona the Evening Primrose is a popular option as it is drought tolerant and can withstand full sun. Evening Primrose has even been used to treat health disorders such as psoriasis, eczema, and controlling fatty acids.

Gerbera Daisy

The Gerbera is native to Asia, Africa, and South America yet has been broadly cultivated and planted in gardens all over North America and Arizona. Flower colors vary greatly and include shades for red, white, pink, yellow and orange.  As a wildly popular bedding gardening plant the Gerbera Daisy is the 5th most cut and displayed flower in the world.

Prickly Pear

Cactus and Arizona go together and the Prickly Pear is one of the hardiest cacti available.  It grows well in both low and high altitudes and is available in a wide variety of colors. These plants are vigorous growing cactus that features detachable spines.  With thick wide pads these plants can grow between a foot and up to 18 feet tall.

Four o’Clock

The Four o’Clock has an interesting history having been cultivated by the Aztecs for medicine.  Being native to Peru the Four o’Clock is a great ornamental flower which has vibrant color and can even have varied flowers growing on the same plant.  As the name suggests the flowers open in the late afternoon with a strong and sweet smell into the evening and night.

Penstemon

Generally Penstemon are perennial plants which include about 250 species between Eastern Asia and North America.  They are found in both desert areas, alpine zones, and moist forests.  This makes them adaptable to various climates.  With flowers commonly purple, red, and orange the Penstemon will add a wonderful burst of color into your landscape.

Salvia

Salvia comes in a wide variety of colors which grow in dense flowering stalks.  Colors vary from purple to reds, whites, and even shades of blue. They offer incredible color to landscapes and attract insects like butterflies to your garden.  They are also incredibly heat and sun resistant and actually thrive in both.  There are many species of Salvia which offer different shapes of flowers and colors which will accent your landscape.

Datura

The Datura features beautiful white flowers which release a wonderful aroma in t he evening.  The flowers have a trumpet vine look and they are a native sprawling wildflower. This makes they drought resistant, perennial, and a great addition to just about any Arizona landscape.  They flower grows well in full sun.

Lawn Care Tips For Arizona

Lawn Care Tips For Arizona

If you are searching “Lawn Care Tips For Arizona” you might have just moved to the state or you got your first home.  Keeping your lawn looking great takes a little preparation, good watering, and a bit of work.  The heat of Arizona means that you will need to adjust your watering depending on the season and step up your lawn mowing schedule. Being ready for caring for your lawn starts with having your lawn mower serviced or lawn mower repaired. When your tools are in good condition it makes lawn care easier, faster, and a lot less frustrating.

Lawn Mowing

Most lawn mowers have height adjustments and it is tempting to lower it as low as possible to try to cut down on the frequency of having to mow, this isn’t a best practice. When you cut your lawn too short you are “scalping” your lawn. While you don’t want long unkempt lawn you should avoid cutting it too short as it will require more water the shorter it is.

Lawn Mowing Heights

There are three common types of grass used in Arizona lawns: Hybrid Bermuda, Bermuda, and Annual/Pernennial Rye.  Both Bermuda and Rye grass should be cut to between a inch and a half to two inches.  Hybrid Bermuda grass can be cut shorter and should be cut between a half an inch to 1 inch.

Lawn Care by the Seasons

Each season has different challenges from the heat of summer to the leaves and debris of fall and winter. Read more below to get specific information for each of the 4 seasons.

Spring Lawn Care

In the spring it is a good plan to apply any weed control or fertilizer that you will want to use. These products help keep weeds out of your lawn and promote greener more lush lawns.  Watering in the mild season of spring should be done to avoid any brown spots but not over done to avoid wasted water.

Summer Lawn Care

In Arizona, especially in the Phoenix Valley, summer is hot. The intense heat and arid climate can be hard on lawns and will require daily watering. The best time to water is just before sunrise in the morning so your lawn has the moisture it needs.  Use a soil probe to measure the moisture after watering.  If it doesn’t go 10 inches into the soil easily increase the duration of watering.

Fall Lawn Care

Once the summer heat has subsided you can cut back your watering and use your probe to make sure you are watering enough. It will vary depending on the heat and the type of soil in your landscape. Use the same rule of 10 inches of moisture and adjust your watering frequency and duration to meet your lawns needs.

Winter Lawn Care

To keep lawns lush and green through the winter it is common in Arizona to “overseed” lawns.  From parks to golf courses and residences overseeding is a common practice to keep the lawn dense and lush.  During winter and the cooler months you will be able to cut watering frequency and duration back even more. Use your soil probe to monitor the moisture in your lawn’s soil to keep track of how you are doing.

Lawn Care Equipment & Repair

If you live in the Phoenix valley A&P Nursery sells, services, and repairs lawn mowers, lawn care equipment, and all other types of motorized landscaping equipment.  We can tune up your lawn mower, repair it if it is broken, or even sell you a brand new easier to use lawn mower. Whatever your needs we can help you take care of your lawn more easily and help you choose the fertilizers that will help you keep it green all year long.

Growing Watermelon in Arizona

Growing Watermelon in Arizona

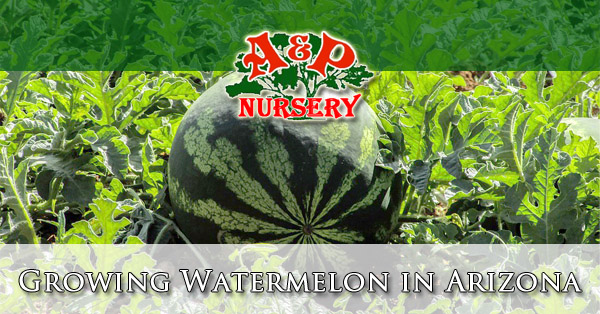
If you thinking of growing watermelon in Arizona, this article is for you. Watermelon is synonymous with summer and is served at just about every backyard BBQ and 4th of July party you go to.  It is an easy-to-grow crop which yields incredible flavor and is one of the largest edible fruits.

Watermelon Seed Varieties

There are 4 main categories of watermelons that most people buy or grow today. These are icebox, picnic, yellow, and seedless watermelons.  Icebox watermelons are the smallest which range from 5 to 15 pounds.  Seedless watermelons are a little bigger and will usually grow to between 10 and 20 pounds. The picnic watermelon is the largest of them and will grow under the right conditions to between 15 and 20 pounds.

Watermelon Options

There is a wide variety of hybrid and heirloom seeds available to the Arizona home gardener which gives the power of choice for the pattern, color, size, and flesh colors. The flesh colors you eat can be the iconic bright red all the way to nearly white. Rinds are also available from dark or light green to mottled, stripped, or solid colors.

How To Grow Watermelon

Having your own fresh watermelon for the summer is a wonderful way to enjoy the fruits of your gardening labor.   Planning the space you will need, variety of seeds, and knowing how to water your watermelon are some of the key points to success.

Soil Preparation

Watermelon needs to have good soil and fertilizer to grow well. Soil should be amended with organic matter like compost or animal manure.  Soil should also be enriched with fertilizer which is well balanced and rich with nitrogen.

Watermelon Vine Spacing

Watermelon vines are known for growing quickly and spreading out. They can reach lengths up to about 20 feet.  This means you need to choose areas in your landscape that afford room to your watermelon.  Avoid planting too close to other crops or ornamental plants as the vine might fight for space. There should be about 4 feet between your watermelon seed plants in a row, and 8 feet between rows.  Space is a challenge in growing watermelon, start out with plenty and you’ll thank yourself.

Planting Your Seeds

Once you have chosen the seeds you want to plant from your local nursery you need soil that isn’t too cold. It is best to wait until the soil is 70°F or warmer, which isn’t typically a problem in Arizona. The soil needs to be warm for the seeds to properly germinate and grow. Small hills should be made and about 9 seeds should be pushed 1 inch deep in the top of each of the hills.

Watermelon Watering

Watermelons have deeper roots than most people expect and need to be watered deeply.  This is especially important in the desert heat of Arizona. Soil probes can be purchased to keep track of how deeply the soil is saturated.  Keeping track of your watering schedule helps create plans that are easy to follow and will help you be successful.

Harvesting Your Watermelon

Once the work and wait is done it is time to enjoy your watermelon, but knowing when they are ready can be tricky.  In hot summer weather when watermelon are generally being grown it only takes about 32 days for the watermelon to be ripe after the plant blooms.

How To Tell When Watermelon Is Ripe

Tendril Ripe – Many experienced gardeners watch for a tendril which is located closest to the main stem. A tendril is a stem of modified leaf which grows as a spirally slender coil.  As soon as this tendril dries up and turns brown your watermelon is ripe.

Sound Ripe – Another method a lot of people like is tapping on the watermelon and waiting for a nice soft hollow sound. They do this by slapping, tapping, or thumping their melons.

Appearance Ripe – One of the most reliable ways for gardeners to know when the watermelon is ripe to harvest is watching the bottom of the melon where they touch the ground. This spot many times starts as a near white look and will turn to a rich yellow as the watermelon matures.  The skin of the watermelon also changes appearance from having a slick shiny surface to one that is more dull.

Watermelon Handling

Watermelons can be ruined with rough handling. They should never be dropped, bumped, or rolled.  If gardeners are not careful with their watermelon there can be bruising of the flesh inside the watermelon.

Storing Watermelon

While watermelon is best served chilled, uncut watermelon need to be stored with temperatures between 60 and 70 degrees Fahrenheit. Watermelon which is exposed to temperatures above 90 or below 50 for too long will have deterioration of the flesh.

East Phoenix Valley Gardening Supply

A&P Nursery has been planting, growing, and harvesting plants in Arizona for many years. We have the knowledge, right tools, fertilizers, and everything you need to get started in growing watermelon here in Arizona. We can help you plant the type you want, where to plant them, and help you understand how to keep them watered and fertilized for the best results. Call or stop by one of our 4 east valley locations today!