Growing Shrubs in Arizona

Growing Shrubs in Arizona

If you are searching “Growing Shrubs in Arizona” you are probably looking for the types of shrubs that grow well in state of Arizona or you are wondering how to best use them for your landscape.  Well laid out designs utilize shrubs to provide a backdrop for featured plants and incorporate flowering shrubs as focal points.

Types of Shrubs To Plant

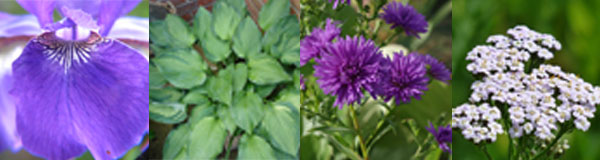
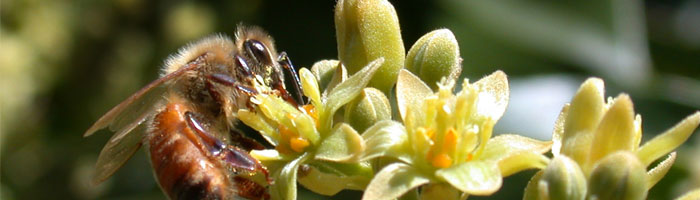
There are a lot of different kinds of shrubs to choose from. Some do better than others in Arizona and cope with the heat.  With the right attention and care most types of shrubs can be grown successfully in the state, so we have chosen to highlight a selection that is geared well for easier care.  These shrub options include incredibly vibrant coloring flowers and will provide excellent visual interest to your landscape.

Chuparosa

Chuparosa Shrub ArizonaThe Chuparosa is a native to the desert and grows well in the heat of Arizona.  This plant grows well in full sun and when mature will grow to about 4 feet high and 4 feet wide.  The Chuparosa flowers bloom in the late winter to spring and vary in color from red to orange. The plant has great landscaping benefits as it doesn’t drop litter, is pool friendly, and attracts wildlife.

Firecracker Bush

Firecracker Bush Shrub ArizonaThe Firecracker Bush puts a bang in your landscape of vibrant summer color. The red orange flowers of this shrub grow well in full or partial sun. The shrub will grow to about 4 feet high and 4 feet wide with medium green foliage.  This option has no thorns and only has a low natural litter from pedals and leaves.  This bush also attracts wildlife with the brightly colored flowers and is sure to impress.
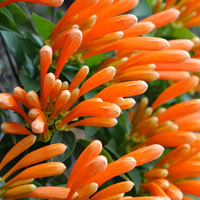
Flame Honeysuckle

Flame Honeysuckle Shrub ArizonaThe Flame Honeysuckle is a favorite with landscapers as it has incredibly vibrant color and incredible hardiness for cooler weather. This hardiness makes it a great option for the areas of Arizona which experience below freezing temperatures. The bright red-orange flowers emerge in summer and late fall and are great for attracting wildlife. The size of a full grown Flame Honeysuckle is about 3 feet high by 4 feet wide.

Langman’s Sage

Langman’s Sage Shrub ArizonaThe Langman’s Sage features incredibly pretty lavender flowers that grow dense on its branches. The plant grows well in both full and reflected sun and weathers cold well, down to 10°F. This great burst of color and great hardiness make it a favorite for areas of Arizona that experience colder weather. The shrub grows to about 5 feet high by 5 feet wide and blooms out in summer and fall. This shrub is pool friendly with very little natural litter.

Shrubby Senna

Shrubby Senna Shrub Arizona
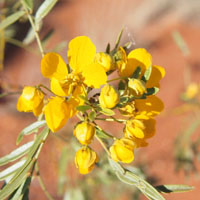
The Shrubby Senna enjoys full sun to grow in but also has incredible hardiness and can endure down to 10°F.  This shrub will grow to about 4 feet high and about 6 feet in width. Flowering occurs in summer and features incredibly vibrant yellow blooms.  This shrub does not have thorns and also attracts wildlife to your landscape.

Planting Your Shrubs

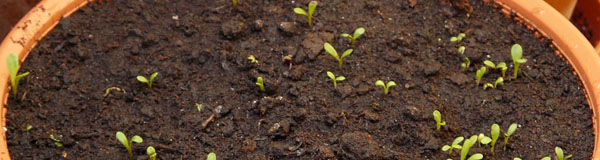
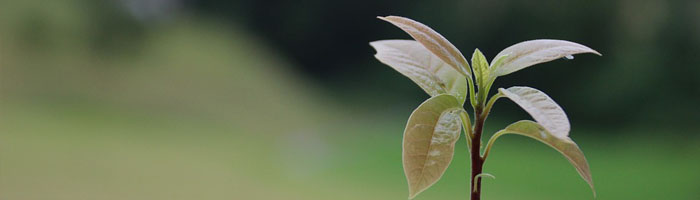
Once you have the shrubs picked out for your landscape at your local shrub nursery you just have to get the home and get them in the ground.  Most nurseries have shrub planting services or can help arrange professional landscaping companies to come and plant your shrubs. Many gardeners and property owners also enjoy doing this work themselves. Here is a quick over view of how to plant your shrub yourself.

Planning The Area

Shrubs tend to grow to about 4 or 5 feet wide.  Plan your landscape and garden for the full mature size of your shrubs and don’t get them too close to structures or other plants.
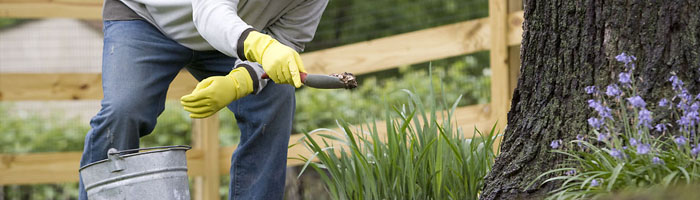
Dig The Holes

The hole should be dug about 2 or 3 times the width of the root ball. This allows the roots to spread out easier and grow properly. The depth of the hole should be the same as the height of the root ball.

Plant Your Shrub

Take the shrub out of the pot or burlap sack and inspect your root ball. Generally while growing in pots the roots will be compressed against the sides of the pot. If the shrub has its roots bound up too tightly you can use a knife or pruners to loosen and divide the roots. Once you have done this you can set the shrub in the hole so that the top of the root ball is level with the surrounding dirt. Return all of the soil which was in the hole and gently press the soil to help gets rid of air pockets.

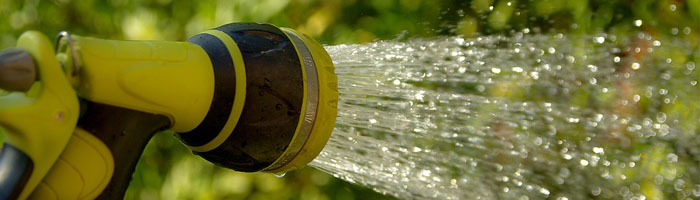
Early Watering for Shrubs

This is one of the most important steps in planting new plants and shrubs. You need to water the plant immediately after you have the soil back in the ground around your new shrub. This minimizes the shock the plant experiences and helps ensure it is hydrated.

Add Mulch

Mulch helps plants grow all over the country and does so in Arizona. We tend to use it a little differently as we have a different kind of soil. In Arizona it is usually best to use mulch as a 2 inch layer on top of the soil rather than included in the soil. This layer helps retain water and makes the plant more drought resistant. Click here: For more information about Improving Clay Soil in Arizona.

Caring For Your Shrubs

Once your shrubs are in the ground you will want to continue to care for and protect your investment. Shrubs will provide amazing landscaping value and bursts of color when cared for properly. Follow the guidelines below or contact your local nursery for more information.

Watering

If you have chosen low water use desert shrubs you will be able to use less water and easier plant care. Watering should be done so that it covers a radius around the plant which extends about a foot wider than the canopy of the plant.

Shrub Watering Guide

There are four seasons with drastically different temperatures which affects how much water is appropriate. Many plants also hibernate in winter and require less water. We will outline watering for shrubs for all 4 seasons below.

Watering Shrubs in Arizona

  • Spring – Every 3 to 6 weeks
  • Summer – Every 2 to 4 weeks
  • Fall – Every 3 to 6 weeks
  • Winter – Every 5 to 7 weeks

All watering should be increased in times of extreme heat or extended drought. These guidelines are for desert adapted plants.  Shrubs that are not acclimated or native to the desert will require more frequent watering. Soil probes can be used to gauge when to water. If your probe only will penetrate about 4 inches of soil, it is time to water.

East Phoenix Valley Shrub Nursery

If you are looking for shrubs that are sure to thrive in the desert, choose those that were are grown here to begin with. A&P Nursery grows their stock right here in the valley, so you can bet that the plants are already accustomed to the heat, soil, and dry conditions that are naturally found in the Phoenix valley.

We have 4 locations that are in Mesa, Gilbert, and Queen Creek, Arizona. We have the shrubs, soil, tools, and expert staff which will make it easy to plan your landscape, get everything planted, and care for it properly. Contact us by phone today or stop by one of our locations.

Improving Clay Soil in Arizona

Improving Clay Soil in Arizona

If you are searching “improving clay soil” because you are trying to grow a better landscape or garden in Arizona, this article is for you. It is normal for low desert soils to have high clay content, high pH, and low organic material. This leads to soil which is very alkaline, or salty.

High clay content does help the soil retain nutrients and water yet can stare it of oxygen and makes digging holes more difficult. In contrast some areas have sandy soil which also contains low organic material and will not hold moisture.

Working With Mother Nature

Classifications of soil like clay, sand, or silt are a reference to the texture of the soil, which is just about impossible to change. Instead of trying to fight Mother Nature and her desert landscape Arizona gardeners can choose plants which are accustomed to the conditions and will grow well. Choosing plants for your garden that prefer the acidic and loose soils of the eastern United States usually ends with frustration and choosing replacement plants.

Organic Material & Arizona

While a lot of gardening guides recommend the enrichment of soil with lots of organic material which adds nutrients to the soil and improves water retention and penetration, it is not ideal for Arizona. Other regions benefit from such treatments but here the alkaline soils cause organic material to decompose much more rapidly which can actually harm your plants.

Where it should be used

Mulch can and should be used in Arizona landscapes, just not IN the soil. It is a great addition to top the layers of your soil which will provide temperature regulation, help retain moisture, and reduce the growth of weeds.

How it should be used

Mulch can be spread out so it extends to the same diameter of the branches in a layer which is about 2 to 3 inches deep. Avoid letting organic material making direct contact with stems or the trunks of trees. If plants are desired which prefer the acidic soils of the eastern United States it is best to grow them in large containers where the soil’s makeup can be closely monitored and adjusted.

Mulch for vegetable gardens & flower beds

Vegetables and flowers are exceptions to being potentially damaged by rapid decomposition of organic matter in your soil. You can incorporate the organic materials each year by adding 3 inches of it into the soil and mixing it thoroughly.

Types of Organic Material

There are a lot of various organic materials which can be used to help gardens in Arizona. Many of them we either already have on hand or can purchase inexpensively from local nurseries.

Mulch

Mulch is a combination which includes clippings from yards and other common waste products from homes. This can include leaves, grass clippings, hay, scraps from the kitchen, straw, sawdust, shredded newspaper, woodchips, cardboard and more.

Leaves

While leaves are a common ingredient in mulch they fall naturally around our yards and plants. Leaving them when they lay under your plants provides incredible nutrient value. As they naturally decompose on the surface of the soil the nutrients will be added to your soil slowly.

Compost

You can make your own or buy it as your local nursery. It is typically made from produce waste or leaves which helps provide moisture retention but doesn’t carry with it excessive nutrients.

Manure

While it can be very beneficial to your plants it must be from the right animals and aged properly. It should come from vegetable eating animals like cows, horses, sheep, chickens or rabbits and have been aged for 6 months to a year.

Shredded Bark

Shredded bark is a popular landscaping material which provides a layer of protection from the sun and helps hold in some moisture on incredibly hot days. You can purchase it as your local nursery or if you have had a tree removed you might have some on hand.

Phoenix Valley Nurseries

If you live in the Phoenix valley and want to make the most of your landscape and garden A&P Nursery is here to help. We grow our plants right here in the East Phoenix Valley and sell them at 4 locations. Our team of nursery staff and expert gardeners love to help Arizona residents learn about what grows best, how to make that happen, and help equip gardeners with the best knowledge and tools available. Call or visit one of our 4 locations in the East Valley for more information or to get your garden started.

Phoenix Valley Citrus Tree Easy Care Guide

Phoenix Valley Citrus Tree Easy Care Guide

If you are searching “Phoenix Valley Citrus Tree Easy Care Guide”, you are looking for a guide that will help you understand how to care for your citrus trees in the heat of the Phoenix Valley.  Growing citrus trees in the desert environments that are common in Phoenix, Mesa, Gilbert, Queen Creek, and other Phoenix Valley cities is different than other areas of the state and country.

Appropriate Watering is Key

Master gardeners in the state of Arizona explain that the biggest problem for home gardeners growing healthy citrus trees is watering. When you water your citrus trees the area on the ground that you water should be about a foot wider than the canopy of the tree. Generally this is about how far the root system extends and is where your tree is searching for the moisture and nutrients it needs.

How To Water

It is best to water slowly and deeply to help push salt build-up past your roots. Watering should be slow and long enough that the depth reaches about 2 feet into the soil around your tree. Newer trees should be watered deeper for the first 3 years after they are planted. It is important to water deeply yet allow your soil to dry before you water again.

New Tree Pruning

Newly planted trees do not produce fruit for the first number of years after you plant them. The fruit that does grow on newly planted, young trees should be removed. Suckers and dead branches should be the limit of your pruning with young fruit trees. Any shoots that are growing quickly and headed straight up are described as suckers and should be removed. They should be pruned below the bud union. This will depend on the type of rootstock you choose, and not the fruit tree variety you buy or have planted.

Citrus Tree Pruning Tips

Typically in the Phoenix Valley the best time to prune citrus trees is from about mid February until March. You just want to wait until there is zero chance that there will be a freeze.  It is best to get this done before it is warm and your tree starts to have new growth.

Provide Some Shade

Leaving enough branches and leaves to create a skirt around your tree is an important factor in growing healthy citrus trees in the Phoenix Valley. Leave enough new growth to provide shade for the trunk of your tree so it does not get sunburned. If your tree trunk gets too much sun it can affect how healthy your tree is, and how much fruit it can produce.  Even if you are watering properly too much sun will hold you back. Young trees can be covered with a shade cloth that helps block the intense afternoon sun.

Protecting The Tree

There will be branches, new growth, and parts of your trunk you will be unable to provide enough shade for with the canopy. For these areas you can cover them with a specially formulated paint which is made for trees and helps protect them from over exposure to sunlight. You can purchase this tree trunk paint at your local citrus tree nursery.

Fertilizing Citrus Trees

Newly planted citrus trees don’t need to be fertilized for the first few years. Nitrogen can be used once the tree has had a chance to establish itself and you see new growth. Trees that have been planted for 2 years or more need to be fertilized 3 times per year. A lot of Phoenix Valley citrus tree lovers choose to make it easy and just apply fertilizer on 3 easy to remember holidays: Valentine’s Day, Mother’s Day, and Labor Day.

Citrus Tree Problems & Solutions

When we plant our citrus trees we all have different visions of how we will use the fruit, but share a hope that there will be a lot of it and it will taste great!  Being able to pile fresh and healthy line, oranges, or lemons into a basket is the goal of every citrus tree owner. Making this a reality in the low desert of the Phoenix Valley is definitely possible with the right watering and application of fertilizer.

Fruit Dropping Too Early

Some fruit dropping from citrus trees is normal as they tend to set more fruit than can be carried to maturity. When a citrus tree drops an excessive amount it is typically a sign that there is a problem with fertilizing or watering.

Thick Fruit Rinds

It is fairly normal for young orange or grapefruit trees to have thick rinds here that protect the tree against out dry and hot climate. If gardeners continue to experience thick rinds in their mature trees it many times can point to excessive nitrogen fertilizer being used. While thick rinds might not be ideal it does not usually affect the taste of the fruit.

Curling Leaves

When your citrus tree leaves start curling inward from the edges or turning to a dull green you need to step up your watering.  It is best to remember slow and deep watering that completely saturates the soil about 2 to 3 feet deep and then letting the soil dry out. Avoid trying to “catch up” by over watering.

Splitting Fruit

When your fruit is reaching maturity and cracks it is a sign that watering wasn’t sufficient earlier on during development. Dry or hard rinds are caused by improper watering and cannot expand as fruit grows. It’s best to establish a watering schedule, and keep it with calendar reminders or automated watering systems.

Granulated or Dry Fruit

Some types of grafting will result in trees that are more sensitive to drought conditions. Adhering to a consistent watering schedule and fertilizer program will help avoid or alleviate these issues in subsequent years of growth.  When you know you have this challenge it is best to pick the fruit as soon as it is ripe.

Yellow or Brown Leaves

There are two types of scenarios when leaves can be an indication that something is wrong with your citrus tree. You will find that these conditions manifest themselves by either being just the tip of leaves, or entire leaves. Read more below to nail down which problem you might be having.

Yellow Leaves

When the whole of the leaves are turning yellow or pale green instead of just the tips you can guess that you have a problem with over-water or a nitrogen deficiency.  This can be corrected by adjusting your watering schedule to allow soil to dry between watering, and increasing your soil’s nitrogen content.

Yellow Leaf Tips

When you have leaves that have tips or edges that have yellow that fades into brown it is a sign that you have an accumulation of salt in the tree tissues. Desert water supply and soil has a high content of mineral  salts which can pose a challenge for citrus tree lovers. This problem is resolved by, you guessed it, watering correctly. When water is too frequent and shallow the salt tends to collect near roots and get pulled into the tree.

Citrus Tree Care Help

If you live in the Phoenix Valley and need help getting started, growing healthy fruit, or have questions the our team is there to help at 4 Phoenix Valley locations.  We grow our stock right here in the Phoenix area and know what it takes to plant, grow, and harvest the best fruit. Let us help you get the most out of your gardening by calling one of our stores, or just stop by.

Growing Hydrangea In Arizona

Growing Hydrangea In Arizona

Are you searching for “Growing Hydrangea In Arizona” because you want to add one of the most beautiful shrubs to your landscape? If so, A&P Nursery can help. Hydrangea, for the uninitiated gardener, is a genus of about 70 species of flowering plants. They are native to the Americas and the south and east of Asia. Generally the shrubs grow to about 3 feet to 9 feet tall, yet some species can grow as high as near 100 feet. While the greatest diversity of Hydrangea exists in Asia, we can still find, plant, and grow beautiful examples right here in Arizona, as long as we choose the right Hydrangea species.

Selecting The Right Hydrangea

Arizona covers USDA zones 5 through 10 and can get quite hot in the southwest area of the state. The Hydrangea is rated by the U.S. Department of Agriculture as a 3 through 9 in hardiness depending on the species. This means for the hotter areas of Arizona, like Phoenix, certain species are better and will grant the gardener with greater success. If you want to check which hardiness zone your zip code is in, please click here.

Heat Tolerant Hydrangea Species

If you want to choose a species that will work anywhere in Arizona you might choose from the following: Bigleaf Hydrangea, Oakleaf Hydrangea, or Smooth Hydrangea. All of these species are rated for the various climates that are found in Arizona and will thrive as long as their other needs are met.

Bigleaf Hydrangea

While being native to Japan the Bigleaf Hydrangea is a deciduous shrub which grows to about 7 feet tall by about 8 feet wide. They bloom out with flowers in the summer and autumn with large blue or pink heads of flowers. In landscaping people love it for being a boarder or planting it at the back of a flower bed. With its large size, and rich foliage it makes a great backdrop for your annuals or perennials.

Oakleaf Hydrangea

A native to the Americas this Hydrangea species grows wild in the Southeastern United States in places like Louisiana, Florida, North Carolina, and Tennessee. It is also a deciduous shrub that features white showy flower heads and is widely used in gardening and landscaping. This plant is common planted near large trees such as magnolias, oaks, hickory, and others.

Smooth Hydrangea

The Smooth Hydrangea is also known as the Sevenbark, or wild hydrangea and is native to the Eastern United States. It native area of growth stretches from southern New York all the way to the panhandle of Florida and out into the flatlands of Kansas and Oklahoma. They typically grow to about 10 feet tall when mature and bloom out with flowers around May and June. Smooth Hydrangea is used extensively as an ornamental landscaping plant and was even used medicinally by Native Americans.

Choosing Where To Plant

Depending on which of the species you chose to purchase you will need more, or less shade. Both the Smooth and Oakleaf Hydrangea prefer part shade. While the Bigleaf Hydrangea grows well with direct sunlight with afternoon shade that helps reduce wilting. If you are going to plant your Hydrangea in full sun in Arizona you might consider planting the Panicle Hydrangea, which can withstand the greatest sun of any Hydrangea species. Ultimately you should talk with your plant nursery specialist about your landscape layout and where your favorite hydrangea will grow best based on how tall your house is, and the landscape layout.

Preparing Soil For Hydrangeas

Arizona’s soil isn’t much like the native areas of the Hydrangea such as the Eastern United States or Asia.  Our desert environment tends to not have the organic matter needed to grow the Hydrangea successfully. The soil should be amended with a 1-2 inch layer of compost across the surface of the soil. Compost then should be worked into the top foot of soil. The addition of organic material helps provide the nutrients needed and also assists with drainage in clay or compacted soils.

How To Plant Your Hydrangea

While it is possible to plant Hydrangea year round the best time of year to plant them is when it is cooler. The fall, winter, and spring are preferable and the earlier the better to give the root system a chance to develop before the heat sets in for the summer.

Digging The Hole

Once the soil is amended, dig a hole which is the same height as the root ball and about 3 times the width. Hydrangea as a rule should be planted about 6 feet away from other plants so it will have room to mature.

Planting

Set your Hydrangea in the center of your hole and return the soil around the root ball. Once the dirt has been returned you will want to mound up a ring of soil around your root ball which is about 3 inches high. This mini moat will keep water near the root ball and help you avoid drought problems.

Mulch & Watering

A layer of mulch that is about 3 inches deep should be used around the base and the Hydrangea should be watered thoroughly. Soil should be kept moist yet not saturated consistently for the first months after you plant your Hydrangea.

Continuing Care Tips

Watering – Most of the time 1 inch of water a day is enough for the Hydrangea, yet in especially hot weather doubling that amount to 2 inches per day helps avoid wilt. The leaves of the Hydrangea are prone to leaf spot disease which is caused by watering their leaves, so try to keep all of your watering on the soil.

Fertilizing – The Hydrangea has a moderate fertilizer need and should be treated with a slow release dry fertilizer with a 10-10-10 ratio and 2 cups per every 100 square feet in the spring once the plant beings to green up and once again when they begin to flower.

Buying Your Hydrangea

If you live in the Phoenix area in cities like Gilbert, Queen Creek, or Mesa, Arizona you can visit one of our 4 convenient East Valley locations to get help choosing the species, location, and even choose to have professionals transport and plant your Hydrangea. We make gardening and landscaping easy and enjoyable for our customers with tailored advice and services for every gardening need.  Stop by or call one of our locations listed below and we will be happy to help you select and plant your Hydrangea in Arizona.

5 Spring Gardening Tips

5 Spring Gardening Tips Arizona

For a gardener, nothing gets us up in the morning like upcoming growing seasons or attending a flower and garden show during this time. If you are familiar with this show, you will know that there are a few that rival the Philadelphia Flower Show, which happens in march and is known for being the worlds longest running and largest indoor flower show.

I have attended the show almost every year for the last 2 decades. I remember the first year I went, I came home energized and ready to begin gardening right away, just to find that there were around 3 inches of snow on the ground. It was too early, or at least that is what I thought. In the following years, I learned that there are a lot of things that you can do to start gardening season before the frost, and that will save you time and money.

Get an Early Start Indoors

Some plants and flowers should be started as seeds weeks prior to it becoming warm enough to transplant them outside. Plants that are started from seeds will normally cost a lot less than what you will pay at a nursery for those seedling containers once gardening season begins.

Cut the bottoms out of plastic jugs to protect your seedlings. Finding when you should start your plants indoors will depend on when the last frost happens, then counting backwards based on t he type of plants you want to grow. Seed packets for your plants will often have instructions on starting your plant indoors which states how and when to plant. In most of the country, March is the month for starting seedlings indoors.

You can also repurpose throw away items such as cardboard boxes, newspaper, toilet paper rolls, half-egg shells, egg cartons to make mini biodegradable seedling pots. Some of the common plants that need to start as seeds indoors are eggplant, squash, melons, peppers, tomatoes and a variety of herbs and flowers. If you don’t really have a sunny space which is a necessity for starting plants inside, you should consider creating a cold frame in the yard as a place to start your seeds. You can find cold frame designs online and how you can build them with inexpensive materials like old windows, plastic sheeting, scrap lumber, and even bales of hay.

Prepare your garden and lawn equipment

Being ready for the yearly upkeep of our landscapes starts with having our lawn and garden equipment serviced.  Depending on your landscape and how much rain we get there can start to be a wait for tune ups and repairs, so the earlier you have your lawn mower or gardening equipment served, the better.

There’s nothing worse than getting started on a hot day with a lawn that is overdue to be mowed, only to be stopped by a dull lawn mower blade or other issue with your equipment.  Get a jump on the season and be ready with your freshly serviced lawn mower, edger, and other gardening equipment.

Declare war on weeds early

Whenever the first signs of plants and new growth come back to life in the spring, you can also bet that there will be a variety of weeds with them. Once the soil is no longer frozen normally weeks before the last frost is when you need to start preparing the soil in areas that are prone to weeds. Cover this area in mulch to help keep weeds at bay. Also begin pulling up hard to kill weeds such as dock weed, dandelions and poison ivy. Weeds will just get stronger, bigger, and harder to get rid of as the growing season continues, so taking care of them now will save you money and time for the spring season. You should stock up on rock salt, which should be marked down and then sprinkle it on side walks and driveways in the spring to keep weeds from popping up.

Remove yard debris and leaves

If you haven’t gotten around to raking the leaves and yard debris during the fall, that is okay. In some situations, leaves can become a protective barrier like mulch which can help some plants to make it through the winter. When new plant growth starts, the leaves from last year can stop the growth and cause pest issues and even some plant diseases. You should consider composting the leaves and yard debris or shred it to make mulch. If you have a mulching lawn mower, just mow over the leaves so that the nutrients return to the soil.

Tend to the perennials

Most of your perennials, plants that continue to grow for years, including shrubs and trees, could do with some attention. Perennials can add value to your home, so consider giving them some TLC as an investment for your future. Later winter and early spring are the best times to prune shrubs and trees in most areas. Ornamental grasses should be cut before the new growth starts, and thinning and pruning fruit trees should be done prior to the new growth starting. You can even divide some perennials like asters, hostas, yarrow, and Siberian Iris in the early spring which makes a whole new barrel of plants for free. Now that is music for a cost friendly garden.

East Phoenix Valley Nurseries
Spring Gardening Tips from AP Nursery

If you need to have your lawn mower serviced, want to find plants or seeds to use in your garden, need some fertilizer, or have anything garden product A&P Nursery has 4 locations in Arizona in Mesa, Gilbert, and Queen Creek.  We carry everything you need to start, maintain, and get the most out of your garden. With partnerships with local landscapers we can also organize services to plant and maintain your gardens and landscapes.

Growing Apricot Trees In Arizona

Growing Apricot Trees In Arizona

If you love apricots and gardening then you should have an apricot tree in your garden. Growing Apricot trees in Arizona differs from other places in the country. It is hotter and more dry in Arizona, especially in the South. While Apricot trees do prefer the cooler temperatures of the north, we can still get them to grow well in the south.

Topics Covered In On This Page:

Apricot Tree Propagation
Apricot Tree Propagation Arizona

All Apricot trees are grown from the stone in the fruit, which is the seed. It takes 3 or 4 years for the stone to develop into a fruit bearing tree. This is why most gardeners choose to buy their apricot trees from a local nursery. These trees can be transplanted into your backyard and start producing fruit a whole lot faster than starting with a seed. The trees nurseries stock are usually already a couple of years old. This cuts out a lot of the wait time for you’re to get fruit from your new tree. That being said it will still be a couple years before you can expect fruit from your apricot tree.

Planting Apricot Trees

While most places in the country recommend full sun for the apricot tree, Arizona gets more sun than most. This means that partial shade is not a bad idea for your tree. Choose a location that isn’t too close to the house or power lines that gets good sun.

Get your shovel and dig a deep hole in your chosen location. Make it deep enough to place some decomposed compost, if you have some. Blend the compost with your regular garden soil. If you bought a tree in a peat pot you don’t have to take it out, but you can slit the sides. This will make it easier for the roots to get out and for the tree to get established. If your apricot tree came in a burlap bag take the bag off and gently spread the roots in the hole you dug.

Replace the dirt that you dug out so that the tree is covered to the same depth it was when it was sold. You want to test how deep the hole you dug will be with the compost so when you place your tree in the hole that you have the mark where the bag or soil was in the peat pot is at the same level with the garden soil. Once the tree is at the right level and the soil is back make sure to give the soil a good soak with your hose.

Growing Apricot Trees
Growing Apricot Trees Arizona

Vigorous growth is common after planting the apricot tree in the first year. It is recommended to stake the tree for support in the first year of growth. Without the support strong winds can push and warp your tree. This can make your apricot tree grow at an angle instead of straight up. Excessive winds and not stakes can even mean that your tree is uprooted and damaged.

Fertilizing the apricot tree should happen during late winter and early spring. Another round of fertilizer when the tree is producing fruit will help produce more and better fruit. Many gardeners choose fruit tree fertilizer spikes as a way to encourage good growth. These spikes are driven into the soil and slowly release the fertilizer that is specifically engineered to fruit trees.

Pest & Insect Control
Pest & Insect Control Apricot Trees Arizona

Like most fruit trees insects and pests can be a nuisance. Every spring before the buds open up it is a good idea to apply a dormant oil fruit tree spray. To protect your fruit it is very important to use both a spray against plant disease and insecticides. Safety comes first when using these products and proper clothing, eye protection, and face masks should be used. Follow manufacturer’s recommendations for using these products for correct mixing. If your apricot tree is suffering from birds pecking your fruit you can get netting that will keep the birds away from the fruit.

Apricot Tree Pruning
Apricot Tree Pruning Arizona

If your goal is to produce fruit from your tree, which would be the point, make sure you don’t over prune. Apricots grow from 2nd year growth and you need to make sure you leave it in the right places. Lightly pruning in the early years will help you get more fruit out of your apricot tree earlier.

Effective pruning helps all plants grow better and produce more fruit. The best time to prune your apricot tree is when it is coldest, during the winter time. You want to make sure you get it done before the new year’s growth starts to pop out.

Apricot Trees For Sale
Apricot Trees For Sale Mesa Gilbert Queen Creek

If you are ready to plant an apricot tree in Arizona A&P Nursery has 4 locations in the East Phoenix Valley to help you get your project started. We have the tools, fertilizers, trees, and even have services to get the tree planted for you. No matter how you want to get started we have the advice and services to fit your needs. Call or stop by one of our 4 locations.

How to Choose Plants at a Nursery

How to Choose Plants at a Nursery Arizona

If you are searching for “How to Choose Plants at a Nursery” you are looking to find information about how to get the biggest bang for your gardening buck.  People who love gardening love browsing through nurseries.  We want to share with you how to get the most for your money and make the best use of your time.

Ways Plants are Packaged at Nurseries

As gardeners browse through the nursery its easy to notice that plants are sold in 3 main forms: containers, bare-root, and balled and burlapped. The way that plants are sold is usually related to their size and type of plant. Plants that are sold with bare roots are typically roses and hedge plants. The plants that are sold in containers are usually smaller plants like small trees, shrubs, and bedding plants. Burlapped root plants are normally the largest plants like trees and large shrubs.

How Nursery Plants are Grown

Bare-root, container, and burlap packaged plants are grown in fields where nurseries can better manage their growth, nourishment, and allow for more aggressive growth.

Small Container Plants

Small Container Plants Nursery ArizonaThese smaller plants start life and grow in containers and continue to grow in progressively larger containers. Some container plants are pretty expensive as there is cost involved in investing in larger and larger containers as the plants grow through the years of maturing.  A good example of this is the dwarf conifer, they are notoriously slow to grow. It takes several years for them to grow big enough to be sold.

Bare-Root Plants

Bare Root Plants Nursery ArizonaDuring the cooler parts of the year nurseries offer bare-root plants, such as roses or lilacs.  This is the time of year where they won’t begin to grow before being planted. Some nurseries keep bare-root plants in suspended animation by keeping them in cold storage.  Being able to purchase your bare-root plants at your local nursery does help avoid fungal diseases that can cripple your plants.

Large Burlapped Plants

Large Burlapped Plant Nursery Arizona
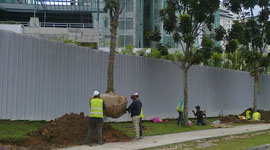
Nurseries typically grow shrubs and trees in fields where the plants are able to grow to larger sizes and are easier to maintain.  The stock grown in the field needs to be dug up in winter and early spring while the plants are dormant. After they are dug up the larger plants get the roots wrapped in burlap and twine. The largest trees many times also end up having metal cages used. Large trees that are for sale at nurseries lose a portion of their roots when dug up and package, but this is the only way to get a larger specimen.

Selecting Nursery Plants

Every gardener in Arizona wants to get the most for their money, and the healthiest plants for their landscape. The following will help you get the best stock and best fit for your home and landscape.

Signs To Look For

When you have a nice selection of plants you can learn a lot just by comparing the available plants. For example let’s say you are thinking about buying a river birch and there is a wide selection of plants. All of them are about the same height and are maturing by showing substantial trunks and peeling of the bark.  The price per tree is all about the same and although aren’t cheap they offer immediate landscaping cover from a more mature tree.

Things to keep in mind while you are comparing a tree like this, or any plant, are things like how many trunks or stalks they have, the condition of the leaves, smaller root balls, or roots that are exposed and look distressed or dried out. Some plants like the river birch have a classic look like those with 3 trunks. The leaves shouldn’t be yellowing as this can be an indication that it is nitrogen starved. Smaller root balls typically mean either drought or poor quality soil they were grown in. Look for signs of poorly maintained stock and only buy the best that is on display.

  • Configuration of plant
  • Condition of leaves and roots
  • Size of root balls
  • Overall maturity of the plant

Getting The Best Fit

Landscaping relates to architecture and the trees you plant shouldn’t be too small or too big for your home or business. The scale of you tree should stay to within 1/3rd to 1/4th taller than your home. If it is too much taller it will dwarf your house. Ranch style homes that are one story should consider trees that grow to no more than 15 to 20 feet in height. Two story homes can go bigger and allow for trees that mature to be 22 to 30 feet in height. It is best to plant the biggest trees at the edges of your property to avoid overpowering your home.  This keeps them away from the house, and it is best to think ahead if there are power lines.

Getting Your Plants Home

If you aren’t taking advantage of delivery and planting from your nursery you need to know the best way to transport your plants home. If you are taking the plants home yourself in your vehicle make sure you have a tarp to cover them and some rope to secure them. The wind from driving can seriously damage or even kill your plants so make sure you have them covered, even if it is a short distance home. One example of tree that is especially sensitive to wind and dehydration is the evergreen, it simply cannot tolerate dehydration of the needles.

East Phoenix Valley Nurseries

Residents of Mesa, Queen Creek, Gilbert, and the whole East Phoenix Valley have 4 A&P Nursery locations to choose from for the best plants, knowledgeable staff, and friendly service.  Delivery and planting services are available through a network of trusted landscapers, so you can rest assured that your landscape will look great with your new plants. Call or stop by one of our locations today!

Growing Avocado In Arizona

Growing Avocado In Arizona

With the rising costs of produce at the local grocery stores many Arizona residents are starting to grow more and more of their produce themselves. Avocado is a favorite for many recipes and meals. Being able to grow it in your yard saves money and gives you the knowledge that they were grown organically and in the best methods possible.

Page Contents:

Best Type Of Avocado Tree For Phoenix

There is a wide variety of avocado trees. Some do better in different climates than others. With the heat in Arizona the type of avocado tree you choose can mean the difference between success and failure. For the heat in our area it is best to choose either the Guatemalan or Mexican Avocado trees.

Avocado Tree Site Selection

The site you choose for your avocado tree should be protected from the wind and have fast draining soil. This means that you will want a more sandy type soil as opposed to the clay that can be common in Arizona. It is best to prep the soil in the area you want to plant the avocado tree. Include some compost in the mix so nutrients will be abundant. The soil should end up being equal parts of sand and compost.

It is best to plan a spot that gets sun in the morning, and shade in the afternoon. The afternoon is the hottest part of the day and the avocado tree does not enjoy the harsh light and temperatures.  This means planting the tree on the east side of your yard. It is also best if there is a large tree to plant it near or under.  If you don’t have a tree that will provide shade for the afternoon you will need to provide shade for the tree so it does not burn. Shade structures are pretty easy to set up, as your local nursery

Planting Avocado Trees

A hole should be dug that is 2 to 3 times the width of the container and the same depth. Before putting the tree in the hole saturate the hole with water and wait for the water to drain. Once the water has drained from the hole you can place your avocado tree in. Gently pack the mixed soil, compost and sand around the root ball.

Create a little berm, or moat of raised soil around the base of the plant with the soil you have and fill it with water. It should be about 4 inches high and help contain the water so it is delivered well to the root ball.

Watering Avocado Trees

During the summer and growing months you will need to give the tree a good soak at least once a month. For the hotter months you should give your avocado tree a deep soak every 2 weeks. You need to irrigate the avocado tree for several hours to push the salt away from the root ball.

Avocado Trees Fertilization

Stay away from standard fertilizers that may contain salt or sodium. It is harmful for the avocado tree and will stunt its growth. Many avid gardeners choose to use fish emulsion at least once during the growing season. Fish fertilizers are safer for your avocado trees and are available at your location nursery.

Avocado Trees Pest Control

With the avocado tree not being native to Arizona they have no natural pests. If you find that your garden ends up with one or another type of insect that is attacking your avocados make sure to check with your local nursery for which type of pesticides or covers you can use to help protect your investment.


East Phoenix Valley Nurseries

A&P Nursery has 4 locations that can help you with all of your gardening needs. From the large yard to small urban farming type set ups we have the plants, the tools, the knowledge to help get you going and keep your gardening thriving!


Pallet Gardening in Arizona

Pallet Gardening in Arizona

Lots of Arizona residents love gardening and reusing pallets in creative ways.  Used pallets are inexpensive, easy to find, inexpensive, and make a great place to grow flowers or succulents.  Pallet gardens are especially useful when living in apartments in large cities like Phoenix.  The vertical pallet garden can be stood up against a patio wall and get plenty of sun and fresh air.

Pallet Planter Types

There are two main types of pallet planters, those that are standing on end, and those that are laying down on the ground. The construction of each is quite different, as is the area you will use and display your garden.

Vertical Pallet Planter

Vertical Pallet Planter Arizona
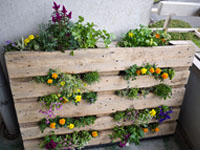
Vertical pallet planters are great for smaller patio areas. They provide enough space for the soil to sit securely between the slats and don’t take up much room on your patio. Having a place to grow flowers or decorative plants while living in apartments, makes for a nice touch of life, green, and color when your plants are growing or in bloom.

Horizontal Pallet Planter

Horizontal Pallet Planter Arizona
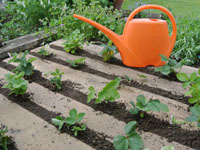
Horizontal pallet planters are designed to be similar to a raised garden bed. They are covered on the bottom and sides to hold the soil inside and allow plants to grow through the gaps in the wood, or slats. This can be a great option for people who want to be able to move their garden.

How to Build A Vertical Pallet Garden

There are 6 easy steps to building your vertical pallet garden. They are: getting your pallet, collecting gardening supplies, preparing your pallet, stapling on your landscaping fabric, planting your favorite flowers or succulents, and then enjoying your pallet garden.

Get Your Pallet

Getting your pallet can be as easy as placing a call to a couple local warehouses or buying an inexpensive pallet.  Even local nurseries sometimes have used pallets laying around that they need to get rid of. It’s a good idea to pick a pallet that hasn’t been used to transport any chemicals that might hinder the growth of your plants.

Get The Supplies

In addition to the pallet you will need a couple large bags of potting soil, a small roll of landscaping fabric, the flowers or succulents you would like to grow, sandpaper, a staple gun and staples. You can find all of these items at local hardware stores. Some popular plants that people put in their pallet gardens are annual flowers, or succulents.

Prepare The Pallet

While you are sure to have picked a great pallet any nails that are sticking out, rough spots, or areas that might stick someone should be removed and sanded to be safe.  Smooth out any dangerous spots with your sandpaper and use a hammer to remove any nails that might be sticking out.

Attach Your Landscaping Fabric

To hold the dirt in the back and sides you are going to cover them with the landscaping fabric. Flip your pallet so it is facing down and cover the entire back by rolling out your landscaping fabric. If your cover looks thin or your want to have your pallet garden last the longest it can, cover it twice. Make sure to cover the bottom, back, and sides of your pallet with the landscaping fabric. Staple it all into place by setting staples every 2 inches.

Inspect your staples twice and ensure that you have staples everywhere possible to help contain the dirt and make your pallet garden more robust.

Plant Your Flowers & Succulents

Flip your pallet garden over so the cover is facing down and begin by emptying your first bag of potting soil onto the pallet. Push the soil through the gaps in the slats and spread it out with a trowel. Repeat the process with your second bag of potting soil and make sure it is nice and tight. Once your soil is in place you can plant the flowers or succulents you have bought. After everything is planted and secure you and have a friend help you stand the garden up on its end. Make sure the direction you choose to stand it up isn’t open on the edge.

Enjoy Your Pallet Garden

Once the pallet garden is stood up at a safe angle you will be able to enjoy the color and sight of the flowers and succulents you have chose to grow. Having the extra splash of interest and color is fun to show off to friends and guests and simply a welcome touch of life in any residential setting.

Pallet Gardening Nurseries

If you want to build your own pallet garden A&P Nursery has you covered with the best plants, tools, and materials you will need to get started.  We have a great selection of bedding plants, succulents, and annual flowers that will add the color and beauty you are craving. If you have questions about the variety we carry you can call, or to see the full selection of plants, tools, and materials stop by one of our 4 locations.

Spring Vegetable Gardening Guide Made Easy

Spring Vegetable Gardening Guide Made Easy

Are you searching the internet for “Spring Vegetable Gardening Guide Made Easy“? If so we have a great guide for you to get the most of our your garden this year.  If you want to be enjoying your freshly grown produce earlier this year than ever, follow the guidance in this article.

Although various standard variety of garden vegetables are not able to be planted outdoors or from seed unless the soil has warmed up fully, and any threats of frost gone, there are still many crops you can plant in the cool season If you are looking to get a head start on your garden, and getting food to your kitchen earlier than the summer vegetables, then this list is for you.

Gardening Climates

Each area’s weather climate and patterns are different, so it will all be based on your local weather. These cool season vegetables are able to be planted directly in soil either uncovered or covered or under a low tunnel. Alternatively, they can be started in trays or pots and placed in a sunny window.

By planting your vegetables under a low tunnel or roe covers does not just assist with warming the soil faster, but it also helps to protect seedlings from any frosts. Of course, a long period of cold weather or a hard freeze could still kill the plants that use row covers.

Indoor Gardening Head Start

One method is to start plants in trays or pots that are able to be moved outdoors into the sun on warm days, but brought back in at nighttime. This helps avoid any frost that may occur, if you don’t forget to bring them in. It can allow you to start an early spring garden prior to the soil being ready. Container style gardening also allows you to begin growing your food on balconies, windowsills, or decks, which is great for those without a garden plot outside.

The winter here in east Phoenix has been mild, allowing gardeners to begin planting using row covers in February, but have been able to start spring vegetables directly in soil without cover. Although, this is still a risk as the normal frost date remains a month away. Due to starting rather early baby lettuce greens are ready for harvest sooner, as well the as the spinach, and  kale, radishes and baby chad are sprouting up sooner. These are all things that gardeners should look forward to eating once winter is over, because they won’t have to travel hundreds to thousands of miles to my table.

Early Spring Gardening Plants

The following spring vegetable options can be easily planted from seed. They are all amazing options for starting an early garden, and usually considered foolproof, meaning even beginning gardeners should find them easy to start out with.

  1. Spinach
    Gardening Spinach Spring Arizona

One of my favorite greens is spinach, and it is one option that is quick at sprouting and can be grown in a spring garden. Also, it can be rather frost-resistant, even more so when under cover. Spinach comes in various varieties, most are categorized by being semi-savoy or savoy, which often have a curly or crinkled crispy leaf. However, they can come in a smooth lea that has a softer texture and flatter leaves. I suggest growing several types of spinach to see which will work best for your type of soil and location. Of course, finding out which varieties you prefer the taste of is also important.

I enjoy growing these closely for my early spring greens, then harvesting the leaves while small. This can be as soon as three weeks from time of planting, weather and variety depending. If you have a fall garden, spinach is a great option too. You can cover it with mulch and it’s often ready for early spring harvest.

  1. Chard
    Gardening Chard Spring Arizona

Chard is related to the beet, and another great option for an early spring vegetable. Chard is easily grown from a seed and can be cooked or ate fresh, or even toss it in a smoothie to drink! I usually plant them closer together than suggested on the seed packet, and harvest the crowded chard to use as baby greens when thinning beds. There is a variety of color, size and textures available, but most color is often in the thick stems, with leaves being mainly green. You can add color to your spring salads by growing white, yellow and red chard with the usual green chard, and it will make your garden more colorful too! Depending on the variety, some chard can be harvested for baby greens early as 25 days, and about twice as long to reach full size leaves.

  1. Lettuce
    Gardening Lettuce Spring Arizona

Lettuce is commonly grown into a full size head that many of us are used to seeing in the grocery stores, but I have discovered that rowing lettuce just as a baby green is not just faster, but easier and offers an almost constant supply of salad greens between spring until well into summer. I prefer using a mixed lettuce seed, sometimes known as mesclun mix. Rather than sowing seeds farther apart, which is recommended for full size heads, I sow close together in each row, this yields me a solid row for lettuce leaves which are easy to harvest. I can repeatedly cut these through the season. Lettuce can come in various shapes and colors, not simply the standard green romaine, but green and red leaf lettuce, and butterhead varieties. By growing a mixture of baby greens offers you a larger selection of texture and colors for salads. You can usually harvest baby greens in just a couple weeks, with a rather constant supply when planting successions of seeds each week or so.

  1. Radishes
    Gardening Radishes Spring Arizona

In addition to various types of greens, radishes are among the fastest growing vegetables. With many varieties available, they can be harvest ready in just three weeks. Also, radishes are a great option for interplanting with various spring greens, like lettuce. It can also assist in thinning crops naturally as radishes are harvested.

When it comes to radishes, many only think of the round red or white and pink variety, commonly found in stores. However, they have many colors, sizes and shapes. Radishes can be sweet or spicy, it all depends on the variety. Radishes are easy enough to let the kids help plant them too, the seeds are big enough that small children can easily manage. They are also fast to mature, simple to pull up, and make a great option for impatient gardeners.

  1. Kale
    Gardening Kale Spring Arizona

This is a green that many love hating, but it is a great spring veggie for growing from seeds. Since it can also be harvested as baby greens or full size leaves, it has the option of providing many forms of food from less effort. Kale can be consumed raw in salads, or put in smoothies, even stir-fried or steamed. It makes a good added to greens for any diet.

Kale can be crinkly and dense, like ‘dinosaur’ kale, or it can be ruffle-y and flatter, like red Russian types, but often it is sweeter when used as baby greens in spring gardens. It often produces again in late fall after the first frost. Baby kale can be ready for harvest in just three weeks, and full size leaves coming to maturity between 40 and 60 days, variety depending.

  1. Peas
    Gardening Peas Spring Arizona

Last in our list are peas of various variety, including pod peas and snow peas. These are good options for spring gardens that kids often enjoy. Seeds are large enough that children can easily help in planting, and many kids enjoy looking through the garden to find peas or harvesting and even eating then and there!

It often takes a little longer for snap peas and shelling peas, but kids also tend to love these as well. There are kids out there that won’t eat a cooked pea, but I have seen them eat them fresh from the pods. Peas usually take between 50 and 65 days to reach maturity, variety depending. They may grow as ‘bushes’ or vines, so they are good in a garden or trellising. To achieve the best germination rates, you should soak pea seeds in water overnight prior to planting.

Spring Gardening Nursery Supply

If you live in the Phoenix valley and want to get the best plants, expert advice, and quality fertilizers and tools A&P Nursery has 4 locations in the East Valley of Phoenix. With a wide variety of vegetables we will be able to help you get your garden started for the year. Call or stop by our of the 4 locations below to ask a question or get started.